This month's theme was chosen by Angela of The Tiny Tyrant's Kitchen, and she suggested baking something inspired by a favorite cocktail. This is perfect for me! It's obvious I haven't been cooking much, and the reason will be clear soon, but to go along with that, I haven't been drinking much, either. Having an excuse to revive a favorite cocktail by baking it is absolutely perfect timing!
Of course, I have many favorite cocktails. I work at a winery, so obviously I love wine, and I would love a glass of wine right now (but alas). I have a small number of favorite cocktails, simply because I prefer wine. But my favorites list include Dark n' Stormies, St Germaine cocktails (champagne and St Germaine, the simple version) and Vermontucky Lemonade. But what to bake? Fortunately, M posted a recipe on facebook for absinthe cookies- essentially those delicious Italian anise biscuit-cookies with anise glaze, only using an absinthe glaze. Ooh! I could work with that!
Surprisingly, I'm not a huge absinthe fan. I love licorice, but I like it sweetened, and the only time I've ever had absinthe, the cocktail was definitely NOT sweetened whatsoever. I also don't think absinthe is the right alcohol for me to have right now, even in a miniscule amount.
So I took this recipe and modified it to use St Germaine. And I love. My husband says he's pretty "meh" about St Germaine, but I did notice all but one of the 8 cookies we had left after taking some to my parents were gone by the time I got home from work yesterday. "Meh" indeed. I need to bake another batch asap!
St Germaine Cookies
inspired by Absinthe Cookies from A Fine Kettle of Fish
Cookie dough
1/2 cup (one stick) unsalted, softened butter
1/2 cup sugar
3 eggs
1T St Germaine (or vanilla, or anise, or another tasty alcohol)
3T milk
1/4t vinegar
2 and 1/4 cup all-purpose flour
1T baking powder
pinch of salt
Glaze (note: I didn't have quite enough glaze for each cookie- this is fine if you can't wait long enough to sample before the cookies cool enough to glaze)
1-1.5cup powdered sugar
1T butter
1.5T St Germaine (or other tasty alcohol, or 1t vanilla, anise, almond, etc)
1T milk (possibly up to 2T)
To make the dough:
Preheat oven to 350F.
Cream butter and sugar together. Add eggs, one at a time, and beat well after each. Whisk the flour and baking powder together in a separate bowl, and the St Germaine, vinegar and milk together in yet another separate bowl (and let that sit for a few minutes). Alternate adding the flour and milk mixtures, starting and ending with the flour mixture. Beat til just barely combined. Drop tablespoonfuls of dough on a parchment-lined cookie sheet, and bake in the 350F oven for 12-14 minutes (original recipe said 10-12), til the edges are just barely starting to brown. Let cool.
To make the glaze:
Melt the butter and whisk in the St Germaine and 1T. Whisk in the powdered sugar (start with 1 cup) and add either more sugar or more milk to get the desired consistency- somewhat thick, like honey consistency. Thinner is fine, but it'll run off the cookies more. Drizzle the glaze over the cookies, however much or little you like (I did not have quite enough glaze for the entire batch) Let the glaze harden overnight or for a few hours, either uncovered or very loosely covered.
(I found these got a little sticky in tupperware on a humid July day, and the glaze never really hardened. This leads to sticky fingers, but that's the only bad thing)
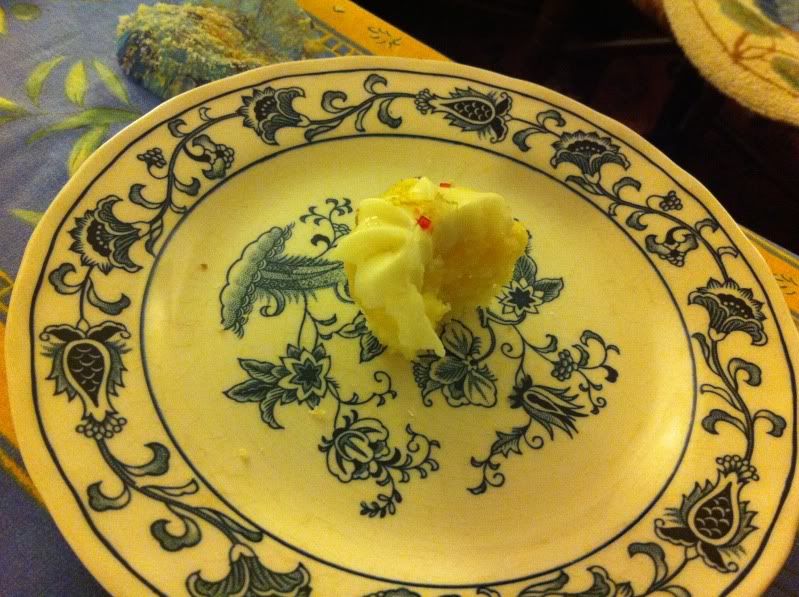
YUM. The cookies have a very slight St Germaine taste to them (I wish I could have tried the dough)
but after frosting it's a serious St Germaine flavor. If you want to avoid alcohol, include the St Germaine in the cookies (it's a small amount anyway, and much would bake off) and use lemon juice or vanilla to flavor the glaze.
They're also quick and easy. I can't comment on how long they'll keep, since we ate them all in less than 3 days. ;)
Showing posts with label dessert. Show all posts
Monday, July 29, 2013
Monday, April 29, 2013
What's Baking? April: Mini/Bite Sized Treats
This month's What's Baking theme was chosen by Amanda of Our Italian Kitchen, and she chose mini/bite sized treats. Great idea! At first I was going to copy the yummy brownies stuffed with rolos and baked in a mini muffin tin that my boss made for our work party a couple weekends ago, but then one of my friends posted this delicious recipe on facebook.
I made mini blueberry cobblers. These have the basic baking ingredients you already have on hand (just change up the fruit to suit your taste/contents of your fridge or farmer's market) and were super quick. In the time it took for my oven to heat up to 350F, I had already mixed everything and assembled all the ingredients in the muffin tins.
Since I found this recipe on facebook, I have no idea where it came from- it included no citation. So if you can tell me its origin, I'll edit to include that! It's a great idea, someone needs credit for this.
Mini Blueberry Cobblers
recipe from...??
Makes 12 mini cobblers
1/2 cup flour
1/2 cup sugar
1t baking powder
pinch of salt
3oz (3/8 cup) milk
12t butter
12 dashes of cinnamon or cinnamon sugar
2/3 cup blueberries, or other fruit (peaches, raspberries, strawberries, etc. If using apples I'd consider sauteing them a bit first)
Turn the oven on to preheat to 350F.
Place 1t butter in each well of a 12-muffin tin (the recipe said 1t, I used as small a slice of butter as I could consistently cut). Pop this in the oven for a few minutes, until the butter has melted (you don't need to wait for the oven to come to temperature).
In a medium bowl, beat together the flour, sugar, baking powder, salt and milk. Place 2T (one cookie scoop-full) in each muffin tin well, on top of the butter. Drop a few berries (I like 8-10 of the big fat blueberries) on top of the batter.
Add a dash of cinnamon/cinnamon sugar.
Bake at 350F for 20-25 minutes (the original said 12 minutes, this was way too little). Let cool for a few minutes in the pan, then remove.
Note: I did not spray the pan, and they were easy enough to get out. They didn't slide out, but only one fell apart. I might add more berries next time.
I can't comment on how long these will keep, because we ate them all in one day :-/ YUM. The batter is nice and sweet, so the berries don't need any extra sweetening- I used cinnamon sugar this time but next time I may just add cinnamon straight to the batter. I predict that I will make these many, many times over the next few months, especially as berry picking season starts.
Labels:
baking,
blueberry,
dessert,
easy recipes,
fruit,
What's Baking?
Monday, July 30, 2012
What's Baking? July: Summer Fruits
This month's What's Baking? theme of "Summer Fruits" was chosen by Jaida of Sweet Beginnings. This was perfect for me because one of my favorite summer activities is picking fruit from Tougas Farm in Northboro! I was very eager to get over there on July 6th, as soon as I was back from traveling. I hadn't picked blueberries at Tougas before, only because of the timing in previous years, and I forgot how slow-going it is- I picked by myself and it took me 1.5hrs to get 8.5lbs. I really wanted 15lbs (bulk discount on 15+lbs) but by 8.5lbs I was DONE. Fortunately, I've been able to stretch these berries all month, and will use the last of them tonight in my 4th (or 5th?) batch of blueberry corn salad- our favorite new recipe of the summer.
I picked these blueberries on Thursday, and on Friday we had a seriously blueberry-themed dinner. When I asked Clint what he wanted, he said blueberry cake (not pie? no, cake. That was ok, since it was hot and I was pretty sure pie crust would not cooperate anyway.) and how about blueberry bellinis? I'd never have thought of bellinis. Now we are down to only 2 bottles of wedding prosecco left (September is our 3rd anniversary, so maybe by then we'll finish it all off!)
Blueberry Bellinis, from The Cookin' Canuck
(they look a little weird, from the floating/oxidation of the blueberry puree, but boy are they tasty!)
Here's our dinner for the evening, which has been repeated endlessly- I'd say ad nauseam, but each repetition is just as/more delicious than the last! Baked onion rings, mustard and sage turkey burgers, and corn and blueberry salad. Stay tuned for those recipes.
But the cake is really want you bakers want to see! I found this on tastespotting and of the cake recipes I found, I chose this for its simplicity. It also seemed healthier than the other recipes I saw, it uses only one stick of butter (but then, it only makes one 9in round pan of cake, so it's about a normal amount of butter for a cake). It also looked a lot prettier than some of the other things!
And I seem to have chosen right, it's quite delicious. I made it the following weekend for a potluck picnic and it was *devoured*. It doesn't have a huge amount of sugar, so I didn't feel guilty having a piece for breakfast, either ;)
Blueberry Buttermilk Cake
recipe from Kitchen Confidante
1 stick of unsalted butter, at room temp
1/2 cup + 2T white sugar (original was 3/4 cup)
1 egg
1 cup flour (on my second batch I used 1/3 WW flour and 2/3 AP)
1/2 t baking soda
1/4t salt (I used a pinch, having made this 3 days after my doctor recommended a low-salt diet :( )
1/4t allspice (original recipe called for 1/8t cinnamon, but allspice is now my spice of choice when using blueberries)
1/2 cup buttermilk (seriously, don't bother buying is: 1/2 cup milk + 1/2T white or cider (depending on what you're baking) vinegar. Let sit for a few minutes before using)
1-1.5 cups of blueberries, divided
Preheat oven to 350F. Butter/flour (or Pam-spray and flour) a 9inch pie dish.
Cream the butter and sugar, add the egg and beat til fluffy, a few minutes. Whisk the dry ingredients and add in small batches to the butter/egg mixture, alternating with the buttermilk. Finally, fold in half the blueberries gently, and transfer batter to the prepared baking dish. Drop the remaining blueberries on top.
Bake for 25-30min (more like 35-40 for me, my oven has issues (even though the thermometer says the temp is accurate!)), until the top is golden brown and a toothpick inserted in the middle comes out clean.
Serve alone for breakfast, with whipped cream, ice cream or a sprinkle of powdered sugar for dessert, double it and bake in a 9x13 (with enough batter leftover for a loaf pan) and cut into squares for a quick snack. The only thing I can't recommend is baking these in a muffin tin, because somehow that completely failed for me- no idea why.
But do you notice how quick the instructions are? The first night I made this, I turned the oven on, got all the ingredients out, made the batter, washed the berries, added them, got the batter into the pan, all before the oven was up to temp! This is the perfect weeknight dessert.
The cake itself is incredibly light and fluffy, and for some reason I'm used to cakes with fruit being heavier, like a pound cake (my mom's favorite blueberry cake is in a bundt pan and pound cake-like, but oh boy that's delicious, she's been making every summer that since Martha Stewart had it on in like 2001) or more like a gingerbread cake consistency. But this is the ideal cake for a hot summer day- and fortunately, I've been living on our screen porch just off the kitchen, so I'm perfectly happy to have the oven on! :)
Labels:
baking,
berries,
blueberry,
dessert,
What's Baking?
Thursday, March 15, 2012
Cookies topped with other cookies
Not in a sandwich cookie way, either.
I was recently introduce to Biscoff Spread. It's essentially ground up Biscoff cookies, pureed into a peanut butter-like paste. It looks like gooey peanut butter, but it tastes amazing- like cinnamon-y nilla wafers. Or, it tastes like a paste made out of Biscoff cookies, but I'd never had those before.
We enjoyed biscoff on nilla wafers, pretzels and a spoon. It was good. This was at M's house, so of course once I got home, and was getting ready to have a few people over, I had to go out and buy Biscoff Spread for myself. You can find it with the peanut butter, and it's a little pricey, about the same as Nutella (although I lucked out and Nutella was on special this week! woohoo!). I branched out a bit and tried it on granny smith apples, and discovered it's quite delicious on bananas. Biscoff is good stuff- not the healthiest snack ever, but I like to think eating it on fruit almost cancels it out- or makes a better dessert choice.
It just so happened that at the same time as the Biscoff Discovery, I was looking for a good cookie recipe. I had some self-imposed restrictions which were making the search a little tough. No chocolate, not oatmeal, I was sick of sugar cookies, I'd just made peanut butter nutella cookies and wanted something different.... well, I found a snickerdoodle recipe. Sounds good. But there was a second part...
Snickerdoodle cookie sandwiches with Biscoff Frosting. Oh my.

Snickerdoodles
recipe from Two Peas and Their Pod
1 1/2 cups sugar
1 cup (2 sticks) butter, room temperature
2 eggs
2 3/4 cups flour
2t baking powder
1/2t salt
2T sugar
2t cinnamon
Cream together butter and sugar and beat til fluffy. Add eggs, one at a time. Whisk together flour, baking powder and salt, then stir into the butter mixture.
Whisk together the 2T sugar and cinnamon. Form dough into tablespoon-sized balls, roll in the cinnamon sugar, then place on a cookie sheet. Bake at 350F for 10-15 minutes (original said 8-10, I needed 15min), until they just turn golden brown.

FINALLY, I have found a good snickerdoodle recipe. They have the perfect snickerdoodley, cinnamony, eggy flavor that I love, and are nice and chewy. Mr Snickerdoodle Expert over here says they're better than the last recipe I tried, but they're supposed to be flatter. Yeah whatever. I'll smoosh them down before I bake them next time. But whatever he says, I think these are absolutely great. But there is a next step...
Biscoff Frosting
3T butter, softened
1/2 cup Biscoff Spread
1 cup powdered sugar
1/2T cinnamon
2-3T milk
Beat together butter and biscoff, then beat in sugar and cinnamon. It'll get crumbly, then add in the milk, tablespoon by tablespoon, beating sufficiently after each addition, until it's fluffy. (I only needed 2T).

Spread the cookie spread frosting ON the cookies. Whoa! They were supposed to be cookie sandwiches, but I was trying to save on the calories and just used one cookie with frosting on top.
But then, my friends, I got a little crazy. I had to go to the grocery store for milk yesterday, and I was on the hunt for Lilly Pulitzer animal crackers (none at the Mayfield St Big Y, which I expected). I did, however, find Biscoff Cookies- the stuff the spread is made from! I had to get them. The package says "Europe's Favorite Cookie with Coffee". I haven't yet tried them with coffee, but they're pretty darn good with tea!
We're running out of snickerdoodles by now... but we still have a lot of the Biscoff frosting left. So I kind of went to town with the Biscoff.
Biscoff Frosting on Biscoff Cookies. And I ate it too quickly to photograph it, but I also put Biscoff Spread (straight from the jar) on the Biscoff Cookies.
Cookies topped with spreads made from cookies... it's the ambrosia of baked goods.
Sunday, February 26, 2012
What's Baking? February: Valentine's Day Colors
This month our What's Baking? theme is very appropriately Valetine's Day colors, hosted by She Cooks and Bakes. I love color-themed holidays, so I was excited by this. I also got a little lucky, as we had our annual DAR Good Citizens awards meeting on the 25th, and those of us on the hospitality committee were requested to bring food for the tea that followed a Valentine's Day theme.

I assumed I'd make heart-shaped sugar cookies with pink and/or red icing, but as the month went on, I decided I'd made sugar cookies too often recently and I needed to do something different. I browsed tastespotting, but somehow I remembered a cupcake recipe Bird sent me well over a year ago- one that I couldn't wait to bake, but never ended up trying. I thought that might work. And wouldn't you know, I can't find her email with the link. But thanks to google, I found another recipe, and I'm really pleased with the results. Without further ado, my sweet in Valentine's Day colors....

Pink Grapefruit Cupcakes
recipe from Alida's Kitchen
Cupcakes
(I doubled the original)
12T butter (1 and a half sticks), softened
1 and 1/3 cups granulated sugar
4 eggs
1t vanilla
1cup Greek yogurt (nonfat or low fat)
2 cups flour
1T baking powder
1/2t salt
zest from 1 or 2 medium-to-large grapefruits
Cream together butter and sugar, beat until fluffy. Beat in the eggs (1 or 2 at a time) until well-combined. Whisk together the flour, baking powder and salt, and add half to the butter/sugar/egg mixture, then stir in the yogurt and then the remaining flour, stirring only just til combined. Stir in the grapefruit zest.
Fill cupcake cups 2/3 full and bake at 350F until done- I baked mini cupcakes and it took about 16-18 minutes, for regular cupcake it'll be a bit longer.
Frosting
(I doubled the original)
1 8oz package 1/3 fat cream cheese, cold (take it out of the fridge and start the frosting immediately)
zest of 1 grapefruit
2T grapefruit juice
1t vanilla
4-6 cups powdered sugar
1t grapefruit zest, plus more for garnish
Beat together the cream cheese, juice, vanilla and 2 cups of powdered sugar until combined. Continue to add the sugar, 1 or 1/2 cup at a time, until the frosting is stiff, and stir in the zest. I piped using a large star tip, from my special giant tip collection my friend gave me for my 30th birthday- what a perfect present, right? She works in admissions at a culinary school so she knows where to get the good stuff!
The results: delicious!
I've never piped cream cheese frosting before, it's always been a little too runny. But I recently read on Annie's Eats about cc frosting and I followed her recommendation of using chilled cc instead of softened/room temp, and I'm not sure if that's solely the trick, but I was able to pipe this! I'm also used to having butter as well as cc, so maybe not having butter in this recipe helped. But even better, no butter and using low fat cc means it's low fat frosting! High in sugar, but hey, you can't have everything. The frosting is a little liquidy, but after a couple hours there's a nice, thin shell, which has a texture on the cupcakes I really enjoy.
The cake recipe is very similar to my old stand-by, the Magnolia Bakery vanilla cupcake recipe, but uses yogurt instead of milk. The result is a hardier but still light cupcake and I actually think I may like it better... I feel awful saying that! But maybe it's nice for winter, when you want more substantial food. We'll save the light and fluffy cupcakes for a hot July day!
Now, the grapefruit. I adore grapefruit. It's kind of crazy. Back in grad school, the grocery store would have a citrus case lot sale. 40 grapefruits would be around $20-27, depending on the year. I'd go and buy one.... and a week later, go and buy another. I actually used to be allergic to citrus (not like anaphalactic allergic) but I think I ate so many grapefruit my senior year that I simply overcame that allergy. Is that even possible? Even if not, grapefruit has no ill effects on me anymore, and I'll eat 3 or 4 in one sitting. So of course the idea of putting grapefruit in a cupcake just seems heavenly.
I would say that for these, you might want to go light on the zest. 1 and a half grapefruits worth of zest might be best, they can get a little bitter with too much zest. With that in mind (since I ate the batter before making the frosting), I went light on the frosting zest, but I did increase the juice in the frosting.
As for Valentine's Day colors, it's not obvious. This might be more of an interpretation of the theme. It's not day-glo pink or in-your-face red velvet. I actually intended to add some pink food coloring, but as I spooned the frosting into the piping bag, I realized I'd forgotten.... and left it at that. The grapefruit is pink, and the frosting has kind of a pink tinge... So I add the Valentine's sanding sugar to drive the point home. But however you choose to interpret this theme, I definitely recommend these cupcakes.
I'm also glad I made them mini, so I can just have one bite of grapefruity cream cheesey deliciousness a few times a day and not feel quite so guilty... I love mini cupcakes!
Tuesday, December 27, 2011
What's Baking? December: Brownies!
December is National Brownie Month, so it seemed like a perfect choice for Nicole's theme. And what a great excuse to bake up a great batch!
Chocolate and I have a love/hate relationship. It's kind of weird. I get all "omg seriously?!" when someone says they don't like chocolate, but.... to be honest, I don't always like chocolate. I'd prefer to avoid chocolate cake. I can't stand chocolate ice cream (ugh, gross), and I'll only eat chocolate cookies if I have a cup of coffee in the other hand. But give me a chocolate bar and I'm all over it- I require my chocolate in its late-20th-century-American pure form. Or as a lovely hot drink.
But brownies are one of the few chocolatey baked goods I'll get that glazed look in my eyes for. They have to be nice, fudgy, gooey brownies. And nuts, please.
I've been late in baking my theme item for the past few months, so this month I started early early early. My choir performed a staged Boar's Head Festival on December 10th, and we always work together to put on a nice reception after the concert. Of course, I'm the first to sign up to bring food for the reception! So of course with that, and this month's theme, I just had to bring brownies. But not just any brownie: when we're talking reception, I aim to impress. So I took to tastespotting for inspiration.
I found a recipe for peppermint brownies. I've done the kind where you stick peppermint patties in the middle of the batter- they were good, but I unfortunately used splenda for the brownies- I say unfortunately because I despise splenda. If you like splenda, go ahead, sub it in. But I'd rather have no sugar than fake sugar in a baked good. This peppermint brownie concept was different, though- it had a layer of peppermint icing on top of the brownies, and then some chocolate ganache. Sounds good! But, wouldn't you know.... I used up all my peppermint extract last year on the millions of batches of peppermint bark I made, and forgot to buy more. So I bring you...

Cinnamon Brownies
based on tea for six's recipe
Brownies
12T (1.5 sticks) butter
1 1/2 cups sugar
3 eggs
1/2 cup cocoa powder
1/2 cup flour
1/4t salt
1t vanilla
Melt the butter and stir in the sugar- I did this all in the medium saucepan I used for melting the butter. Beat in the eggs, one at a time, then the vanilla. Sift together the dry ingredients and mix them in.
Important: line a 9x13 baking dish with parchment paper and spray with nonstick spray. Don't skip the parchment paper- it'll make it so much easier to ice the brownies later. Bake at 350F for 40-45 min, until they're set. Let cool in the pan.
Cinnamon icing
2 cups powdered sugar
1T water
3-4 drops of cinnamon oil (or go ahead and use your peppermint extract, 1t)
a few drops of red food coloring, for festiveness
Whisk all that together. Pour over the cooled but still in the pan brownies, and spread around with a spatula. It doesn't have to be perfect. Chill in the fridge for a couple hours (I chilled overnight)
Chocolate ganache
250g chocolate (chopped bittersweet, or semisweet chocolate chips, whatever you have)
1/2 cup cream (I used light cream)
Put chocolate in medium bowl. Heat cream over medium heat until it just starts to boil, then pour over chocolate. Let sit for a few minutes, then start to stir. Stir until all the chocolate is melted. Then pour over the iced brownies and spread around. Pop back in the fridge for a few hours to set the chocolate.
Then cut the brownies!

These were fab. Honestly I had some doubts about using cinnamon oil along with chocolate, but have you ever had those after dinner minty things that are a stick of flavored hard candy dipped in chocolate? They have them at some fancy restaurants. The red ones are cinnamon, and were always my favorite. These brownies taste like that.
Now I've fallen in love with the cinnamon oil and have started using it more- cinnamon sugar cookies, anyone?
One note about these brownies, however: they're a little messy! I was nervous about eating them in my fancy renaissance costume at the reception, although they were gone in an instant so I only ended up with the lopsided ones as I cut and plated them. The brownies themselves are a solid little fudgy cake, very nice for topping. I highly recommend these.
Labels:
baking,
brownies,
chocolate,
dessert,
What's Baking?
Saturday, August 27, 2011
What's Baking? August: Celebrate Summer
Our August What's Baking? theme was chosen by Jade from The Mess Pot. Celebrate Summer is baking with things that remind you of summer, or that are in season. So of course I had to choose one of my favorite summer fruits, peaches.

I went to Tougas Farm on Thursday to pick peaches, and I was surprised by how crowded it was! Especially on a Thursday! But perhaps part of it was everyone hurrying to do it before the hurricane comes and destroys what's left. I planned to pick a peck of peaches, because I'm not so thrilled about canning this summer (no reason), but when I got there I picked a half bushel.

I felt I needed to bake something for the hurricane (i.e. something to eat if we lose power), and Clint's not a huge peach fan but I wanted something he might eat, too. Normally it'd be a no-brainer to bake a peach pie (YUM) or cobbler (also YUM), but I just didn't feel like it. So I looked around, and found a recipe for peach upside-down cake. I'd never think to use peaches in this, but they take really well to this recipe. I was also very clever and cooked up more peaches before adding the cake batter so that I had to eat them (well ok, that wasn't so much planning ahead as the pan just happening to be too crowded), and I honestly think I'd do step 1 as a quick dessert over pound cake or ice cream some day. The caramel sauce from the peaches also soaks into the cake nicely and gives it a delicious flavor.

Peach and Cornmeal Upside-down Cake
from What's On My Plate

For the peach topping:
3 peaches, cut into wedges (12 wedges per peach) (I left the skin on)
3T butter
1/4 cup sugar
For the cake:
1/2 cup butter, softened
3/4 cup sugar
3 eggs
1t vanilla
1/2 cup cream (I used fat free 1/2&1/2)
3/4 cup flour
1 cup cornmeal
1t baking powder
3/4t salt
1t lavender (I skipped, couldn't find my lavender! I know I have some)
Step 1, for the peach topping:
in a 10in cast iron skillet (I used my Le Creuset braiser), melt the butter over medium heat. Sprinkle the sugar over, and stir around a bit and cook for 3min, until it starts to caramelize. Add the peaches and arrange in circles. I actually just dumped the peaches in, it was too hard with the spattering caramel when the cold peaches hit to arrange them, so I dumped them all in and then arranged them with the wooden spoon. Cook until they're soft, about 15min. Remove from heat.

Step 2, for the cake:
Cream together butter and sugar, for about 3 min, til fluffy. Then add eggs, one at a time. Stir in the vanilla and cream. Whisk together remaining dry ingredients in a separate bowl, then add in 2 batches to the cake batter.
Step 3, for assembly:
Drop spoonfuls of the cake batter over the peaches, then spread around with a spatula. Bake at 350F for... well, the original recipe said 20-22min. It took me about 40. Set the timer for 20 and keep checking.
Let the cake rest about 10 min, then run a knife along the edge, and invert on a serving plate.
Yum!

Monday, July 18, 2011
A Successful Strawberry Season
(unlike last year)
And it seems like it's been a year since I last posted. Insert some lame excuses here- I really have none. Travel interfered with posting and cooking, but I've been back for a couple weeks now. Really, the problem is that unemployment sucks.
Regardless, back in June I went strawberry picking twice (since I'm a loser without a job, I can.) and I made some tasty things with them- only one of which I've mentioned.

I don't want to bother going into a lot of detail about my strawberry fun now that strawberry season is long over and it won't really help you anyway, but let me share my success with sorbets. I've tried sorbet once before, but I neglected to consider how different some berries are compared to each other while making the sorbet, and ended up with more of a bluish granita studded with whole blueberries. A bit odd, but tasty. Fortunately, when trying strawberry sorbet for the first time, I went with a real strawberry sorbet recipe, with excellent results.

Strawberry Basil Sorbet
recipe from The Nifty Foodie
1.5lb fresh, hulled strawberries
1 cup +2T sugar
1.5T lemon juice
pinch of salt
handful (around 1/4 cup) fresh basil leaves, roughly chopped
Slice the strawberries and toss with 2T sugar. Let sit at room temperature for about an hour, turning occasionally. Then combine in a food processor with the remaining sugar and other ingredients, process until pureed.
Pour into your ice cream maker and follow its instructions. Enjoy!
Strawberry Rhubarb Sorbet
based on a combination of the above recipe and this recipe from the LA Times
2 fat or 3 regular stalks of rhubarb, diced (about 6 oz)
1/2 cup sugar
1/3 cup water, plus 1T or so more
1lb hulled strawberries
2T cup sugar
1t lemon juice
In a small saucepan, stir together the rhubarb, 1/2 cup sugar and water. Bring to a boil over medium-high heat and then reduce to a simmer, and cook for 20 min. Remove from heat and let cool to room temp. Meanwhile, toss the strawberries with the remaining sugar and let sit for about 30-45 min, stirring occasionally. Combine rhubarb mixture, strawberry mixture and lemon juice in a food processor, puree, then pour into your ice cream maker and follow the instructions.
These sorbets were very popular in our house, and didn't last long. I like my fruit desserts to be not so sweet so you can really taste the fresh fruit, and these were perfect. I'm definitely planning on using the 13lbs of frozen strawberries in the chest freezer for more sorbet later, as well as the remainder of last year's peaches.
Thursday, June 23, 2011
What's Baking? June: Layer Cakes
This month's What's Baking? theme is layer cakes, chosen by Heather.
It's perfect timing for me, since I had a couple birthday cakes to bake! For my own birthday, I baked a strawberry cake, using allllll the strawberries I'd picked the week before. For Clint's birthday, I made a red velvet cake- my very first one! Usually I leave the red velvet to him, but it was his birthday so I had to give it a try.
Before I tell you about my cakes, though, let me show you the view from where I'm blogging.
Jealous?
Strawberry Cake
from Confections of a Foodie Bride

Note: the blogger's comments on this cake mention that it's nearly impossible to find a strawberry cake recipe from scratch. Clint looked at that and scoffed, but it's true. I had 13lbs of strawberries at my disposal, but the only recipes I could find involved adding strawberry jello to a box of cake mix. Seriously? Not for my birthday! So I was pleased to find this recipe. It's a hardier cake, not super sweet but I think it would make great cupcakes. It also has a nice, natural pink color. Not neon pink, like strawberry jello.

Also, I cut this recipe in half to make 3 6in layers. You can find the original recipe, for 8in pans, in the link above.
Ingredients:
6T cup strawberry puree (slice strawberries, toss with a bit of sugar and let sit for about an hour, stirring occasionally. Then puree. Use the puree for the cake and the frosting)
2T milk
2 eggs
1t vanilla
1/2 cup whole wheat flour
1/2 cup + 2T cake flour
3/4 cup + 2T sugar
dash of salt
2t baking powder
6T butter, softened
In a small bowl, whisk together the puree, milk, eggs and vanilla.
In the bowl of your stand mixer, sift together the flours, sugar, baking powder and salt. Beat in the butter at low speed, and mix until the mixture resembles a coarse meal. Stir in the liquids til combined.
Divide the batter among 3 6 inch cake pans. Bake at 350F for 25-35 minutes (the original recipe, in 8 inch pans, said to bake 25min, but it took 35 min for me. Sometimes I really wonder about my oven- maybe I need a second thermometer to make sure the first is right).
Let the cakes cool in the pans, then remove. Frost each layer with strawberry buttercream and top with sliced strawberries, then add the next layer and repeat, etc.
I used Martha's strawberry buttercream. I don't want to tell you about mine, since it totally failed- even though I've made this recipe many, many times before. :-/

A week later, we had Clint's birthday cake

Montclair Martha's Red Velvet Cake
from Martha Stewart

1 and 1/2 sticks butter, softened
2 and 1/2 cups cake flour
3T cocoa powder (I used dutch process, Clint normally uses Hershey's)
1 and 1/2 t baking powder
2 cups sugar
3 eggs
1t vanilla
pinch of salt
red food coloring (I used gel)
3T warm water
1 cup buttermilk
1t baking soda
1T white vinegar
Sift together the flour, cocoa and baking powder (otherwise you'll get big lumps of powdery cocoa, not so fun).
Cream together the butter and sugar, and beat for 15 minutes. Beat in the eggs, one at a time, then the vanilla, salt and food coloring. Now alternate adding the sifted flour/etc with the buttermilk, starting and ending with the flour. Finally, in a small bowl, combine the vinegar and baking soda, then add to the batter.
Divide among 2 8 inch cake pans and bake at 350F for 25-35 min. Cool in pans, then remove.
Frosting
Suzi-Q Filling/Ermine Frosting (my mom's had this recipe so long she doesn't know where it came from).
Note: Clint, the resident red velvet expert, insists that this frosting is the only appropriate frosting for red velvet. He calls it "red velvet cake frosting", since this is the only thing he's ever had it on. I recently discovered its more-or-less official name is "Ermine Frosting", but I grew up knowing it as "Suzi-Q Filling". I've only seen this frosting on chocolate cake, and it's kind of the only way I want my chocolate cake. It's totally unsuitable for piping, but oh well.
5T flour
1 cup milk
1 cup sugar
1/2 cup butter, softened
1/2 cup shortening
pinch of salt
1t vanilla
In a small saucepan, cook the milk and flour, whisking often, until it's thick like paste. Let cool.
Beat the butter, shortening and sugar together until fluffy. Add the flour/milk paste, salt and vanilla. Beat until fluffy (or my mom's direction: "beat like hell".)
The cake is frosted very simply: 2 layers of cake with this frosting in between the layers and all over the outside of the cake. Simple and classic!
This is a great red velvet cake. It's not Clint's mom's recipe (which is for a 9x13 pan and I wasn't in the mood for math when it came time to bake this, and obviously it had to be a layer cake this time), but the texture was lovely.
It's perfect timing for me, since I had a couple birthday cakes to bake! For my own birthday, I baked a strawberry cake, using allllll the strawberries I'd picked the week before. For Clint's birthday, I made a red velvet cake- my very first one! Usually I leave the red velvet to him, but it was his birthday so I had to give it a try.Before I tell you about my cakes, though, let me show you the view from where I'm blogging.
Jealous?Strawberry Cake
from Confections of a Foodie Bride

Note: the blogger's comments on this cake mention that it's nearly impossible to find a strawberry cake recipe from scratch. Clint looked at that and scoffed, but it's true. I had 13lbs of strawberries at my disposal, but the only recipes I could find involved adding strawberry jello to a box of cake mix. Seriously? Not for my birthday! So I was pleased to find this recipe. It's a hardier cake, not super sweet but I think it would make great cupcakes. It also has a nice, natural pink color. Not neon pink, like strawberry jello.

Also, I cut this recipe in half to make 3 6in layers. You can find the original recipe, for 8in pans, in the link above.
Ingredients:
6T cup strawberry puree (slice strawberries, toss with a bit of sugar and let sit for about an hour, stirring occasionally. Then puree. Use the puree for the cake and the frosting)
2T milk
2 eggs
1t vanilla
1/2 cup whole wheat flour
1/2 cup + 2T cake flour
3/4 cup + 2T sugar
dash of salt
2t baking powder
6T butter, softened
In a small bowl, whisk together the puree, milk, eggs and vanilla.
In the bowl of your stand mixer, sift together the flours, sugar, baking powder and salt. Beat in the butter at low speed, and mix until the mixture resembles a coarse meal. Stir in the liquids til combined.
Divide the batter among 3 6 inch cake pans. Bake at 350F for 25-35 minutes (the original recipe, in 8 inch pans, said to bake 25min, but it took 35 min for me. Sometimes I really wonder about my oven- maybe I need a second thermometer to make sure the first is right).
Let the cakes cool in the pans, then remove. Frost each layer with strawberry buttercream and top with sliced strawberries, then add the next layer and repeat, etc.
I used Martha's strawberry buttercream. I don't want to tell you about mine, since it totally failed- even though I've made this recipe many, many times before. :-/

A week later, we had Clint's birthday cake

Montclair Martha's Red Velvet Cake
from Martha Stewart

1 and 1/2 sticks butter, softened
2 and 1/2 cups cake flour
3T cocoa powder (I used dutch process, Clint normally uses Hershey's)
1 and 1/2 t baking powder
2 cups sugar
3 eggs
1t vanilla
pinch of salt
red food coloring (I used gel)
3T warm water
1 cup buttermilk
1t baking soda
1T white vinegar
Sift together the flour, cocoa and baking powder (otherwise you'll get big lumps of powdery cocoa, not so fun).
Cream together the butter and sugar, and beat for 15 minutes. Beat in the eggs, one at a time, then the vanilla, salt and food coloring. Now alternate adding the sifted flour/etc with the buttermilk, starting and ending with the flour. Finally, in a small bowl, combine the vinegar and baking soda, then add to the batter.
Divide among 2 8 inch cake pans and bake at 350F for 25-35 min. Cool in pans, then remove.
Frosting
Suzi-Q Filling/Ermine Frosting (my mom's had this recipe so long she doesn't know where it came from).
Note: Clint, the resident red velvet expert, insists that this frosting is the only appropriate frosting for red velvet. He calls it "red velvet cake frosting", since this is the only thing he's ever had it on. I recently discovered its more-or-less official name is "Ermine Frosting", but I grew up knowing it as "Suzi-Q Filling". I've only seen this frosting on chocolate cake, and it's kind of the only way I want my chocolate cake. It's totally unsuitable for piping, but oh well.
5T flour
1 cup milk
1 cup sugar
1/2 cup butter, softened
1/2 cup shortening
pinch of salt
1t vanilla
In a small saucepan, cook the milk and flour, whisking often, until it's thick like paste. Let cool.
Beat the butter, shortening and sugar together until fluffy. Add the flour/milk paste, salt and vanilla. Beat until fluffy (or my mom's direction: "beat like hell".)
The cake is frosted very simply: 2 layers of cake with this frosting in between the layers and all over the outside of the cake. Simple and classic!
This is a great red velvet cake. It's not Clint's mom's recipe (which is for a 9x13 pan and I wasn't in the mood for math when it came time to bake this, and obviously it had to be a layer cake this time), but the texture was lovely.
Friday, May 13, 2011
Spiced Poached Apples
Tonight's dessert is brought to you by Dorie Greenspan.
I made dinner one night instead of going out. At the time, we didn't have much in the way of desserts, aside from leftover Easter candy (somehow, sitting at the dining table after slaving away to make dinner, and eating half a hollow chocolate bunny didn't seem to fit), so I decided to flip through the dessert section of Around my French Table.
This poached apple recipe was pretty easy, and as desserts go, pretty healthy. Yes, it's full of sugar, but there's no fat at all, and the start is a piece of fruit. I dressed it up by adding 1/2lb of kumquats I'd purchase a few weeks ago and had no idea how to use- since we were going away a few days after this, I decided I'd better use them up now rather than risk letting them go back while I was gone.
Clint said this was too sweet for him, but I really enjoyed it. I can't decide if I like it better hot or cold, though- which means it might be a nice dessert for a hot summer evening.

Dorie's Poached Apples
from Around my French Table, page 396
1/2 cup honey
1/3 cup sugar (maybe reduce this to 3T)
3 cups water
zest and juice from 1/2 orange (cut the zest into long strips)
zest and juice from 1/2 lemon (cut the zest into long strips)
3 pieces star anise
1 cinnamon stick (2in long)
vanilla bean (I used 1/2t vanilla paste)
3 medium apples or pears, peeled, cored and cut in half
In a medium saucepan, combine the honey, sugar, water, orange, lemon, anise and cinnamon. Bring to a boil over medium-high heat and then reduce to medium-low and cook for 5 minutes. Add the apples and bring to a simmer. Cook for 10-15 min, until the fruit can be pierced easily with a knife- check its progress as it goes, different varieties of apples/pears may cook more quickly.
Remove the fruit once it's done, and boil the syrup for 10 min more. Pour the syrup over the fruit and let cool. Serve warm, at room temperature or cold.
I think I'd love this with a small slice of spiced pound cake or angel food cake.
Wednesday, April 27, 2011
Dessert in a hurry
Do you ever get invited to a last minute dinner party and need something to bring? Or throw a dinner party yourself, and completely forget about dessert? Here's the dessert for you.
As I mentioned the other day, Clint and I had our own Easter this year. But... we didn't really want to be alone, so I called up my cousin R, who lives here in town, and he was nice enough to invite us to dinner with them. It was all pretty last-minute, and I had some bread to bring along, but an hour and a half before we were expected, I decided I should bring dessert- partly because I always bring dessert when we go there. But what to make?

Normally my favorite go-to quick dessert is Swedish Jam Squares (probably not really Swedish), which consist of a cookie crust made from a boxed cake mix, jam spread on top and drizzled with a confestioner's sugar/milk glaze. They're good, but not Easter-dinner-good.
So I made an almond tart. It took about 15 minutes from getting the ingredients out to getting it in the oven, and almost an hour to bake- plenty of time to get dressed!

Almond-Marmalade Tart
adapted from The Family Kitchen
Shortbread crust:
2 sticks butter, softened
2 cups flour
1 cup sugar
1/2t salt
Filling:
approx 2-3oz marzipan (make your own, or use canned), approximately 2-3oz
1/4 cup orange marmalade, or other fruit preserves/jam of your choice
Make the crust. Beat the butter and sugar together until fluffy, then add the flour and salt. It'll be pretty crumbly. Pour half the crust into a greased tart pan (with removable bottom) and pat down.
Roll the marzipan into a thin circle slightly smaller than the tart pan. Place on top of the crust in the pan. Spread the marmalade/jam on top of the marzipan. Pour the remaining crust on top of the marmalade and pat down. Decorate the top: brush with an egg wash with sprinkle with sliced almonds, or dollop some marmalade on, or thin out some marmalade with water and brush over the top.
Bake at 325F for 50-60 min, until the edges are golden brown. Let cool, then remove from tart pan. Serve at room temperature.
This dessert is like a wedge of cookie, but dressed up. The crust is a little sweet and a little salty, and compliments the sweet marzipan and marmalade nicely. It was a big hit! I imagine this will be requested again.
Note: the original recipe called for an egg, but never mentioned adding it so I forgot about it. maybe that's why my crust was so crumbly- but it still works. Also, the original recipe says to chill the crust an hour before putting it in the pan, but that didn't really work with my "dessert in a hurry" requirement the other night.
Thursday, April 14, 2011
Norwegian desserts
The last What's Baking? theme was baking from your heritage, so I spent a lot of time hunting down some appropriate recipes. I originally thought I'd bake something from my Norwegian heritage, but as I said in my post, I didn't really grow up eating Norwegian food, so I didn't feel that was quite right for me.
That's not to say I don't eat Norwegian food now... thanks partly to the Norway Pavilion in Epcot. I found this recipe for rice pudding, which is served there, and it's delicious. We all know I love rice pudding. I also got to use one of my newest refrigerator staples, roasted strawberries.

Norwegian Rice Pudding
from Disney World, recipe from allears.net, which shares many delicious Disney recipes
(I made a 1/4 recipe, since I'd be the only one eating it)
1/2 cup short grain white rice (I used jasmine, it was all I had)
dash of salt
3/4 cup water
1 cup milk (I used skim)
1/2 cup heavy cream
1T sugar
1/2 t vanilla
In a medium saucepan, bring the rice, salt and water to boil, and cook for 15 minutes, uncovered. Reduce heat to a simmer, add milk, and cook for 30 minutes, covered. Remove from heat and chill.
This part is best done fresh before serving: whip the cream until almost fluffy, whip in sugar and vanilla. Gently fold in whipped cream to rice mixture. Chill.
Serve cool, topped with roasted strawberries.
(If you think you might only go through one serving of this rice pudding a day, and making the whipped cream fresh each time might not work... I won't say anything if you get a can of whipped cream. But get Cabot whipped cream, or Hood light whipped cream, those are the best options)
Roasted strawberries
(this is a great thing to do with slightly old, bruised strawberries that aren't so pretty for eating fresh, or if you have a ton of strawberries and don't want to freeze or make jam)
Strawberries (as many as you have)
sugar (approx 2T per lb of strawberries)
lemon juice (approx 2T per lb of strawberries)
Hull and slice strawberries (in quarters or slices, whatever). Place in a baking dish and toss with sugar and lemon juice. Roast at 250F for about 2 hours. Let cool slightly, and store in the refrigerator.
Makes a lovely topping for: waffles, pancakes, ice cream, rice pudding, yogurt, cottage cheese, etc.
Saturday, March 12, 2011
Starve a cold, feed a fever
or... is it feed a cold, starve a fever?
Well, how 'bout I just eat.
When I'm sick (as I am now, sadly), the only thing I really want is pudding. Pudding is tasty, it's soothing on a sore throat, and it's what my mom always used to make me when I was sick as a kid, so it's nostalgic. Mom's recipe is very quick and easy, but tastes so much better than anything in a plastic cup or a little box, which means that a sick person can handle making it.
This time around, I just happened to have a surplus of milk and eggs that I needed to use the day before I got sick, so, having no idea how knocked out I'd be the next day, I decided I wanted some fancy custard. When I needed something cold and soothing the next day, I was very pleased with my pudding decision.

Creme Caramel
from Cooking Light, October 2008
I halved the recipe.
for the custard:
2 cups 2% milk
1t vanilla paste, 2t vanilla extract or 1 vanilla bean (I went with the paste)
1/3 cup sugar
3 eggs
dash of salt
1T heavy cream
for the caramel:
1/2 cup sugar
2T water
For the custard:
Preheat oven to 225F.
In a medium saucepan, combine milk and vanilla and cook over medium heat until tiny bubbles just start to form around the edges. Meanwhile, beat eggs together with 1/3 cup sugar and salt. Once the milk is ready, remove from heat and whisk in a 1/2 cup of the milk mixture into the eggs, then another 1/2 cup and a third 1/2 cup- this is tempering the eggs, making sure they don't scramble when you add the hot milk to them. Add the entire milk mixture to the eggs and whisk until well combined. Set aside to cool slightly.
In a small saucepan, combine the water and 1/2 cup sugar. Stir while the sugar dissolves, then cook over medium-high heat without stirring, until the sugar turns a caramel-y brown.
Spray 5 6oz ramekins (or whatever you have, note the the cooking time will change with larger ramekins) with non-stick cooking spray, arrange on a cookie sheet, and divide the caramel among each dish. Now divide the custard among each cup, and transfer (carefully!) to the oven. Bake at 225F for 2 hours, until they're set. Let the custards cool at room temperature, then refrigerate overnight.
To serve, run a knife along the edge of the ramekin to loosen the custard, and invert on a plate.
This was my first success with creme caramel. I tried it once before, and it was a huge fail- probably because I was too impatient to let it chill overnight and it fell apart when I tried to get the custard out of the dish. I also added chipotle, which I liked, but Clint didn't... at all. So I'm sticking with this Cooking Light recipe! It's so nice and light and soothing on my poor throat, and delicious for non-sick people.
Thursday, February 24, 2011
What's Baking? February: Baked with Love

Dunne is hosting our February What's Baking? challenge, and she chose a theme of "baked with love": bake something appropriate to serve on Valentine's Day.
Well, in our house, Valentine's Day coincided with both of us jump-starting our workouts and trying to eat a little healthier. Fortunately, I had recently seen a gluten-free, low-fat chocolate cookie on the Martha Stewart Show (warning: this link takes you to the video, which will start playing automatically), and I just had to try it!
I omitted the chocolate chunks. The cookies are chocolatey enough, and with the goal of a healthy/er cookie, there's no need for extra chocolate (and ok, yes, I know there's fat in the nuts, but that's healthy fat, and you can use fewer nuts. No comment on the amount of sugar, it's still a cookie, after all). Any nut you have on hand would be great in these. I also had a kind of funny mishap- the second time I made these, I made them from memory and accidentally used one less egg white. You know what? The cookies were totally fine (Clint said better). So don't sweat it if you only have 3 egg whites, go for it.
Flourless Chocolate Hazelnut Cookiesadapted from Martha Stewart
3 cups powdered sugar
3/4 cups Dutch-process cocoa (or you can use regular baking cocoa, but these really are chocolatey-er and better with Dutch process)
dash of salt
1-1/2 cups hazelnuts (or nuts of your choice)
4 (or 3) egg whites (3 makes a crisper cookie, 4 makes them nice and chewy. I prefer 4, Clint prefers 3)
Preheat oven to 325F. Spread the nuts on a cookie sheet and toast for about 10 minutes. Cool them slightly, then chop roughly.
Sift together the powdered sugar, cocoa and salt. (I rarely sift, but I recommend it with cocoa, which tends to stay in chunks (like the movie Dune is in your chocolately drink.), although once baked, you won't notice them very much). Stir in the egg whites and chopped nuts.
Drop by tablespoonful onto a parchment-lined cookie sheet and bake at 325F for 20-25 minutes, until the cookie tops look dry and are cracked.
Labels:
chocolate,
cookies,
dessert,
healthy cooking,
What's Baking?
Saturday, February 5, 2011
Happy Nutella Day!
Yay it's Nutella Day! Don't you love it? Go open your jar of nutella and scoop of a big spoonful for a big nutella toast with me!
Or, you know, make something with it.
First, visit the World Nutella Day website for a round-up of all this year nutella recipe entries. I have plenty of nutella leftover, so I'm very eager for some inspiration. Also visit Ms Adventures in Italy and Bleeding Espresso for additional nutella-related excitement.
I'd go on and on about how much I love nutella, and how tasty it is, but I'm too eager to get to my recipe. I will say, though, that my grandmother is a recent nutella convert, which is great. She'd never heard of it before (I feel terrible I never baked her anything with nutella), but she currently has an Estonian caretaker who lives on nutella, so now the whole household is crazy over it. Rightly so, of course.
This year on World Nutella Day, I'm enjoying Nutella Rice Pudding. I was inspired by a mocha rice pudding I saw on taste spotting, and while I didn't want to put coffee in mine on that particular day (a snowy day, when the roads were so bad I'd already decided to leave work asap), I liked the idea of chocolate... and I had two and a half jars of nutella at home.
Nutella Rice Pudding
a wamozart12 original

1.5 cups of milk (I used skim)
1 cup fat free 1/2&1/2 (or you can use 2.5 cups of whatever dairy product you prefer, this produced a very thick and creamy pudding)
2T sugar
1/3 cup arborio rice
1t vanilla
1T cocoa powder
1/4 cup nutella
In a medium saucepan, combine the milk, 1/2&1/2, sugar, rice and vanilla. Bring to a boil and then lower to a simmer. Simmer for 40 minutes, until it has thickened and the rice is soft. Stir occasionally.
Remove from heat and stir in the cocoa powder and nutella. Cool.
Enjoy hot, warm, cold, plain or with a dollop of just barely sweetened whipped cream, or just eat it straight from the saucepan. I can't decide the best temperature: it's such a comfort food when warm, but the nutella flavor definitely deepens when it's chilled. It has a wonderfully thick texture, not runny at all. I love it. This is now my go-to rice pudding recipe- I'm sure I'll be enjoying it much more often! (fortunately, Clint doesn't like rice pudding, so I don't have to share :-D )
Here's a round up of this year's nutella recipes:
Nutella Banana Swirl Bread
Nutella Brownies
and I never blogged about these, but they're good (omg especially dunked in coffee): Nutella Cookies
I wasn't as well-organized as last year.
Or, you know, make something with it.

First, visit the World Nutella Day website for a round-up of all this year nutella recipe entries. I have plenty of nutella leftover, so I'm very eager for some inspiration. Also visit Ms Adventures in Italy and Bleeding Espresso for additional nutella-related excitement.
I'd go on and on about how much I love nutella, and how tasty it is, but I'm too eager to get to my recipe. I will say, though, that my grandmother is a recent nutella convert, which is great. She'd never heard of it before (I feel terrible I never baked her anything with nutella), but she currently has an Estonian caretaker who lives on nutella, so now the whole household is crazy over it. Rightly so, of course.
This year on World Nutella Day, I'm enjoying Nutella Rice Pudding. I was inspired by a mocha rice pudding I saw on taste spotting, and while I didn't want to put coffee in mine on that particular day (a snowy day, when the roads were so bad I'd already decided to leave work asap), I liked the idea of chocolate... and I had two and a half jars of nutella at home.
Nutella Rice Pudding
a wamozart12 original

1.5 cups of milk (I used skim)
1 cup fat free 1/2&1/2 (or you can use 2.5 cups of whatever dairy product you prefer, this produced a very thick and creamy pudding)
2T sugar
1/3 cup arborio rice
1t vanilla
1T cocoa powder
1/4 cup nutella
In a medium saucepan, combine the milk, 1/2&1/2, sugar, rice and vanilla. Bring to a boil and then lower to a simmer. Simmer for 40 minutes, until it has thickened and the rice is soft. Stir occasionally.
Remove from heat and stir in the cocoa powder and nutella. Cool.
Enjoy hot, warm, cold, plain or with a dollop of just barely sweetened whipped cream, or just eat it straight from the saucepan. I can't decide the best temperature: it's such a comfort food when warm, but the nutella flavor definitely deepens when it's chilled. It has a wonderfully thick texture, not runny at all. I love it. This is now my go-to rice pudding recipe- I'm sure I'll be enjoying it much more often! (fortunately, Clint doesn't like rice pudding, so I don't have to share :-D )
Here's a round up of this year's nutella recipes:
Nutella Banana Swirl Bread
Nutella Brownies
and I never blogged about these, but they're good (omg especially dunked in coffee): Nutella Cookies
I wasn't as well-organized as last year.
Wednesday, February 2, 2011
Nutella Cravings...
Good news, friends: World Nutella Day is Saturday, February 5th! So of course I've been preparing.
Clint bought me 2 jars of nutella last week, and I already had plans for them by the time they arrived in my kitchen. My plans were a little ambitious, but I'm sure I'll still use up most of that nutella.
I'm not giving these in order of when I made them, but first I want to share this recipe that had me awestruck.
Nutella Brownie Bites
Well, that sounds nice, right? Read the recipe:
1/2 cup nutella
1 egg
5T flour
That's it!! So I thought, well, these can't be that good, they're far too easy. I'm glad to say I was wrong. They took about 2 seconds to get in the oven, 10 minutes to bake, and they're amazing. (If I had no willpower, they would have taken about 2 minutes to devour.)

Procedure:
Beat 1/2 cup nutella (I softened it slightly in the microwave, about 15sec) with the egg until they're well combined and creamy. Beat in the flour.
Fill a mini muffin tin with 1T dough per well. Bake at 375F for about 10-12 minutes.
Mine were baked for exactly 10 minutes, and they came out slightly fudgy on top and had a nice cakey brownie base. They were maybe slightly underdone, but I prefer them this way.
Makes about a dozen brownies/mini muffins
I'm saving up my newest nutella recipe, of which I am quite proud (because it's a wamozart12 original, and really delicious) for the actual Nutella Day, but until then I have hopefully 2 other recipes to share. I'm not as well-organized as last year!
Thursday, January 13, 2011
Let's get crazy with leftovers!
btw, friends, I'm playing around with new blog templates/backgrounds. I'll hopefully get a few different things up in the next few weeks. Feedback is welcome!
It all started with a quart of pumpkin eggnog that M pawned off on my because she doesn't really like eggnog, and had another quart already in her fridge. Well, I don't really like eggnog either, but we were both very happy to try to think of ways to cook with it. (I hear she made some really good eggnog muffins and cookies that I'll have to try sometime)
I made waffles. And I didn't blog about them- it would look like that was because I've been busy, but actually, it's because they weren't that good. They had nice flavor, but they were pretty dry- from no fault of the eggnog, I'm sure, I made quite a number of alterations. The waffles were based on this favorite recipe, only I:
reduced the butter from 12T to 8T
used half whole wheat flour
eliminated the sugar
used 1/2 cup milk and 1 cup pumpkin eggnog
and got 5 waffles instead of 8. Hmm.
We happily ate them when they were fresh, but the last 3 sat in the fridge for several days, until yesterday's blizzard, when I decided to work from home. Well, I was much more efficient than I expected, so I took some time to bake.
And... leftover waffles plus still unwanted pumpkin eggnog... well, that just screams bread pudding right?
Waffle (bread) Pudding
A wamozart12 original
12oz /5 cups waffles (about 3 large waffles), broken into pieces
2 eggs
1 cup eggnog
1/2 cup milk
3T sugar
1/2t vanilla
1/2t nutmeg
1/2t cinnamon

Beat the eggs, nog, milk, sugar and spices together in a large bowl. Toss in the waffles,
and let them soak for about half an hour- if the waffles are not covered by the custard, then come back periodically and stir everything around.

Transfer to a greased deep baking dish (I used a medium-large ramekin, I'm not sure how much it holds, though, but I will check) and bake at 350F for about 45 minutes to an hour, until the custard is no longer runny. (I ended up baking for 30 minutes uncovered, then I covered with foil for another 30. I'm not sure which is best, I was worried the top would burn.)

Enjoy warm or at room temperature, on its own or drizzled with caramel sauce, a dollop of whipped cream, or anything else that sounds food.
Results:
This is such a random and strange idea, but I really liked it. The waffles soak up the custard just as well as bread does, and because my waffles are always a little flavored, the whole dessert was nicely flavored. The only downside is that the waffles not covered in custard during the baking time ended up rather dry and hockey puck-like, so you'll need to make sure all of the waffles are covered in the dish. I should have added a little more eggnog, or just taken some of the waffle pieces out.
I will be making this in the future, because what else do you do with leftover waffles? Maybe this weekend I'll root around in the freezer for other leftover waffles, we always save them (I hate wasting food!)
It all started with a quart of pumpkin eggnog that M pawned off on my because she doesn't really like eggnog, and had another quart already in her fridge. Well, I don't really like eggnog either, but we were both very happy to try to think of ways to cook with it. (I hear she made some really good eggnog muffins and cookies that I'll have to try sometime)
I made waffles. And I didn't blog about them- it would look like that was because I've been busy, but actually, it's because they weren't that good. They had nice flavor, but they were pretty dry- from no fault of the eggnog, I'm sure, I made quite a number of alterations. The waffles were based on this favorite recipe, only I:
reduced the butter from 12T to 8T
used half whole wheat flour
eliminated the sugar
used 1/2 cup milk and 1 cup pumpkin eggnog
and got 5 waffles instead of 8. Hmm.
We happily ate them when they were fresh, but the last 3 sat in the fridge for several days, until yesterday's blizzard, when I decided to work from home. Well, I was much more efficient than I expected, so I took some time to bake.
And... leftover waffles plus still unwanted pumpkin eggnog... well, that just screams bread pudding right?
Waffle (bread) Pudding
A wamozart12 original
12oz /5 cups waffles (about 3 large waffles), broken into pieces2 eggs
1 cup eggnog
1/2 cup milk
3T sugar
1/2t vanilla
1/2t nutmeg
1/2t cinnamon

Beat the eggs, nog, milk, sugar and spices together in a large bowl. Toss in the waffles,
and let them soak for about half an hour- if the waffles are not covered by the custard, then come back periodically and stir everything around.
Transfer to a greased deep baking dish (I used a medium-large ramekin, I'm not sure how much it holds, though, but I will check) and bake at 350F for about 45 minutes to an hour, until the custard is no longer runny. (I ended up baking for 30 minutes uncovered, then I covered with foil for another 30. I'm not sure which is best, I was worried the top would burn.)

Enjoy warm or at room temperature, on its own or drizzled with caramel sauce, a dollop of whipped cream, or anything else that sounds food.
Results:
This is such a random and strange idea, but I really liked it. The waffles soak up the custard just as well as bread does, and because my waffles are always a little flavored, the whole dessert was nicely flavored. The only downside is that the waffles not covered in custard during the baking time ended up rather dry and hockey puck-like, so you'll need to make sure all of the waffles are covered in the dish. I should have added a little more eggnog, or just taken some of the waffle pieces out.
I will be making this in the future, because what else do you do with leftover waffles? Maybe this weekend I'll root around in the freezer for other leftover waffles, we always save them (I hate wasting food!)
Subscribe to:
Posts (Atom)