Sunday, July 31, 2011

Sugar cookies for a hot day!

Remember these cookies from last year?
Bird made them for me for my 30th birthday bash. I LOVED these cookies, they were unlike any plain ol' vanilla sugar cookie I'd ever had. Soft, purely delicious, thick and frosted. Amazing! They weren't greasy or crumbly or crunchy like so many sugar cookies can be. Well, because she is who she is, she immediately shared the recipe. It only took me 13 months, but I made some for myself!

Oh yes, and I have the same cookie cutters (thanks to my mom!), which is kind of why I absolutely had to make this recipe.

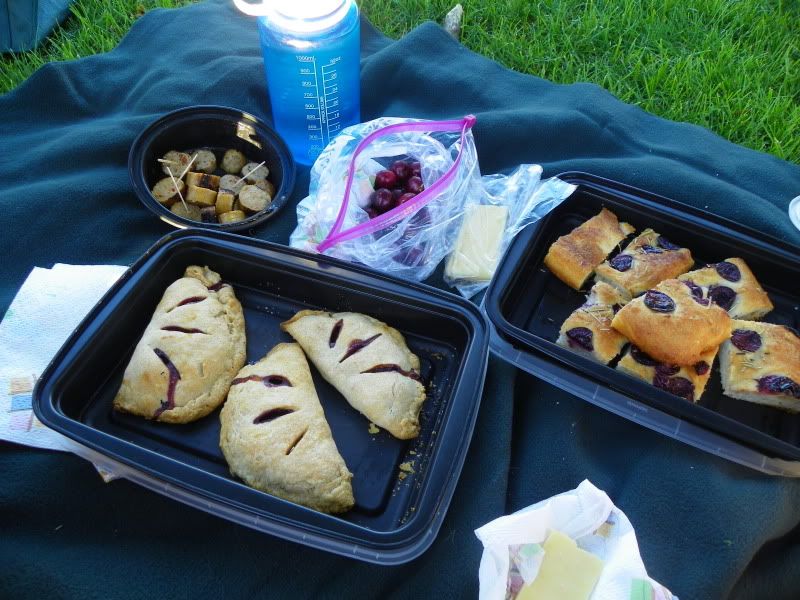
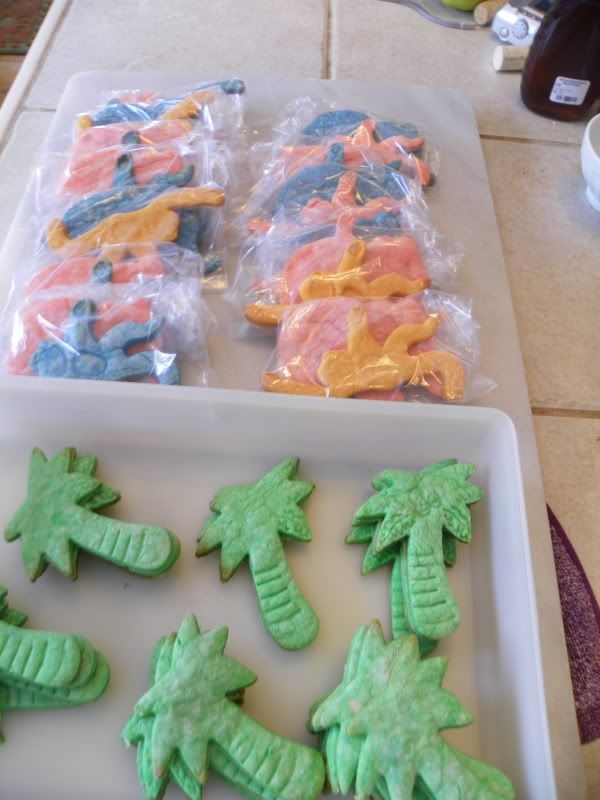
I volunteered at an Ice Cream Social and Craft Fair last weekend, and among other things, I signed up to bring goodies for the bake sale table. Last year I made some fancy cookie that didn't sell very well, so this year I decided to appeal to the kids. What kid wouldn't want a brightly colored, elephant or monkey-shaped cookie? Of course, I had to bake these during the heat wave (it was 98F and we do not have AC) so there was no way I'd frost these. I wrapped up 2 cookies in sandwich baggies and priced them at $1 each.... and only 4 baggies sold. I think this bake sale table isn't really worth it, honestly. But the palm trees were saved for our family party later that day, and were a huge hit! I guess I should go after the adults, not the kids.

Sugar Cookies
recipe from Alton Brown (the man knows what he's talking about!)
one recipe makes about 2 dozen 3 inch cookies, I recommend making 2 batches because 1. they're delicious, and 2. I've never seen a cookie keep so well- you can save these babies!

1 cup (2 sticks) unsalted butter, softened
1 cup sugar
1 egg, beaten
1T milk
1t vanilla or other flavoring (if you want, not in the original recipe)
3-3.5 cups of flour
3/4t baking soda
1/4t salt
Powdered sugar, for rolling out the dough

Beat the butter and sugar together for a until minutes until nice and fluffy. Beat in the egg and milk and flavoring. Sift together 3 cups of flour with the soda and salt, and add in 2 batches to the butter/sugar mixture. If the dough is really really soft (it was for me, perhaps because it was so amazingly hot in the kitchen), add a little more flour. Add food coloring if you'd like (I use gel food coloring). Pat dough into 2 disks, wrap in plastic wrap and refrigerate for a couple hours or overnight.

Sprinkle powdered sugar generously over your rolling surface, rolling pin and the cookie dough. Roll out the dough to 1/4in, cut with Lilly Pulitzer cookie cutters (or, you know, other cookie cutters- but seriously, wouldn't you rather have palm tree cookies?) and bake in your preheated-to-375F oven for anywhere between 8 and 14 min. Alton says 7-9 min but I needed almost 15 for the big elephants. Cook until they're just starting to turn golden brown on the edges. These are still good a bit overdone, but you want them just barely done.

As I said, I made these during the heat wave. I made the dough on Thursday night, when it'd cooled down to a balmy 85F, then I planned to get up early on Friday to roll out the dough and also make sorbet when it was still relatively cool. Well, it was already nearly 90 when I got up, so I scrapped the sorbet idea (I've learned my ice cream maker is useless in 85F+ weather), and the cookie dough was very difficult to roll out! I could only roll out each disk once, then it had to go back in the fridge because the dough was too soft! But let me tell you, even though it took about 3 hours with all the re-refrigerating I had to do, it was entirely worth the effort! These are my new favorite cookies ever.

Oh and like I said, it was hot, so I didn't bother frosting them! Next time I'll take a hint from Bird and do some pretty swirly decorations with royal icing.


Some new design

I'm blatantly copying Bird's idea. But hopefully she won't mind!

Monday, July 25, 2011

What's Baking? July: Bake Local

This month's What's Baking? theme was chosen by Lindsey, and is Bake Local- bake anything from your local area! I decided to use cherries. Tougas Farm has recently started producing cherries, so I jumped at the chance to go cherry picking! I've never done this before, so I was really surprised by how many cherries grow on each branch of a cherry tree! It was a perfect day for fruit picking of any sort (warm but not too hot, partly cloud, plus I was under a mesh canopy that provided a little more shade), so I went slowly and enjoyed myself.

I only got 7.8lbs of cherries- I'd have liked to pick more, but they were not cheap, so I did not want to take any chances of not using up all the cherries in time- plus the cherry field is cash-only, and the girl only has so much cash on her at a given time (birthday money, haha!)

I made many things with these cherries, including a classic cherry pie and cherry hand pies for a picnic,

but for the bake along I like to go with something different: cherry foccacia.

Cherry Foccacia
from Martha Stewart Living, July 2011

Martha had a big spread on sour cherries in the July issue, and she made some really different things, things you'd never think to put cherries in/on. I was using Bing cherries, not sour, but I like all cherries so I didn't care. This was my first attempt at foccacia, and while it didn't turn out exactly like bakery foccacia, it's still delicious and worth the time and effort. It's not hard, you just have several risings to deal with.

2 and 3/4 cup warm water
1t active dry yeast
1.5lbs (4.5-5cups) bread flour
1-2t salt
1/4 cup olive oil
2T fresh rosemary (I used dried)
1.5-2 cups cherries, pitted and halved

In a large bowl (say, of your stand mixer), combine the water, yeast and flour. Mix just until combined (dough will be very sticky) and let rest for about 20 min. Add the salt and mix, then knead for about 5 min. Cover and let rise until doubled, about 1.5-2hrs.

On a floured board (just enough flour so it doesn't stick, and the dough might be really, really sticky), knead the dough just a bit, then flatten out into a square/rectangle-ish shape. Fold the top third down towards you, then the bottom third up away from you. Pat to get the air bubbles out, and the 2 flaps should overlap. Then do the right side third, then the left side third, and pat. Place in a floured bowl, cover and let rest for an hour. Then repeat the folding process again, and let rest for another hour.

In a rimmed 13x17 baking sheet, pour the oil and spread around. Stretch out the dough a bit and place it in the pan, working it to reach all the edges (this is tedious and can take awhile- it won't stick to the pan because the pan is oiled, of course, so you just have to coax it to stretch out).

Heat the oven to 450F, and let the dough rest for 15-20 min.

Finally, place the cherries on the top of the dough (I did some skin-side down, and some skin-side up, whatever you like), and press them in gently. Sprinkle with some coarse (kosher or sea) salt and the rosemary. Bake at 450F for 30-40 min, turning around halfway through.

Once the bread is done, let it cool in the pan for just a few minutes, then remove from pan and let cool on a wire rack. Drizzle the top of the bread with the olive oil from the pan.

Go on a picnic and bring the foccacia to share with all your friends. :)

Wednesday, July 20, 2011

An All-American Breakfast

While my parents, Clint and I were in Washington, DC the week before the 4th of July, they all went to Mount Vernon, the home of George Washington (without me- I was too busy). They brought me gifts because I couldn't go with them, and of course, the gifts were all food-based.

At Mount Vernon, they all visited the Grist Mill, which still produces stone-ground cornmeal. They sell it in cotton sacks, as well as honey produced there. (They also visited the distillery, but I didn't get any whiskey! boo.) Included with the sack of cornmeal they brought back for me was a sheet of recipes and history.

Nelly Custis, George Washington's granddaughter, was raised at Mount Vernon, and shared interesting information: "He [meaning George] rose before sunrise, always wrote or read until 7 in the summer or half past 7 in winter. His breakfast was then ready- he ate three small mush cakes (Indian meal) swimming in butter and honey, drank three cups of tea without cream..." Her recipe for mush cakes, also known as hoe cakes, was included on this sheet, and so once I returned (exhausted) from this trip, I decided to try them.

Hoe cakes make a very humble-looking but hearty breakfast, and I have to say, I thoroughly enjoyed these. Below is my take on the modern adaptation of Nelly Custis' recipe, since the recipe given would "easily feed a school class". That's not so helpful in my little house- plus, I only got 2lbs of the corn meal.

Note: if you don't have corn meal ground at the Mount Vernon grist meal, that's ok. I personally like Quaker or whatever you can find in the bulk section.

Original recipe, to feed a large group:
8 and 3/4 cups corn meal
1 and 1/4t yeast
1 egg
warm water
pinch of salt
Butter or other oil/shortening to cook in
Honey for serving

In a large bowl/container, combine 4 cups of cornmeal with the yeast, and enough warm water to get to the consistency of a thin pancake batter (this is pretty flexible). Cover and let sit at room temperature overnight. The next day, gradually add the remaining cornmeal, the egg and enough warm water to get to thin pancake consistency again. Cover and let sit for 15-20 min.

Fry spoonfuls of batter in a greased frying pan, and serve with butter and honey (or jam, maple syrup, etc)

My adaptation, to feed one person with leftovers (heated up for lunch ;) ):
Part 1:
2 cups of cornmeal
1/2t yeast
warm water
Combine those in a bowl, using enough water to get to thin pancake batter consistency, cover and let sit on the counter overnight.

Part 2:
half of the mixture from part 1 (put the remaining part in the fridge and use within a few days)
1 cup cornmeal
1 egg or half of 1 egg
warm water
pinch of salt

Combine the part 2 ingredients, with enough warm water to get to thin pancake batter consistency again, and let sit while you heat up the frying pan (if you're using the second half of the refrigerated part 1 mixture, let it sit at room temp for a bit before adding the other ingredients). I found either butter or non-stick spray works well. Fry up 2-3T batter, and serve with honey (or maple syrup, jam, etc).

1 egg may be more than this needs, but I figure, egg is protein and healthy, and I didn't feel like tossing half a perfectly good egg. Clint did complain these were too eggy, though, so it's up to you and your love or lack of love for eggs.

If you're not familiar with hoe cakes or cornmeal mush, these pancakes are much denser than regular flour pancakes, but they have that nice corn flavor. They're a bit bitter from having no sugar in them, which is why I do recommend serving them with honey or something sweet. These make a nice, hearty breakfast that I'd really enjoy on a chilly fall morning- and depending on how you fry and serve, they're lower in fat than other breakfast foods!

Monday, July 18, 2011

A Successful Strawberry Season

(unlike last year)


And it seems like it's been a year since I last posted. Insert some lame excuses here- I really have none. Travel interfered with posting and cooking, but I've been back for a couple weeks now. Really, the problem is that unemployment sucks.

Regardless, back in June I went strawberry picking twice (since I'm a loser without a job, I can.) and I made some tasty things with them- only one of which I've mentioned.

I don't want to bother going into a lot of detail about my strawberry fun now that strawberry season is long over and it won't really help you anyway, but let me share my success with sorbets. I've tried sorbet once before, but I neglected to consider how different some berries are compared to each other while making the sorbet, and ended up with more of a bluish granita studded with whole blueberries. A bit odd, but tasty. Fortunately, when trying strawberry sorbet for the first time, I went with a real strawberry sorbet recipe, with excellent results.


Strawberry Basil Sorbet
recipe from The Nifty Foodie

1.5lb fresh, hulled strawberries
1 cup +2T sugar
1.5T lemon juice
pinch of salt
handful (around 1/4 cup) fresh basil leaves, roughly chopped

Slice the strawberries and toss with 2T sugar. Let sit at room temperature for about an hour, turning occasionally. Then combine in a food processor with the remaining sugar and other ingredients, process until pureed.

Pour into your ice cream maker and follow its instructions. Enjoy!

Strawberry Rhubarb Sorbet
based on a combination of the above recipe and this recipe from the LA Times

2 fat or 3 regular stalks of rhubarb, diced (about 6 oz)
1/2 cup sugar
1/3 cup water, plus 1T or so more
1lb hulled strawberries
2T cup sugar
1t lemon juice

In a small saucepan, stir together the rhubarb, 1/2 cup sugar and water. Bring to a boil over medium-high heat and then reduce to a simmer, and cook for 20 min. Remove from heat and let cool to room temp. Meanwhile, toss the strawberries with the remaining sugar and let sit for about 30-45 min, stirring occasionally. Combine rhubarb mixture, strawberry mixture and lemon juice in a food processor, puree, then pour into your ice cream maker and follow the instructions.

These sorbets were very popular in our house, and didn't last long. I like my fruit desserts to be not so sweet so you can really taste the fresh fruit, and these were perfect. I'm definitely planning on using the 13lbs of frozen strawberries in the chest freezer for more sorbet later, as well as the remainder of last year's peaches.