Saturday, April 30, 2011

Meatballs, hold the spaghetti


I don't keep this a secret, but people are still shocked when I say I don't like pasta. I just don't. If it's filled with delicious cheesey goodness then I'll eat it, but otherwise I pass it up if I have other options.

Therefore, the only meatballs I've ever really had are these tiny things on toothpicks. Or the giant bags of frozen Swedish meatballs from Ikea. The meatball is largely ignored in my kitchen. But a few months ago, Martha Stewart had a show all about meatballs. And my eyes were opened to the variety of the meatball: it's not just for spaghetti!

I found this recipe on tastespotting, after having forgotten completely about the MS show. Now I remember, and I have make these buffalo chicken meatballs next.

Asian-inspired turkey meatballs
from Gina's Skinny Recipes (look at that, healthy and delicious!)

1/4 cup panko crumbs
1-1/4 ground turkey (I used chicken and ground it myself in the food processor)
1 egg
1T freshly grated ginger
1 clove garlic, minced
1/2t salt
1/4 cup cilantro, roughly chopped
2 scallions, chopped
2T soy sauce
2t sesame oil

In a large bowl, mix all the ingredients together with your hands (icky, but it's the best way). Form about 3T of meat into balls, and place on a *rimmed*, parchment-lined baking sheet. Bake at 400F for 15-20 min.

Dipping Sauce

4T soy sauce
2t sesame oil
2T fresh lime juice
2T water
1 scallion, chopped

Mix all the ingredients together. Serve with the meatballs.

I never realized how simple meatballs are to make. A little messy, yes, but quick to throw together, quick to cook, and these were ridiculously good. Served with some steamed asparagus and rice, this is a great weeknight meal.

Thursday, April 28, 2011

What makes a scone a scone?

A while ago, I told Clint I wanted to make scones for breakfast. I don't know why I wanted scones, but I did. He liked this idea, he was going to go shovel the previous day's 6 inches of snow to make room for us to actually get into our cars (oh so helpful- now that we have 5-6 ft high heaps of snow on either side of our driveway, it's very important to shovel a couple feet on either side of the car- I forgot this.), and would enjoy a fresh scone when he came back inside.

But before he went out, he asked me "what makes a scone a scone?"

I said, "well, it's..... um..." Yeah, no idea. Shame, foodie, shame!

So let's find out.

According to Wikipedia, a scone is " a small British quickbread (or cake if recipe includes sugar) of Scottish origin.... They are usually made of wheat, barley or oatmeal, with baking powder as a leavening agent."

Ok, so it's a biscuit. But... it's not a biscuit, it's so much more.

Dorie Greenspan (my new hero) says: "[Scones] are made in a manner similar to biscuits and, in fact, share biscuits' buttery-layered texture, but their name, their shape, and the fact that they're served with tea rather than gravy, lift them to the level of fancier fare."

Well, I guess... maybe British scones. In my mind, a scone usually has fruit in it, and always has more fat than a biscuit- although I'd had some scones that are pretty close to a buttermilk biscuit- and is crumbly when you break it open.

Anyway, whatever a scone really is, I wanted one. A nice, crumbly, fluffy scone. I looked around online, I found a lot of lovely recipes (including one that had 3 sticks of butter for 8 scones, yikes), and I settled on this one, from Joy the Baker. I trust Joy the Baker, so when she said these were the best scones, I believed her. And she was right.

These scones have oatmeal, which I usually don't really care for in a scone- because of my first scone recipe, found in 2001, which produced rock-hard gritty, crumbly triangles with a decent oaty flavor, but honestly sit like a brick in your stomach. They were the opposite of fluffy. So I always equate oaty scones with a solid brick. But Clint likes oats, and I try to consider his likes/dislikes when cooking (the more he heats, the less I eat and therefore need to exercise), so I decided to give an oaty recipe a go. I was really pleasantly surprised when these oat scones had a lovely oatmeal cookie flavor (I added vanilla) and a lovely soft, light texture. Also, there's no need to put clotted cream or jam on these, they have plenty of flavor without any toppings (lower calorie bonus! Not that these are good for people watching what they eat (such as me), unless they're looking for a small indulgence.)

Oatmeal Raspberry Scones
from Joy the Baker
oh oh what's this? They're a Dorie Greenspan recipe. See, I told you- my new hero (she claimed my undying loyalty and affection at her fougasse recipe)

Makes 12 scones

1 egg
1/2 cup buttermilk, cold (or 1/2 cup milk + 1.5t vinegar and let that sit for a few minutes)
1t vanilla (my addition)
1 cup AP flour
2/3 cup whole wheat flour (my alteration)
1 1/3 cups oats
1/3 cup suar
1T baking powder
1/2t baking soda
1/2t salt
1/4t nutmeg
1/2t cinnamon (my addition)
10T butter, grated
3/4 frozen raspberries (or any fruit, really)

Note on the butter: I discovered this by accident: freezing your butter makes it much easier to grate. I had to go into the freezer for the backup butter (we but 8lbs at a time at BJs, so most of it goes in the freezer until I need it). I grated (large holes on the box grater) 5T from each of 2 sticks, which meant there was no chance of grating my hand.

In a small bowl, whisk together the egg, buttermilk and vanilla, set aside. In a mixing bowl, whisk together the dry ingredients (flours through spices), then add the butter and smush it around with your fingers to get a crumbly texture. Add the wet ingredients, stir with a fork to combine. Toss in the berries. Knead the dough a few times on a board, then form into 12 balls, about 1/4 cup each. (I formed 6 balls and then the remaining dough into a log, which I wrapped in plastic wrap and froze to bake another day- scones don't keep that well, they're much better fresh).

Place balls on a parchment-lined cookie sheet and bake at 400F for 20-25 minutes, until they're golden brown.

They're best while warm, you can also heat up day-old scones for a few minutes in the oven. Serve alone or topped with clotted cream or cream cheese and/or jam.

Wednesday, April 27, 2011

Dessert in a hurry

Do you ever get invited to a last minute dinner party and need something to bring? Or throw a dinner party yourself, and completely forget about dessert? Here's the dessert for you.

As I mentioned the other day, Clint and I had our own Easter this year. But... we didn't really want to be alone, so I called up my cousin R, who lives here in town, and he was nice enough to invite us to dinner with them. It was all pretty last-minute, and I had some bread to bring along, but an hour and a half before we were expected, I decided I should bring dessert- partly because I always bring dessert when we go there. But what to make?

Normally my favorite go-to quick dessert is Swedish Jam Squares (probably not really Swedish), which consist of a cookie crust made from a boxed cake mix, jam spread on top and drizzled with a confestioner's sugar/milk glaze. They're good, but not Easter-dinner-good.

So I made an almond tart. It took about 15 minutes from getting the ingredients out to getting it in the oven, and almost an hour to bake- plenty of time to get dressed!

Almond-Marmalade Tart
adapted from The Family Kitchen

Shortbread crust:
2 sticks butter, softened
2 cups flour
1 cup sugar
1/2t salt

Filling:
approx 2-3oz marzipan (make your own, or use canned), approximately 2-3oz
1/4 cup orange marmalade, or other fruit preserves/jam of your choice

Make the crust. Beat the butter and sugar together until fluffy, then add the flour and salt. It'll be pretty crumbly. Pour half the crust into a greased tart pan (with removable bottom) and pat down.

Roll the marzipan into a thin circle slightly smaller than the tart pan. Place on top of the crust in the pan. Spread the marmalade/jam on top of the marzipan. Pour the remaining crust on top of the marmalade and pat down. Decorate the top: brush with an egg wash with sprinkle with sliced almonds, or dollop some marmalade on, or thin out some marmalade with water and brush over the top.

Bake at 325F for 50-60 min, until the edges are golden brown. Let cool, then remove from tart pan. Serve at room temperature.

This dessert is like a wedge of cookie, but dressed up. The crust is a little sweet and a little salty, and compliments the sweet marzipan and marmalade nicely. It was a big hit! I imagine this will be requested again.

Note: the original recipe called for an egg, but never mentioned adding it so I forgot about it. maybe that's why my crust was so crumbly- but it still works. Also, the original recipe says to chill the crust an hour before putting it in the pan, but that didn't really work with my "dessert in a hurry" requirement the other night.

Monday, April 25, 2011

What's Baking? April: Spring Baking

Our What's Baking? theme for April was Spring baking, hosted by Leanne of The Martin Family.

When I think of spring foods, I immediately think of Easter. Yes, it's a religious holiday, but to me it's more of the official start of spring than March 21st- especially when Easter is later in the year, and it's actually warm out and flowers are blooming. Easter is the first day I break out a brightly-colored sundress and sandals- even if it's freezing that day. Luckily, it was close to 70F this year, and I was actually warm!

Our Easter plans this year were affected by the flu and travel plans. Fortunately, we were innocent bystanders of all that, but it meant we spent Easter on our own. For me, this was a first time thing, so I scrambled around over a period of two days to try to make our Easter Sunday special. This mostly meant gathering some supplies for Easter baskets and making a nice breakfast.

Because we began Lent with Swedish Semlor on Shrove Tuesday, I decided to end the season with a Swedish Easter bread. This bread was pretty straightforward, but delicious, and I added my own little twist to make it even more delicious. It's not the fanciest Easter treat you'll ever see, but it's just as tasty.

Swedish Easter Bread
recipe found on cooks.com
Makes 2 braided loaves

1 cup milk (I used skim)
4T (1/2 stick) butter
1/2 cup sugar
1t cardamom
1/4 cup warm water
1T active dry yeast
1/2t salt
3.5-4 cups flour
1 egg for an egg wash
Optional: 4-6T marzipan (make your own, or buy a can. I used a can)

Scald the milk. Remove from heat and stir in butter, and then sugar and cardamom. Let cool to lukewarm. Meanwhile, wake up the yeast in the 1/4cup of warm water (I added a sprinkle of sugar as well).

In a large bowl (or your stand mixer bowl), combine the milk mixture, yeast, salt and 3 cups of flour. Stir until combined, and add more flour as needed to produce a sticky dough. Knead for about 5min, in your mixer or by hand.

Let rise in a warm place, in a bowl covered with plastic wrap or a clean dish towel, for about 2 hours.

Punch down the dough and divide in half. Divide each half into 3, and roll each piece into a long snake to braid the dough. Here is where you'll add the marzipan. I tried two methods.

Method 1: start to braid the dough, and after you fold each piece over, stick a small bit of marzipan on the dough that will be covered by the next strand of dough. Keep doing that until it's all braided.

Method 2: Roll each of the dough pieces into a very fat, short snake, and make a long trough down the middle of each snake. Roll bits of marzipan into very skinny snakes, and place in the trough in the dough snake. Pinch the dough over the marzipan and roll out into a longer, skinnier dough snake. Braid that as normal.

Place the braids on a baking sheet, cover with plastic wrap or a dishtowel, and let rise another hour or so. Make an egg wash by beating the egg with 1-2T water, and brush over the braids. Bake for 30-40 min at 350F, until the bread starts to brown.

This bread is delicious fresh from the oven, or if eaten the next day I like to lightly toast it. It's delicious without the marizpan, but the marzipan definitely adds a sweet little surprise.

Overall I think I prefer method 2, it gets small bits of marzipan distributed more evenly through the bread.

Wednesday, April 20, 2011

Branching out: cocktails

I recently returned from a trip to Kentucky. I went with my parents, who've been begging me to take this trip with them for a few years now. Since I'm unemployed, I certainly have time on my hands... so I happily agreed.

It was an awesome trip.

I don't talk all that much about alcohol on this blog, because I'm a wine drinker. What can you say about wine, aside from recommending wineries or specific kinds? I drink a lot of local wine, so my recs won't go very far for most of my readers. And I don't really cook with wine, I like drinking it too much.

Hard alcohol lends itself better to recipes. Yes, there are a number of delicious cocktails using wine, but I don't get too creative- again, I focus on the wine, not the mixer (with the exception of sangria). I'm pleased to say after my Kentucky trip, not only do I think Kentucky is lovely and want to go back, but....

I like bourbon.

I can't wait to tell my grandma, she'll be ecstatic. She's a serious Maker's Mark drinker.

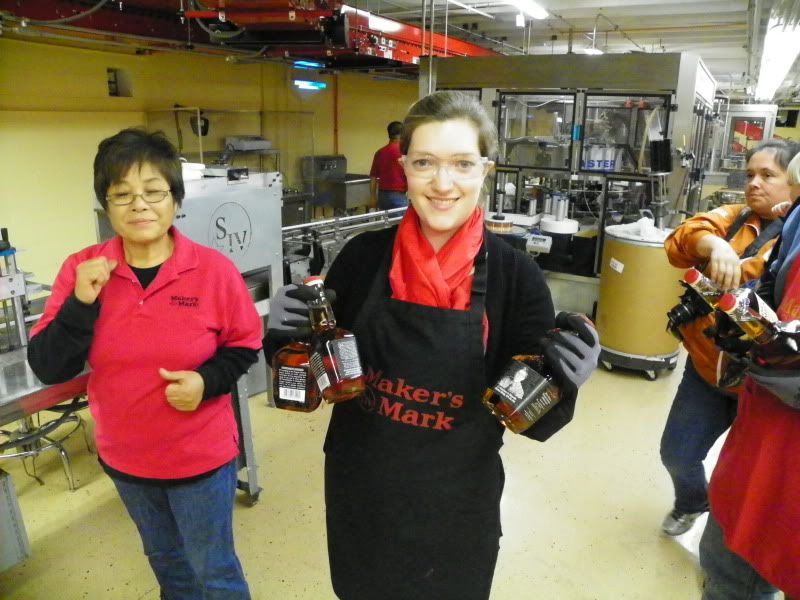
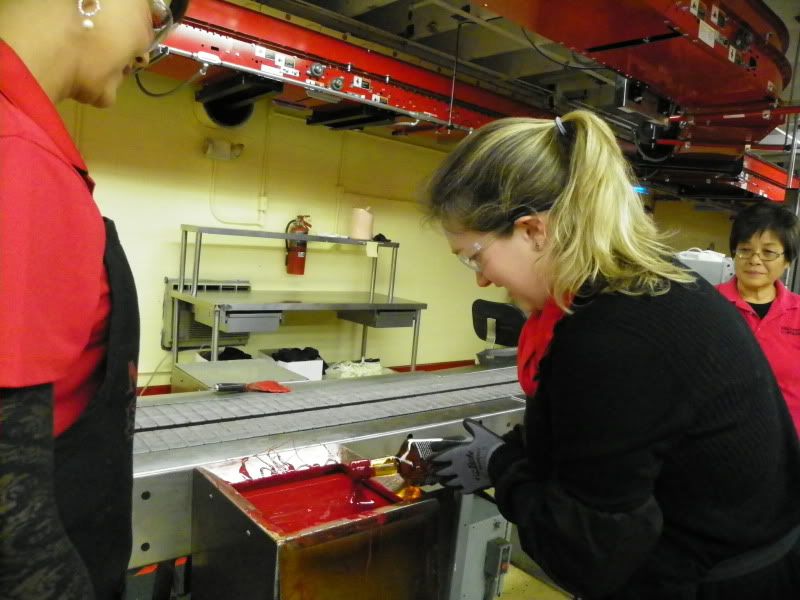
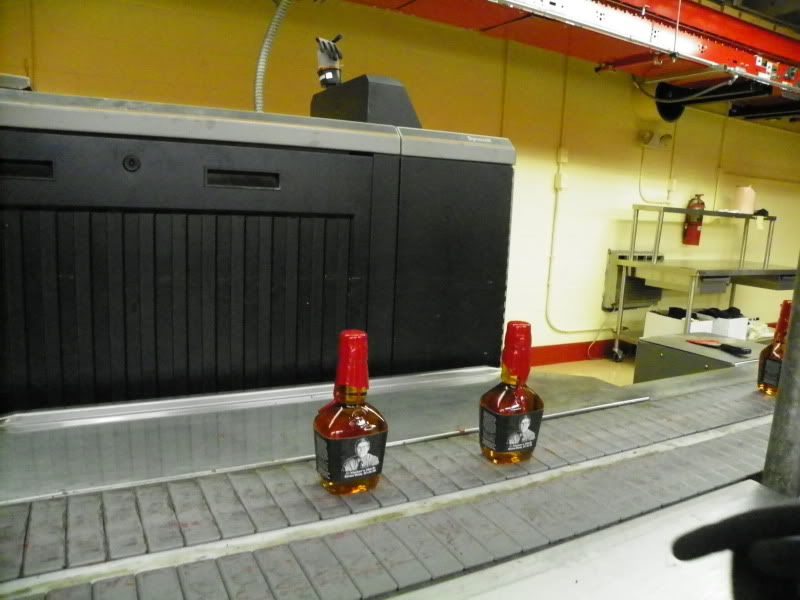
We visited Lexington and Loretto, KY, for the annual Redheads and Thoroughbreds weekend with the folks from Maker's Mark. These people know how to organize an event! We had special seats at the Keeneland Racetrack on Friday to watch 10 horse races, including the 23d annual Maker's Mark Mile (I bet on horse #4, Workin With Hops, and won almost $5, woohoo!!!). In the evening was a huge (albeit terribly wet, the weather didn't cooperate) party in downtown Lexington, and Saturday was a huge, fun- and bourbon-filled day at the distillery in Loretto. Unfortunately, this is the last year for the annual party, but I still hope to go back and visit the distillery again- I think I might enjoy it more with fewer people around.

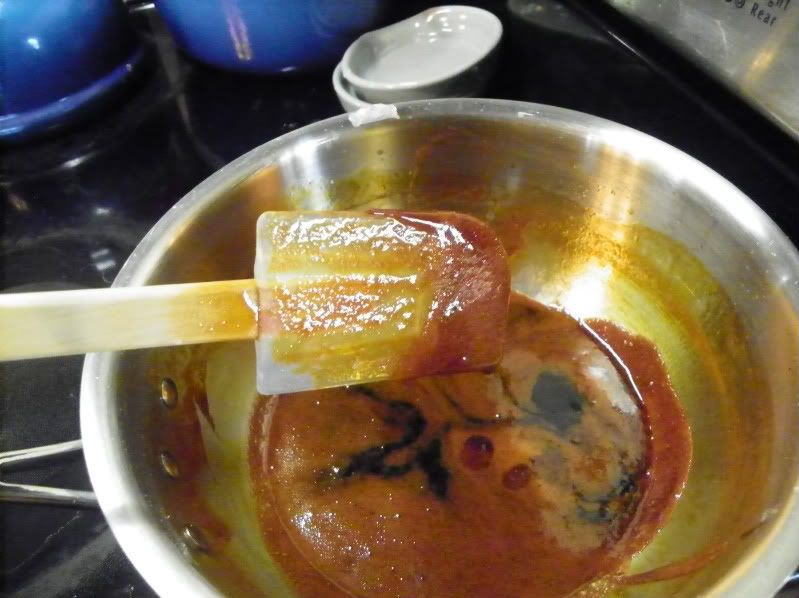
Well anyway, so the point is: I finally started to like bourbon. I've been surrounded by bourbon all my life, but everyone in my family drinks it straight- with something expensive like MM, you probably should. But I can't, it's just too alcoholy. While visiting a friend in Nashville, I was introduced to the oh-so-delicious Jack and Ginger (Jack Daniels in ginger ale), and after purchasing a fairly cheap bottle of whisky to have on hand for a friend, I made a similar drink at home once in a while. While in KY this past week, I had 2 delicious cocktails. (I'd planned to drink mint juleps all weekend long, but alas, some sort of localized mint shortage destroyed those plans!) At Keeneland, the special cocktail of the day was Maker's Mark, citrus liqueur and ginger ale. Very tasty! I have no idea about the ratios, though. At the distillery in Loretto, we were offered Spiced Apple Collinses, which were lovely. And oh look, they shared the recipe:

Spiced Apple Collins
recipe from Maker's Mark

2 parts Maker's Mark
1 1/2 parts Thatcher's spiced apple liqueur
1/2 part sour mix
splash of club soda

Mix and serve over ice.

The only problem was, I'd never heard of Thatcher's. The people mixing and serving the drinks were all "oh you know, Thatcher's!" Well, no, I don't really know. I've never seen this stuff- not that I've ever looked, but still. If you've heard of it, do you think it's a regional delicacy?

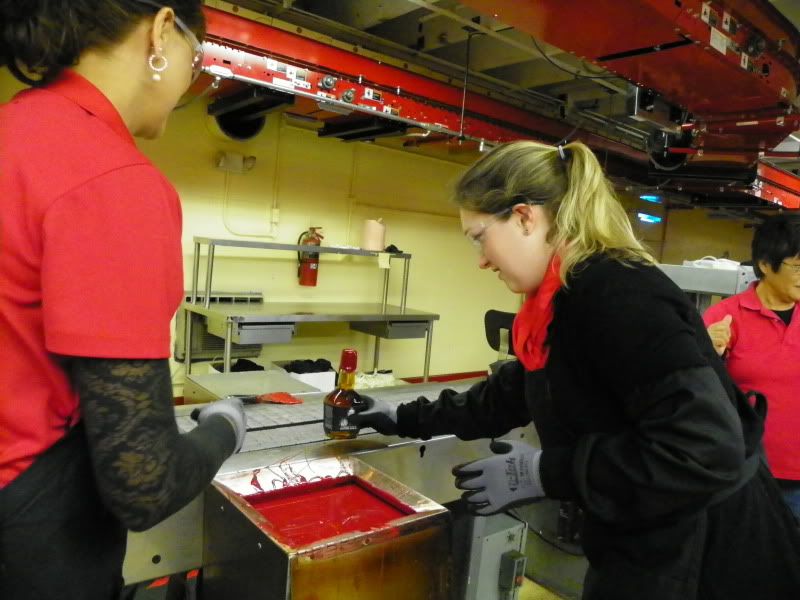
So when I got home, I of course had a great stash of Marker's Mark- because I dipped my own bottles. How awesome was that? Borderline legen-wait for it-dary. Ha. It was a lot of fun, and not hard at all.

Once back in MA, I wanted this spiced apple collins. But.... no Thatcher's. So I made up my own thing.

I don't know what to call it.
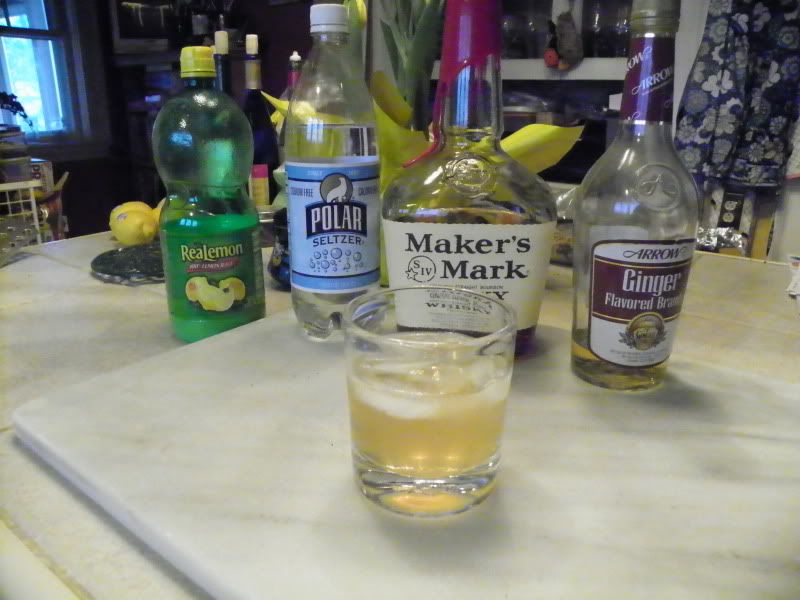
2T Maker's Mark
2T ginger brandy (I used Arrow, the cheap stuff ;) )
4T seltzer/club soda
1/2T lemon juice

Mix it all, serve over ice. Yum!

It's not exactly the same, but it's good.

After perusing our new "Kentucky Bourbon" cookbook, I decided I'd also like to try a Presbyterian. Apparently this was my paternal grandmother's drink, so I was a little pleased it caught my eye. Grandma B drank it with gin, though, and I'm pretty sure I'll never, ever be a gin drinker.

Presbyterian (from Kentucky Bourbon, linked above)
3T Maker's Mark
4T club soda
4T ginger ale
lemon peel

Place ice in a highball glass, pour the bourbon over the ice. Add the club soda and ginger ale, then twist the lemon peel and rub it around the rim of the glass and put the lemon peel in the drink.

This is also good- although to be honest, I just added a squirt of lemon juice and skipped all the stuff about the peel.

I also tried kind of a makeshift old-fashioned, which is kind of my maternal grandmother's sacred drink. But the bitters make it, well, a little bitter.

Old Fashioned
(from Kentucky Bourbon, linked above)

1/2t sugar
2-3 dashes bitters
splash water
orange slice
maraschino cherry
5T Maker's Mark

Add the sugar and bitters to an old fashioned glass. Add the water, orange and cherry and muddle. Fill with ice, and pour the MM in, in 3 equal parts, and stir after each addition (I don't know why you don't just dump it all in- maybe that's why I wasn't in love with this drink, I dumped it all at once).

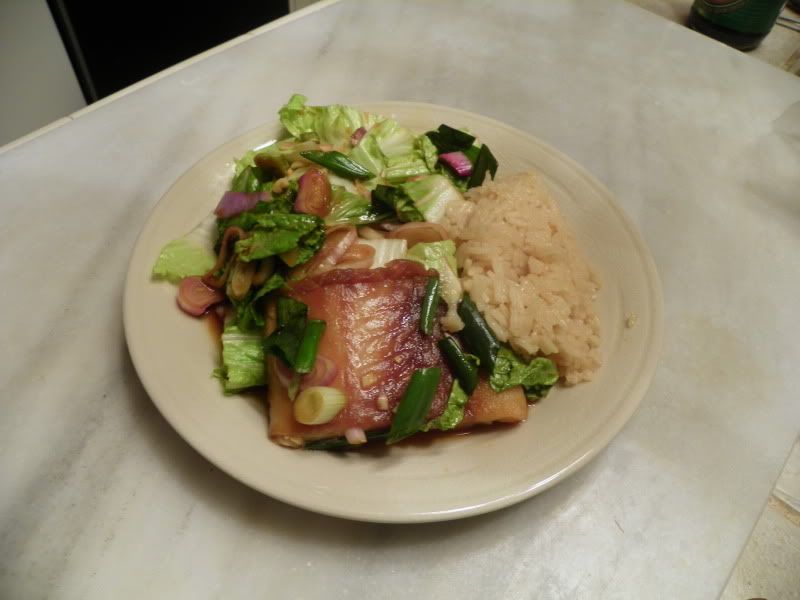
Now I should end with saying that I only have one cocktail photo to share because 1. I didn't think to photograph our cocktails at the distillery, and 2. bourbon in an old fashioned glass with other stuff... pretty much all looks the same. Maraschino cherry here, slice of lemon peel there.... not much difference.

I made these drinks carefully. Please enjoy them that way.

Thursday, April 14, 2011

Norwegian desserts

The last What's Baking? theme was baking from your heritage, so I spent a lot of time hunting down some appropriate recipes. I originally thought I'd bake something from my Norwegian heritage, but as I said in my post, I didn't really grow up eating Norwegian food, so I didn't feel that was quite right for me.

That's not to say I don't eat Norwegian food now... thanks partly to the Norway Pavilion in Epcot. I found this recipe for rice pudding, which is served there, and it's delicious. We all know I love rice pudding. I also got to use one of my newest refrigerator staples, roasted strawberries.

Norwegian Rice Pudding
from Disney World, recipe from allears.net, which shares many delicious Disney recipes
(I made a 1/4 recipe, since I'd be the only one eating it)

1/2 cup short grain white rice (I used jasmine, it was all I had)
dash of salt
3/4 cup water
1 cup milk (I used skim)

1/2 cup heavy cream
1T sugar
1/2 t vanilla

In a medium saucepan, bring the rice, salt and water to boil, and cook for 15 minutes, uncovered. Reduce heat to a simmer, add milk, and cook for 30 minutes, covered. Remove from heat and chill.

This part is best done fresh before serving: whip the cream until almost fluffy, whip in sugar and vanilla. Gently fold in whipped cream to rice mixture. Chill.

Serve cool, topped with roasted strawberries.

(If you think you might only go through one serving of this rice pudding a day, and making the whipped cream fresh each time might not work... I won't say anything if you get a can of whipped cream. But get Cabot whipped cream, or Hood light whipped cream, those are the best options)


Roasted strawberries
(this is a great thing to do with slightly old, bruised strawberries that aren't so pretty for eating fresh, or if you have a ton of strawberries and don't want to freeze or make jam)

Strawberries (as many as you have)
sugar (approx 2T per lb of strawberries)
lemon juice (approx 2T per lb of strawberries)

Hull and slice strawberries (in quarters or slices, whatever). Place in a baking dish and toss with sugar and lemon juice. Roast at 250F for about 2 hours. Let cool slightly, and store in the refrigerator.

Makes a lovely topping for: waffles, pancakes, ice cream, rice pudding, yogurt, cottage cheese, etc.

Tuesday, April 12, 2011

Take-out at home


I see a lot of posts here and there, sharing recipes for Chinese take out and how it's just as good and just as fast. I have to say, I really can't stand American Chinese food. Korean food, on the other hand... yeah, I could definitely do well with my own recipe for bibimbob (still looking!). So when I came across this recipe for scallion pancakes on tastespotting (which are called "Chinese pancakes", but they look just like the Korean pancakes I've had from the Korean restaurant or homemade by Korean friends, and I've never seen scallion pancakes on the menu at a Chinese restaurant- perhaps because I haven't been to one in several years), I started to understand everyone's excitement over homemade Chinese takeout.

These pancakes are nice and easy, and while they're not exactly what I'm used to, they're still very good. They reheat pretty well wrapped in foil in the oven.

Scallion Pancakes
from globetrotter diaries

2 -2.5 cups flour
1 cup hot water
1 bunch scallions, thinly sliced
salt
vegetable oil

Place 2 cups flour in a bowl and make a well. Pour the hot water into the well and incorporate more and more flour as you stir in circles. Transfer to a floured board and knead, adding more flour if necessary for kneading. Knead for a few minutes, then cover with a damp towel and let rest at least 30 min.

Roll dough into a log and divide into 6 even pieces. Roll out each into a flat circle. Brush with oil and sprinkle with salt and scallions. Now roll the pancake back up into a snake (like rolling up a poster) and wind the snake into a coil. Roll that out again with a rolling pin, and that's what you'll cook. (if you need pictures, globetrotter diaries has good ones of this process)

Repeat this process with each of the dough balls.

Heat a large frying pan or griddle over medium high heat and cook the pancakes for a few minutes on each side, until golden brown. Serve with dipping sauce.

Dipping Sauce for pancakes
a wamozart12 interpretation

1/4 cup soy sauce
1T rice vinegar (or white)
1T finely chopped scallion
1 clove garlic, finely chopped
Dash of sugar
sriracha (as much or little as you like, I used about 1t)
1t sesame oil

Mix all ingredients together, and use for dipping pancakes in.

Sunday, April 10, 2011

Spring canning

Marmalade!

A few years ago, I went to a friend's housewarming party. Her mom had helped her out with preparing the menu, and one of the items was her mom's homemade orange marmalade with chevre on toast. It was one of those apps you remember for years to come.

This same friend gave me a huge jar of the same marmalade as a bridal shower gift, which I tried to make last for months (I did pretty well) and almost always ate with chevre. More recently, her mom had a cooking question, and to thank me for her help, she shared her marmalade recipe. It's Ina's!

So I sent Clint off to the store for some oranges. And lemons, this recipe uses both.

Before you start (I don't want you to have the same timing issue that I did), here's the schedule for the marmalade.
1. cut the oranges. Do some other stuff and let them sit overnight.
2. the next day, simmer them for 2 hours. Then boil 30 min and can.

Finally, when you get to the part where you fill the jars... well, you might not want to scrape the pot very well. I licked the wooden spoon, the ladle, the funnel, and the pot. Then I opened one of the jars and starting eating warm marmalade with a soup spoon.

Ina's friend Anna's Orange Marmalade
courtesy my friend's mom, recipe found here and in Ina's cookbook Barefoot Contessa at Home

4 navel oranges
2 lemons
8 cups of sugar
water

Slice the oranges and lemons thinly (preferably with a mandoline, it's much easier). Put all the sliced fruit and juices into a large stainless steel pot with 8 cups of water. Bring to a boil over medium heat, then remove from heat and stir in the sugar until it's dissolved. Cover the pot and let sit at room temperature until the next day.

The next day, return the pot to heat and simmer over very low heat for 2 hours (it should just barely bubble). Stir every so often.

Sterilize some jars and lids, either in the dishwasher on high temp wash or in boiling water (lids should be sterilized in simmering water, the rubber coating on the lids isn't as sturdy).

Increase the heat to medium and boil gently for 30 minutes, stirring *frequently*. Once the marmalade reaches 220F (or it solidifies when dropped on a refrigerated plate), start ladling into jars. Wipe the rims with a clean damp paper towel, and top with lids. Either process in a boiling water processor for longer term storage, or let cool to room temperature and store in the fridge (I chose the second option).

Makes 3-4 pints.

Thursday, April 7, 2011

Fish en papillote

This recipe is supposed to be salmon, but we had some cod to use up, and it turned out great. So sub in almost any fish you want!

The goal for this dinner with something healthy and relatively quick. Check, and check (with one make-ahead step). Oh, and it's very tasty.

Honey-soy fish en papillote
adapted from Tastes of Home

This recipe uses Yuen Chen Thick Sauce. I have no idea what that is, and our sad little ethnic aisle at the grocery store wasn't much help (they don't even always carry fish sauce) but with the help of google, I figured out how to make my own. I found it kind of amusing. Warning: it's a very aromatic sauce to cook, but even though it's a little fishy, I didn't find it unpleasant. Just... intriguing.

Homemade thick sauce
(I can't remember where I got this recipe)
1/2 cup sugar
1/4 cup water
1/4 cup fish sauce

In a medium sauce pan, combine the sugar and water and cook until it's caramel-colored. Slowly pour in the fish sauce- it will bubble up wildly, but swirl the pan and it'll calm down. Cook until it's thick, a few minutes.

Let cool a bit, and store in a sealed container in the fridge (I couldn't find any info on storage, so I just keep it in the fridge).

For the sauce for the fish:
2T thick sauce
2T honey
1T soy sauce
splash of sake (I used mirin- not exactly right, but it's what I had)

Whisk the sauce together.

For the rest of the dish:
4 6oz salmon steaks, or other fish
2 leeks, thinly sliced
2 stalks scallions, thickly sliced
2 cloves garlic, minced
1T fresh ginger, grated
2 shallots, finely diced
1/2 head of bok choy, roughly chopped

Tear off 4 pieces of tinfoil, each about 3x the size of each piece of fish. If you want, spray with nonstick spray of brush with oil (I didn't, it was fine). Place a piece of fish on each foil and brush generously with the sauce. Bring up the sides of the foil so it's like a cup/bowl and the sauce doesn't spill everywhere. Divide all the sliced veggies (leek, scallion, garlic, ginger, shallot, bok choy) among the 4 pieces of fish and pile up on top of the fish. Divide the remaining sauce and pour over each piece of fish/pile of veggies. Add an additional splash of sake to each of the 4 fish/veggie piles, and wrap up the foil, completely sealing the foil package except for a small steam hole in each. Line them up on a baking sheet (rimmed is best, just in case) and bake at 350F for 15-20 min, depending on the thickness of the fish.

Serve the foil packages on each plate for each person to unwrap, or transfer the fish and veggies to each plate yourself. We served with rice flavored with a little soy sauce and ginger.