
Materials:
White cardstock (for the crib, or whatever color you want)
2 pieces of paper/cardstock for the card itself and the inner lining part
Small square/rectangle of paper for the window
Ribbons for the curtains
Craft knife (I have a Martha Stewart one from Michael's)
Cutting mat (I use my fabric cutting mats)
Sharp pencil
Low-temp glue gun (you can use double sided tape, Elmer's or a glue stick, but believe me, this is much easier. They're only a few dollars from Joann's, etc, and work well with paper. I don't recommend a hot glue gun for paper)
For decorations in the room: paper punches, ability to draw, etc, whatever you'd like.
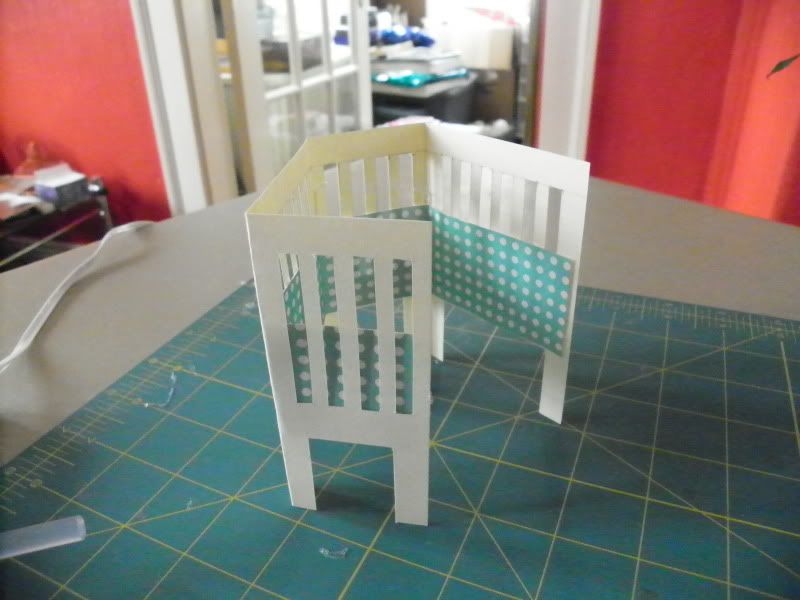
First, the crib.
I'll see if I can figure out how to make a downloadable/printable pdf template, but for now...
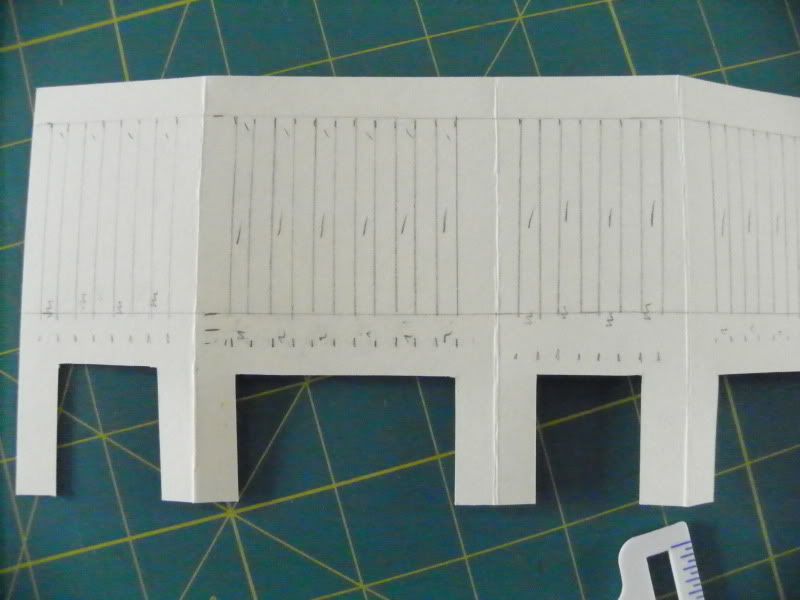
The crib is 4in x 9in. Eventually it'll be a 4-sided structure with legs. All of the legs are 1.25 in long. The end legs are single legs (since it folds around) and are 3/8in wide each, the other 3 legs are double legs and are 3/4 in wide. When you fold it, it'll make sense.
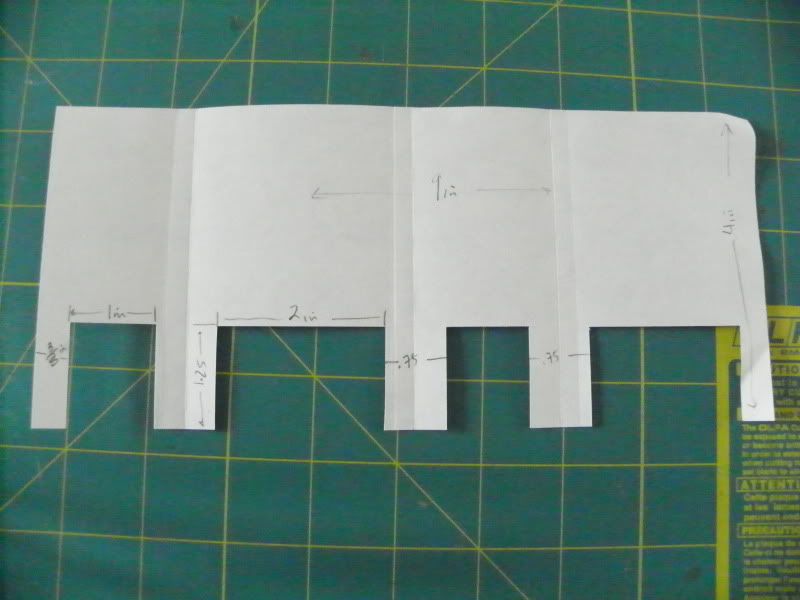 (if you click on the above photo, it'll enlarge and you can see my hand-written dimensions)
Trace all that out with a sharp pencil using very light lines,
 (same with this one, click to enlarge and be able to read my handwriting)
and then using a ruler and a craft knife, cut it out.
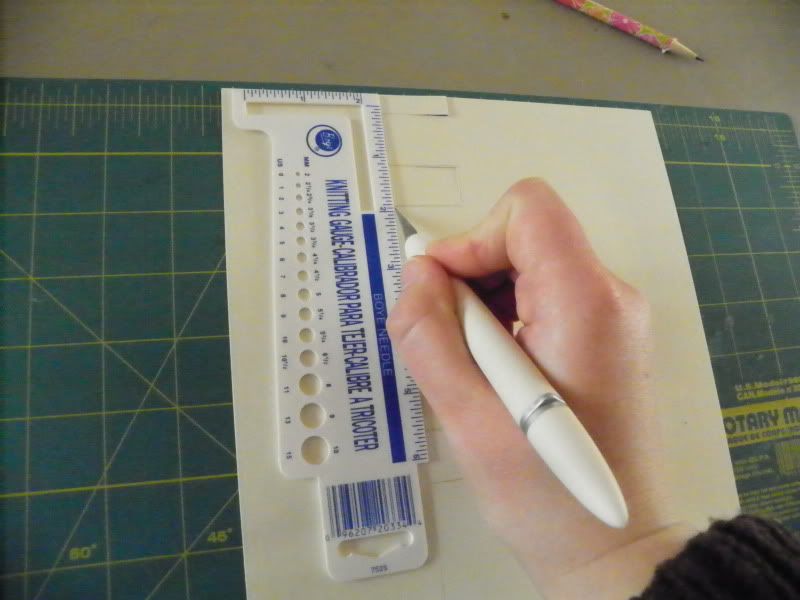
Now make the creases. I like my scoring board (Martha Stewart from Michael's),
 but before I had this, I liked to trace the line on the paper, butt a thin ruler up against that,
  and then bring the paper up against the ruler and then fold it over and slide the ruler down the fold to make it a really good crease.
 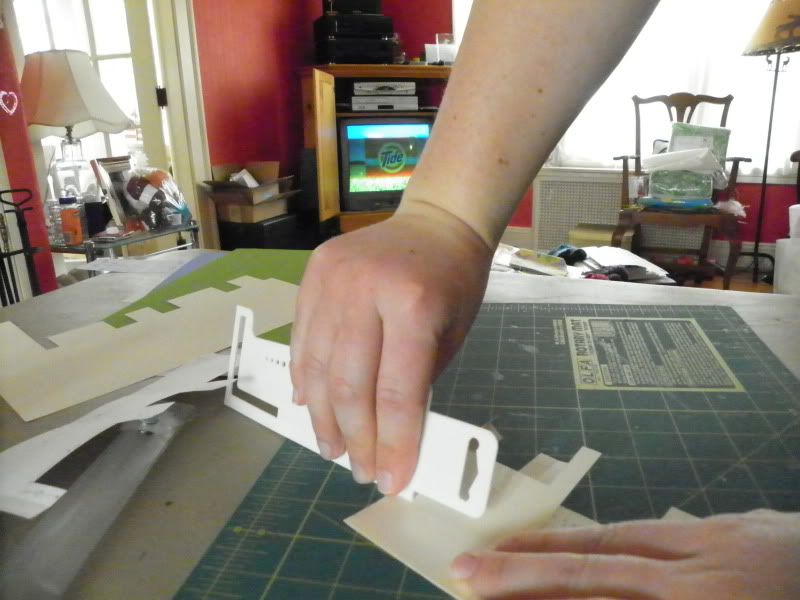 This works pretty well and reduces the special tools you need.
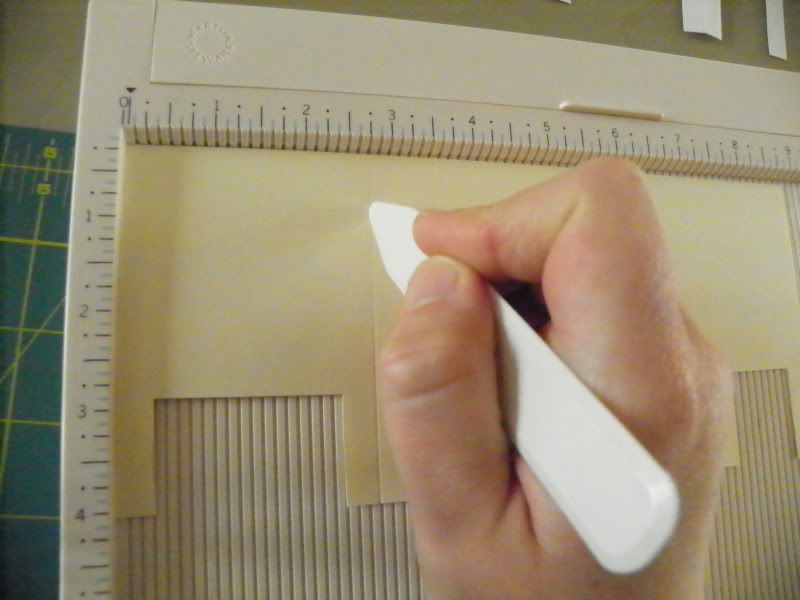
So the crib is cut out and folded. Is it folded correctly? I like the long edge to be on the left-hand side of the card, and you want the edges of the crib to meet in the fold of the card itself (otherwise it won't hold together), so refold if you need to.
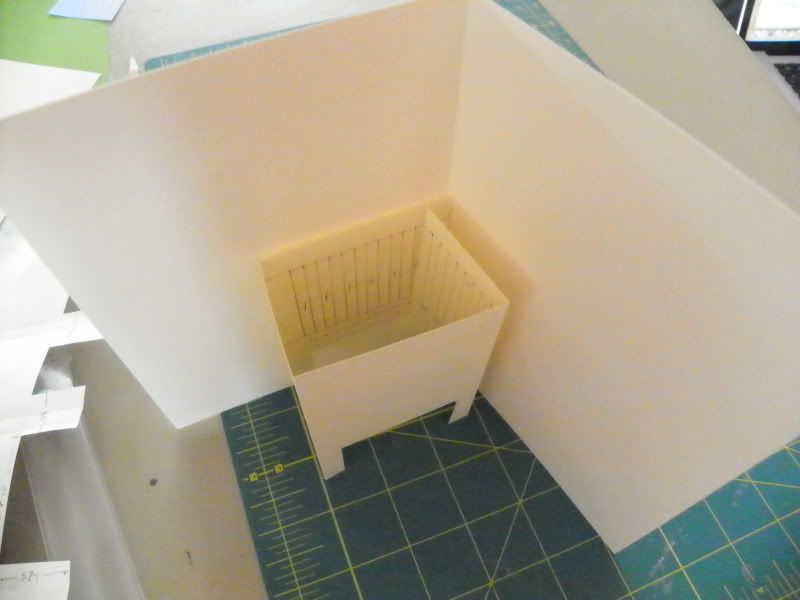
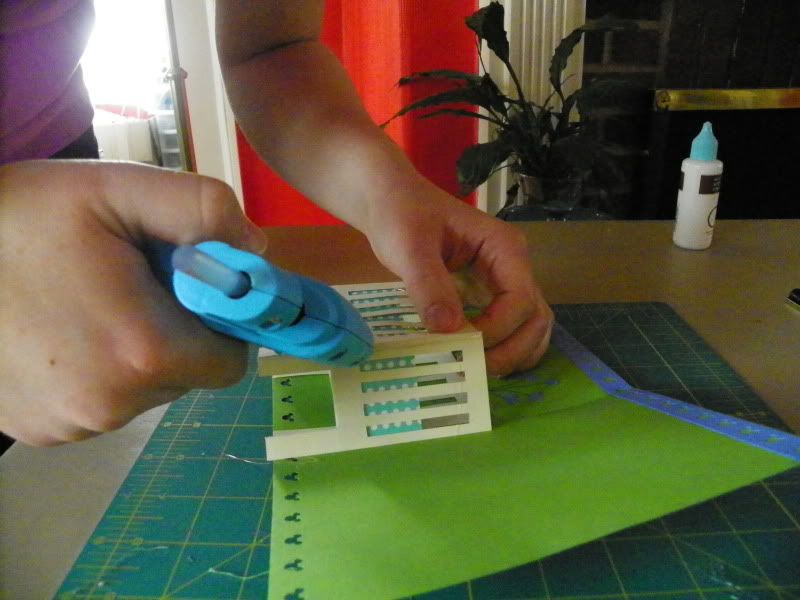
Once you're sure it's folded the right way, flip it over and trace on the lines to cut out the bars of the crib. I like to trace on the lines so I know I'm cutting straight lines.
The bars are 3/16in thick and are 1/2 up from the bottom of the crib (the bottom not counting the legs) and 3/8 in down from the top.
On the short sides, I start 3/16 in from the edge and begin to trace lines every 3/16 in.
On the long sides, I start 5/16 in in from the edge.
Every other space between the lines is cut away, starting at the first block and ending at the last block. Mark the ones to be removed so you remember.

Now cut all the vertical bar lines you just drew with your craft knife.
Now remove every other block by cutting on the horiztontal lines at the top and bottom.
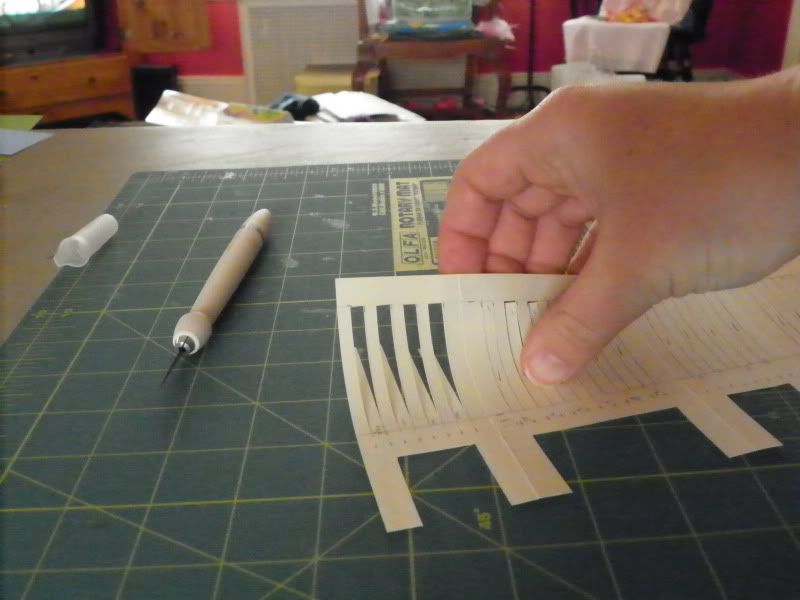
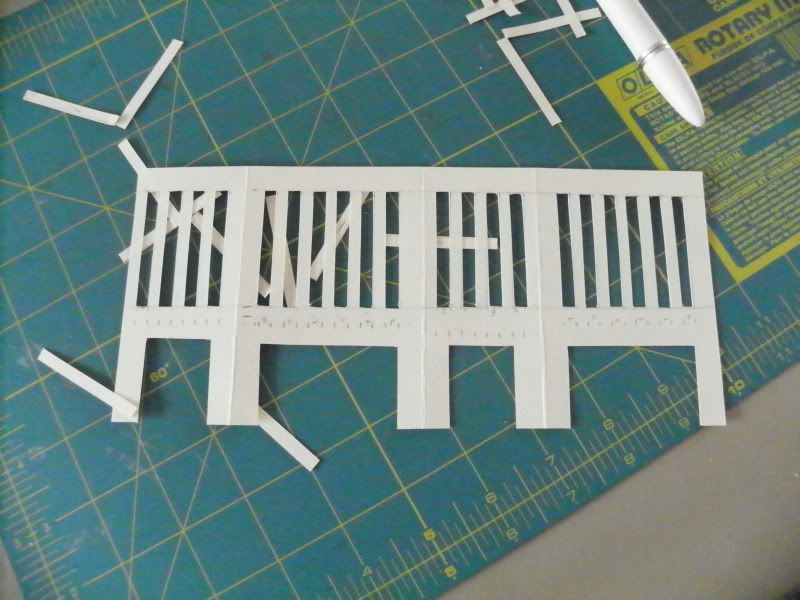 Remember to only cut the blocks that you marked! Otherwise you'll end up with big holes instead of bars. This is why I mark the ones to be removed.
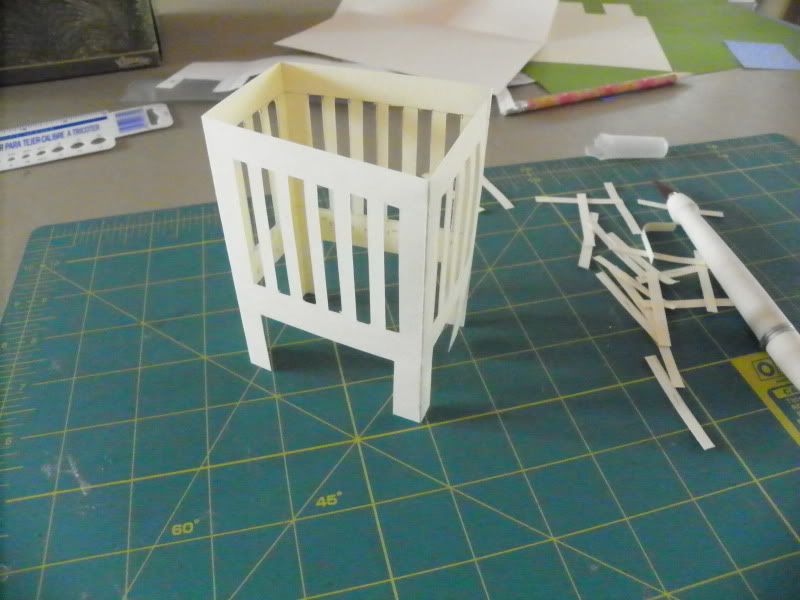
Ok, now the hard part's done, and we can have fun with decorating.
I like to add some bedding inside the crib.
My bedding is 1.5in wide by 9in long. Remember how you'll view the crib once it's glued in, though. You'll be able to see all of the inside and half of the outside (since 2 sides will be glued to the card). So 4.5 in of that bedding strip should be two-sided. Either use 2-sided paper or glue a 4.5x1.5 in strip back-to-back with one half of the 9x1.5in strip.
 Score these to fit snugly inside the crib before you glue them (a glue stick is sufficient here, or you can use the lo-temp glue gun).
When scoring, line everything up so you score in the correct dimensions. Also, where the edges of the bedding meets isn't as important as for the crib, since the bedding will be glued to the crib anyway- but it's still easier to have the edges meet at the corner of the card.
Now attach the bedding to the crib! Use the glue gun for this step. Clint taught me a good trick for this sort of thing: line up the folds to get everything put together straight,
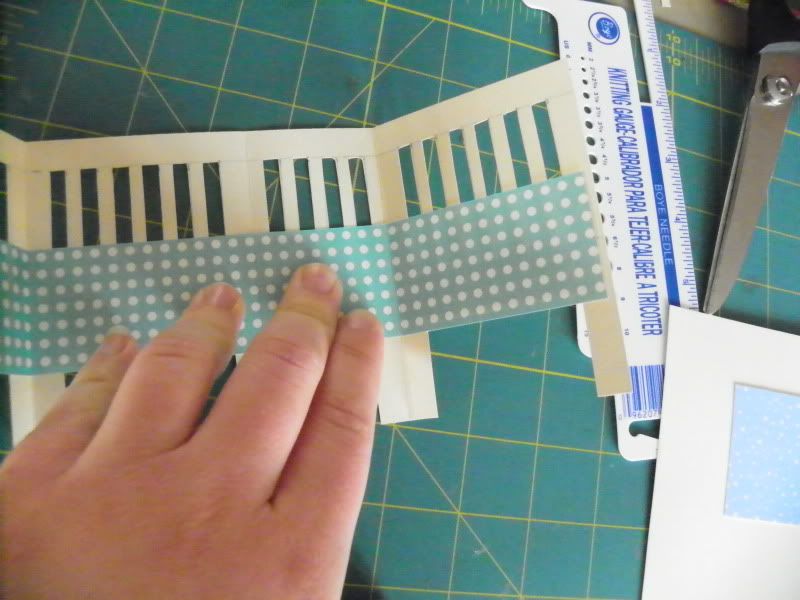 then fold down one flap and glue,
  then the next flap, etc. Things stay together better this way than if you were to just glue the whole crib and try to plop down the bedding on top and have it line up perfectly. Fold each crease again after you glue each of the four sections, to make sure it's still lined up right.
The crib will be pretty stiff after you've glued the bedding on, just refold.
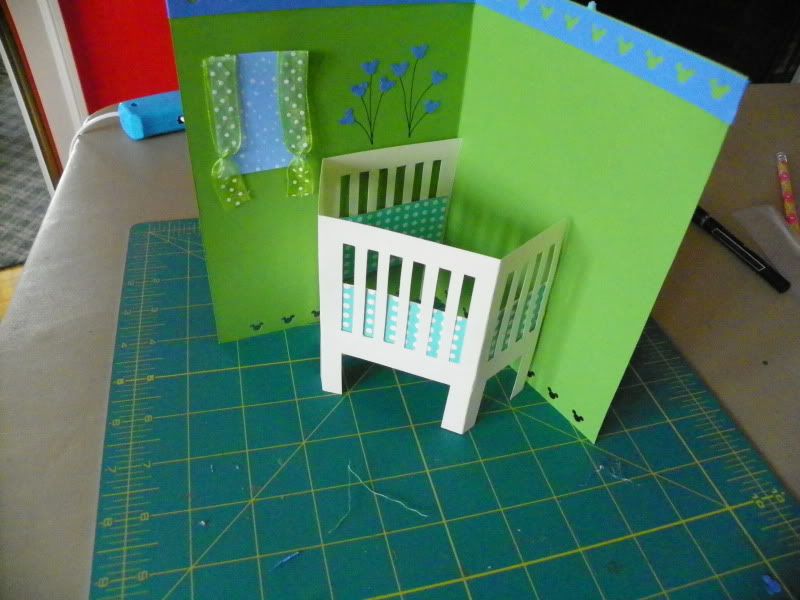
Before gluing the crib to the card, decorate the card.
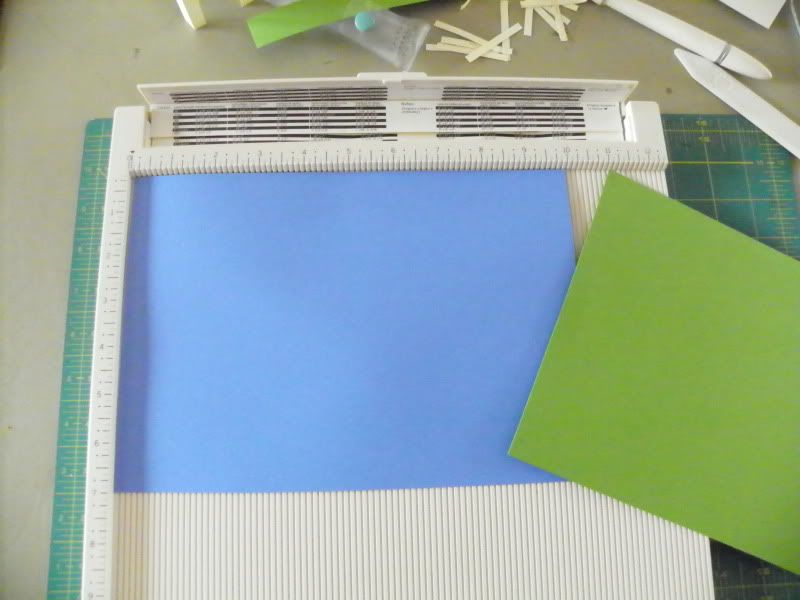 The paper for the card is 10x7in, scored down the middle (at 5in) (or just buy a 5x7 card). You could make a smaller card, but you'll need to reduce the size of the crib.
 I've added a window to the left-hand side of the card (1.5x2in rectangle with some ribbon lo-temp glue gun glued to the rectangle, folded over the top and glued to secure, then tied with thread near the bottom), 2 bunches of mickey balloons (mickey punches glued down with regular glue and black ink lines). On the first version of this card, I made a banner of penants out of equilateral triangles and a lo-temp glue gun glued-on string. You can really do anything you'd like, ask the mom-to-be how they've decorated the nursery and use the actual room as inspiration.
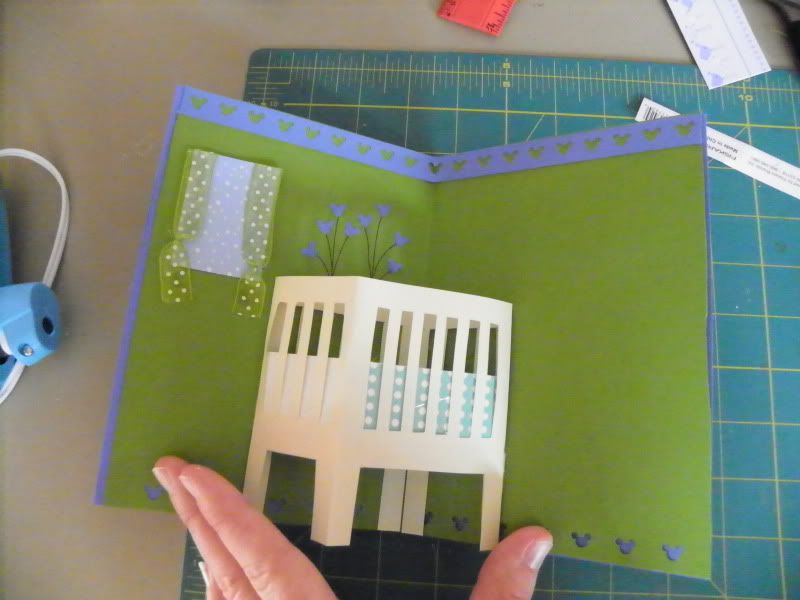
To attach the crib to the card, stand up the inner lining card and nestle the crib in.
 Hold the the crib in place and lay the card down.
 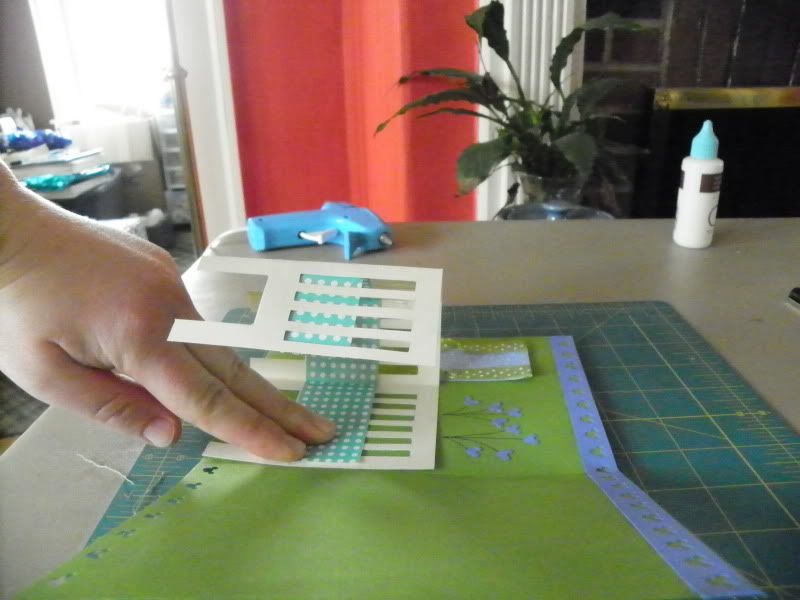 Now flatten the card, still holding that left-hand inner section that'll be glued, and then hold down the next section to the left, lifting the section to be glued slightly.
 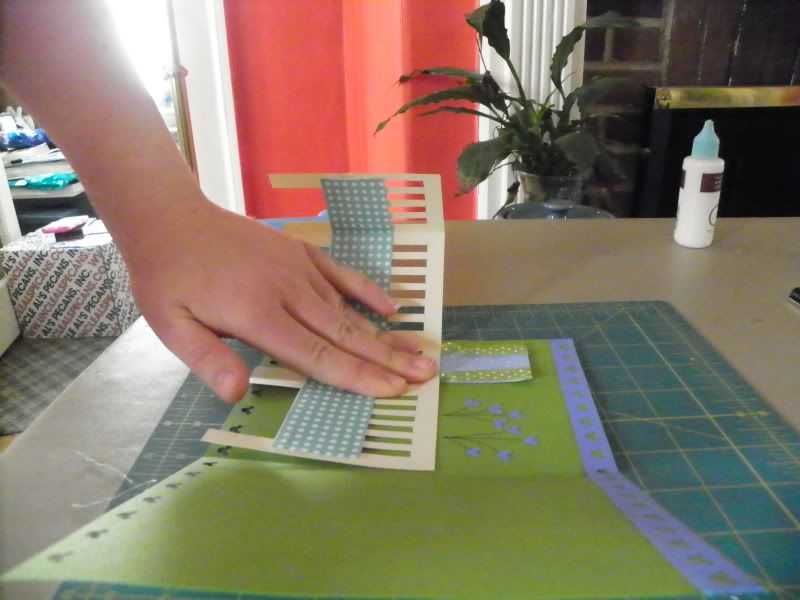 And glue the crib (or the edge of the card, either way).
 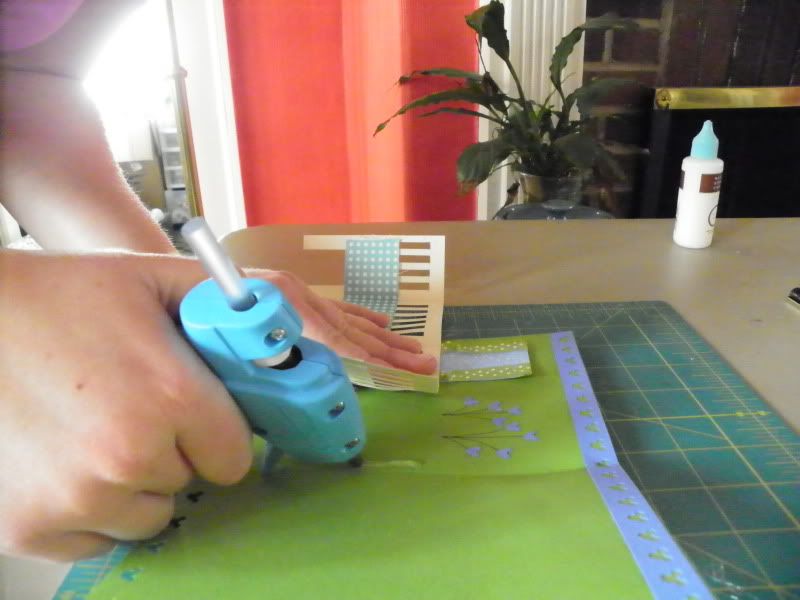 Lay the crib down and press while the glue sets- this is why I'm using the lo-temp glue gun, because it'll set in a few seconds and you don't have to devise some elaborate way to secure the pieces together while they dry and wait hours for it to be completely dry and ready for the next step.
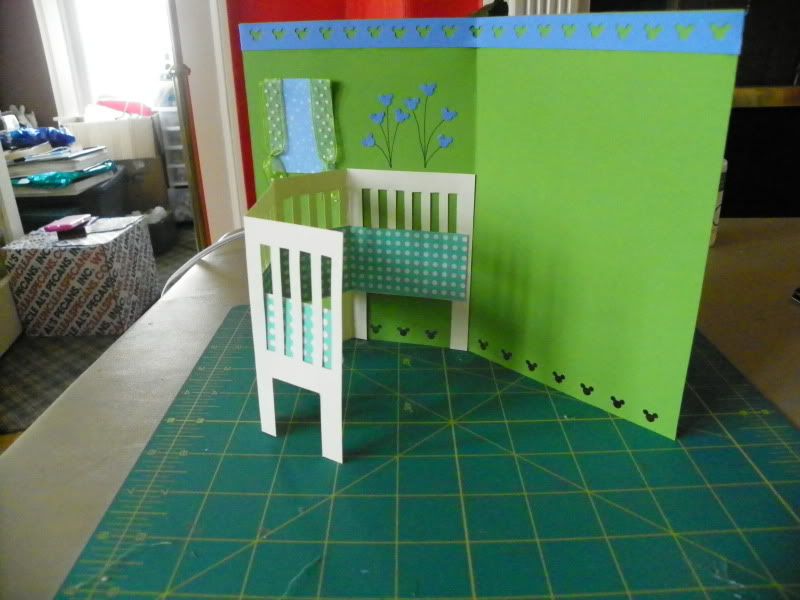
Ok, now glue the other section of the crib to be glued to the card,
 line up the card and press the two together. Voila!
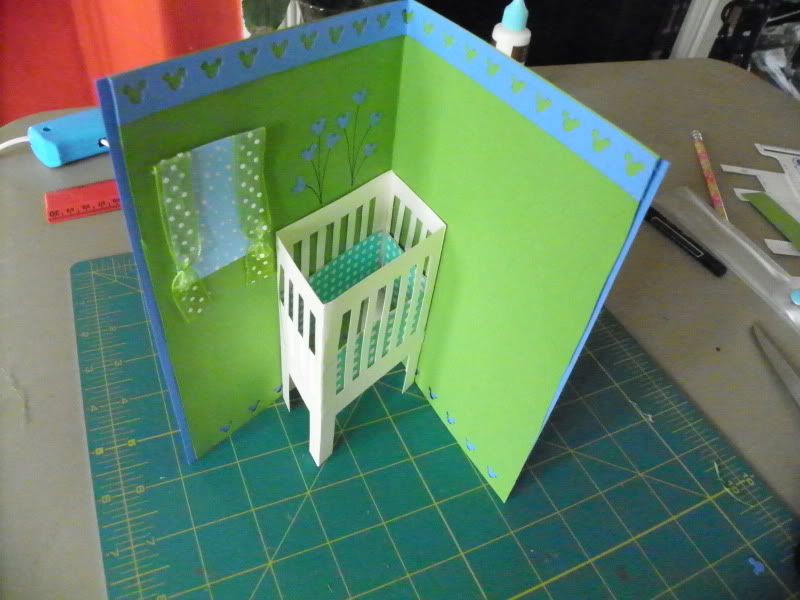
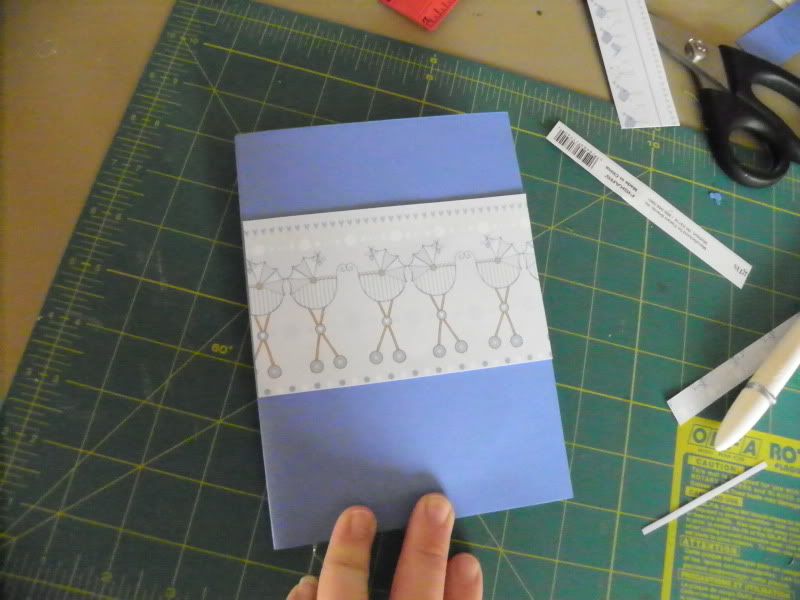
The last step it to glue the inner card to the outer.
This is totally optional, you can just use a card. But if you want to use a decorative punch outn the inner card and have another color show through, you will need the outer card. I like using one cardstock and one paper for the pair, either one can be the inner or outer. If you use 2 pieces of cardstock, it gets pretty heavy- not a problem, but be aware of that. And you may want to trim off any excess outer/inner cards so they line up exactly.
And then decorate the front of the card however you'd like. I went simple with this one and just used a stripe of cute blue prams.
There you have it, how to make your own pop-up crib card. It's not a speedy process, but once you figure it out you can get an assembly line going and it won't take too long. I'll let you know how long my third card takes, after I've figured out all the measurements and don't have to stop to photograph the steps and blog each step as I go.
4 comments:
Thanks for the great tutorial - your card is terrific!
Thank you so much for this tut!!
Love the card! I'm going to make one for a baby shower I'm attending this weekend. Thank you for posting this tutorial!
Hi! Thank you very much for this wonderful tutorial! Very easy to fallow along. I made a template you could add into the instructions. Email me and I'll send it to you!
Post a Comment