Showing posts with label crafts. Show all posts

Wednesday, November 7, 2012

WIAW #6: Election Day

It's time for another What I Ate Wednesday! See Jenn's blog for the whole line-up of WIAW participants.

As you probably know, we just had the big presidential election. I'm normally pretty uninterested in politics, but I had definite ideas and opinions this time around, so I paid attention. As a result, yesterday had some stress eating.

Breakfast was normal. Actually I found some Portuguese muffins at Christmas Tree Shops the other day, so I had one. I got the cinnamon raisin, which aren't quite as good as plain, but maybe this brand isn't as good as I'm used to. Well, really what happened is that I saw some turkey plates and had to text a photo to my mom, to see if they were the same things she has (since there were some nice platters for super cheap) and she and I were texting back and forth while I was in the food section and I kept smelling the most delicious, vaguely familiar smell... eventually I realized it was raisin bread smell, and I turned around and saw these. Mine!
And I had my normal egg, coffee with skim milk and water. I'm rotating through jams lately, none of the ones we have open really excite me. I'm sure I have some wonderful jam in the fridge, it's just a matter of digging far enough back to find it.

Lunch was a mutsu apple with 2 laughing cow wedges. Just before lunch, we walked to the polls (1.3 miles each way), and when I got back I was too hungry to remember to photograph my lunch before I finished it! I also had this delicious popcorn, the stuff I got in my latest Foodie Penpals package, and it's so addicting!

Then I had Halloween candy. Sigh. Stress eating. To stop myself, I went upstairs and sewed for a few hours (can sewing instead of eating count as "falling into good habits"?). Before we went to Florida, we were in Halloween mode. Now things seem to be in full-on Christmas mode, which means I really need to restock my Christmas items in my etsy shop! Here are the new additions to my Christmas collection


Here's a Christmas tree skirt from last year I'm bringing back

 
Dinner was fish tacos (leftovers, actually). I took a bunch of food from my parents' house after the hurricane, since they'd lost power and nearly everything in their freezer thawed. We got 2lbs of cod from them, and we used half of it in fish tacos (the other half in fish kibbe, but I need to tweak the recipe before posting. I had to make some substitutions and hopefully they are why it was a little boring).

(confession- this photo was from the previous night's dinner, I didn't have the beer last night)
I really love the slaw I made- 1/2head of red cabbage, then a dressing of about 3 or 4T lime juice, 1/2T honey, about 1/2t cumin, a dash of chipotle powder and a pinch of sea salt. I meant to chop some cilantro and toss in, but I ended up just putting cilantro on the tacos themselves. So simple and tasty.

On Tuesdays I have choir rehearsal, and the whole rehearsal was spent checking numbers on Huffington Post. We got out 15 minutes early, since we were all a little tense, and then I came home for some peanut butter mochi (which, honestly, is a little weird. The pb filling is good, but the mochi tastes kind of like baked beans. In a weird way. I love baked beans, but it's a weird context.).

Then I decided it was time for a drink, so I had a bit of Northern Comfort. It didn't give me much comfort, I realized I need to dilute in something- apple cider is good. I would have had wine, but we didn't have any open bottles!

Then the election was more or less over, and I made the mistake of checking up on facebook. It started making me too mad, so I went to bed. :p

Wednesday, February 1, 2012

Valentine's Day Prep

Last year I was super gung-ho on Valentine's Day decorations. I was in a better place a year ago, however: February 14th (aside from being the day my dear friend's son was born) was my last day at my horrible, terrible, no-good job. I was SO relieved to get out of there. I had many leads for new jobs, and I felt great. Valentine's Day was a wonderful day, and I was so inspired to decorate for it.

This year, Valentine's Day is the 1 year anniversary of my last day of a job. I'm still unemployed, and to say it's depressing is a huge understatement. But all the same, decorating for Valentine's Day is a jolly thing, so I'm trying to force myself into it. Because honestly, cute things cheer me up. Why do you think I wear Lilly every day?

Last year I made (and pinned on pinterest) these great little hearts. They're quick and easy and adorable. Today I'm thinking I'll make some with Lilly's White Zin wrapping paper and hang them from our dining room chandelier.

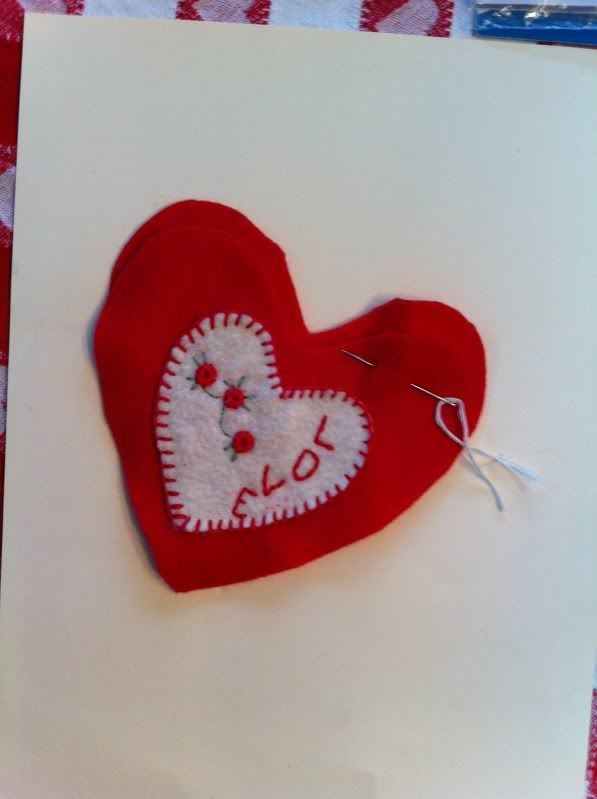
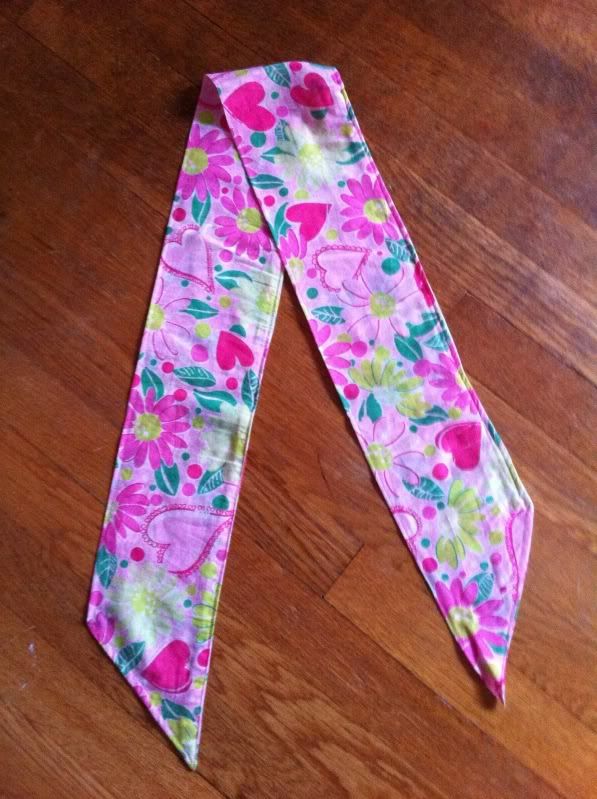
I also sewed some felt heart pillows, although honestly, I only finished one, the second still needs to be sewn together. And I feel silly for placing the "LOVE" on the right side so it curves backwards... I assure you, the first one I made, I did it properly.But this year... I'm still looking for more inspiration. I have a Valentine's scarf in my etsy shop (don't worry, I made one for myself, too!)

And I recently saw these adorable Valentine's Day gift tags from Preppy Paper Designs' etsy shop. Oh... and the best part? You can a pair of her notepads in Lindsey's blogoversary giveaway on Keep It Classy Alabama! Go, enter! Good luck!

Sunday, January 29, 2012

Well, isn't that just darling.

Lindsey over at Keep It Classy, Alabama is celebrating her first blogoversary! And she's celebrating big.

Which kind of makes me think, should I have marked the occasions of my blogoversaries? Hmm. I'm such a lackluster blogger!

but anyway, check out the aahhhhdorable item she's giving away today.

Isn't that just darling!

Oh... am I tooting my own horn? Well hey, I can do that, right?

She has a lovely blog, so go check it out!

Monday, January 16, 2012

wamozart12 eats leftovers because she is too busy to cook

We had a fabulous little afternoon party last weekend. I'd been wanting to have a party for a while, and the holidays seemed like a nice time to do it- I mean, the house is all decorated and festive, you can serve hot mulled cider with bourbon, and our street wasn't completely buried by snow the way it was last year. So we did it. We had a party. It was a post-holidays party, because seriously, things are busy during the holidays. No one even has time to go buy groceries until after New Year's. But at the same time, once New Years has come and gone, life is just dull. So we had a party the weekend after New Year's. With fabulous food. Of which I took not a single picture. But oh I have some good recipes to share.

And so we've been eating leftovers ever since. The only "cooking" I did was to turn the leftover turkey into a pie, and cook the the 2 pork tenderloins I marinaded but realized we had way too much food (even with 2 leaves in the table, all the cheese on the coffee table and the desserts on the buffet, there was no room for one more dish on the dining table). And the leftovers have been delicious. As we speak I'm waiting for some pizza dough to rise so we can use up the last of the pork in a chipotle pork bbq pizza. With smoked gouda. oooooh.

So what have I been doing if not cooking? Oh, so much.
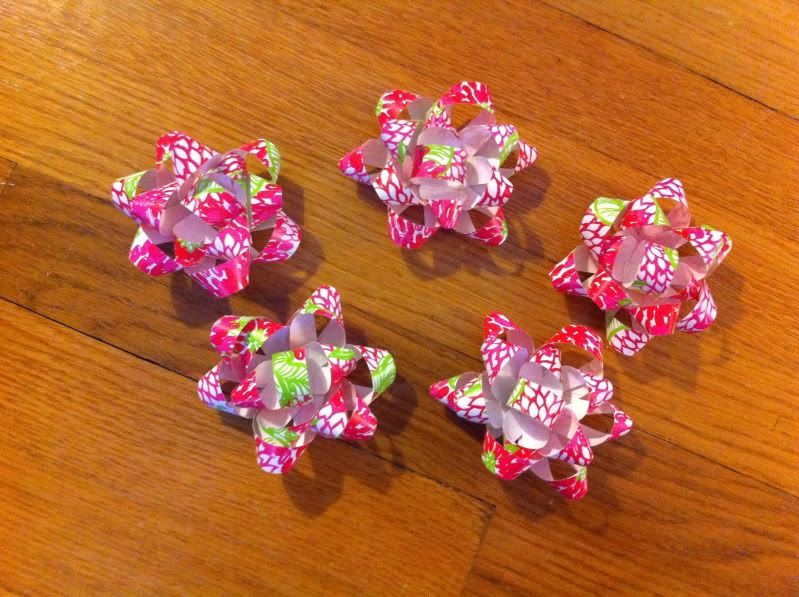
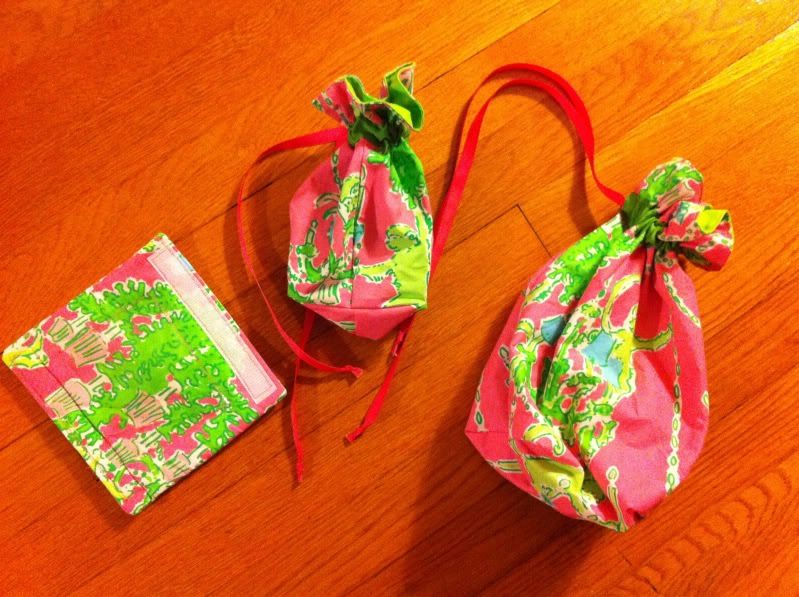
I made gift bows (some say crazy, I say fun!)

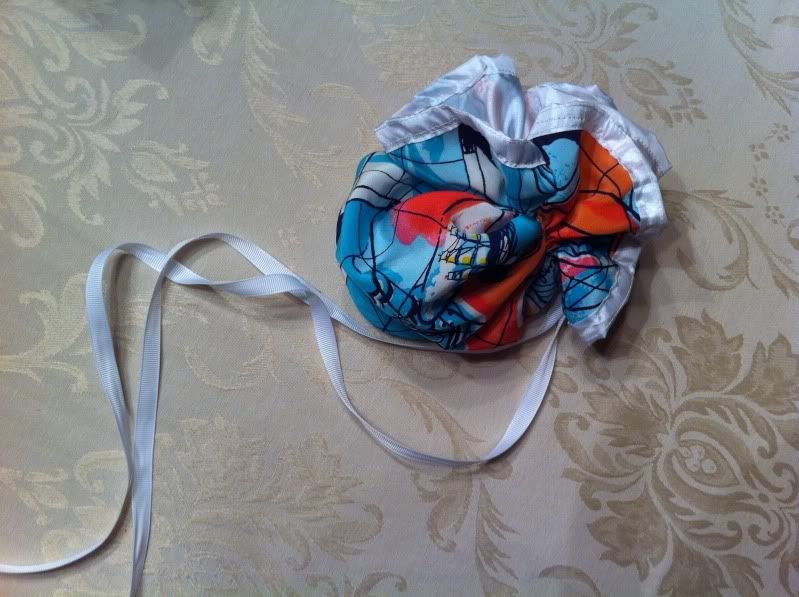
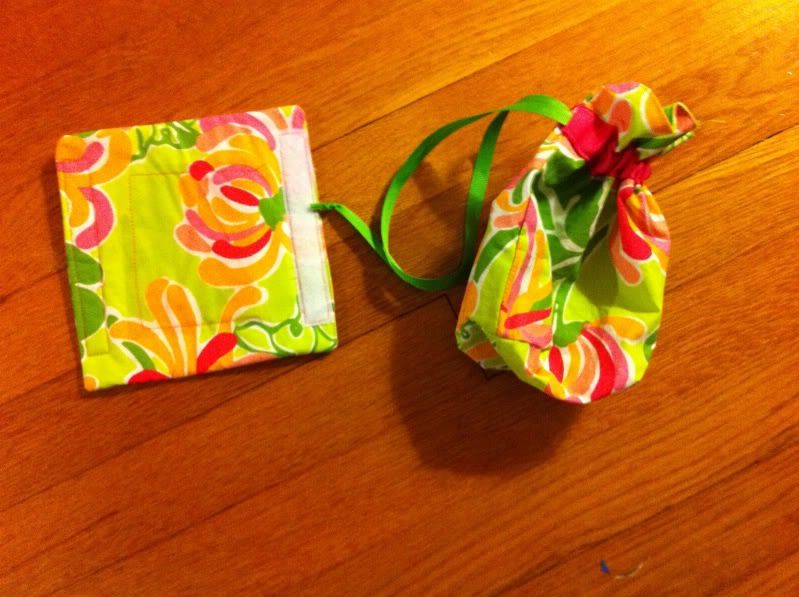
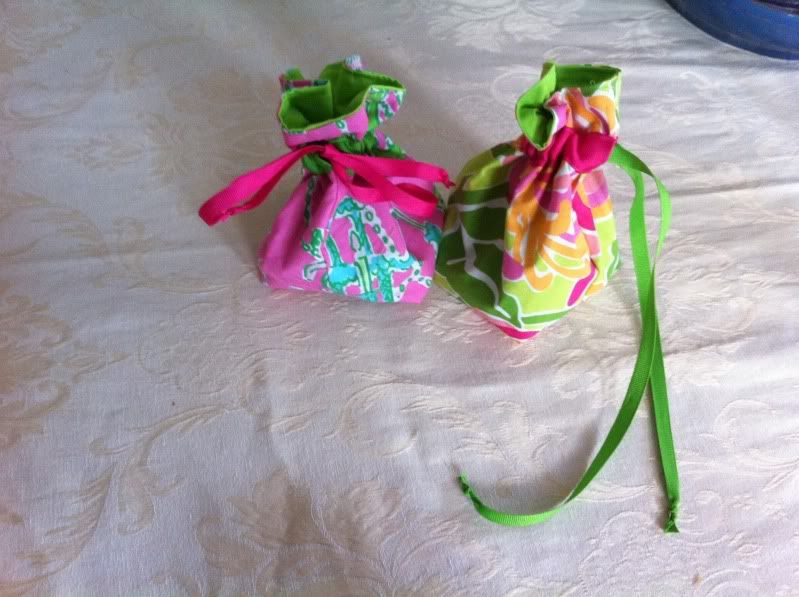
some great drawstring travel pouches
X Marks the Spot silk pouch (only one available!)

3-piece travel set: small drawstring pouch, medium drawstring pouch, and suitcase handle cover.
2-piece travel set: small drawstring pouch and matching suitcase handle cover.

and both sets will be available in other fabrics soon!

small drawstring pouches

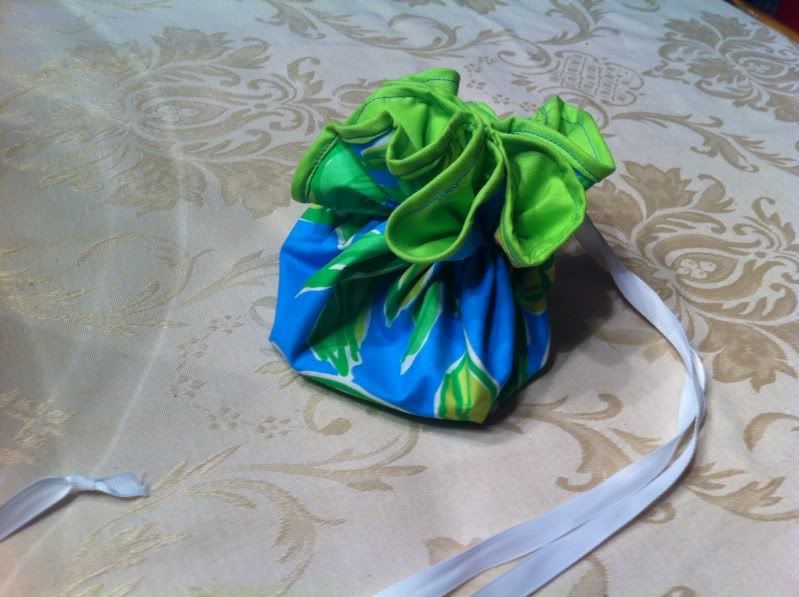
drawstring circle pouch

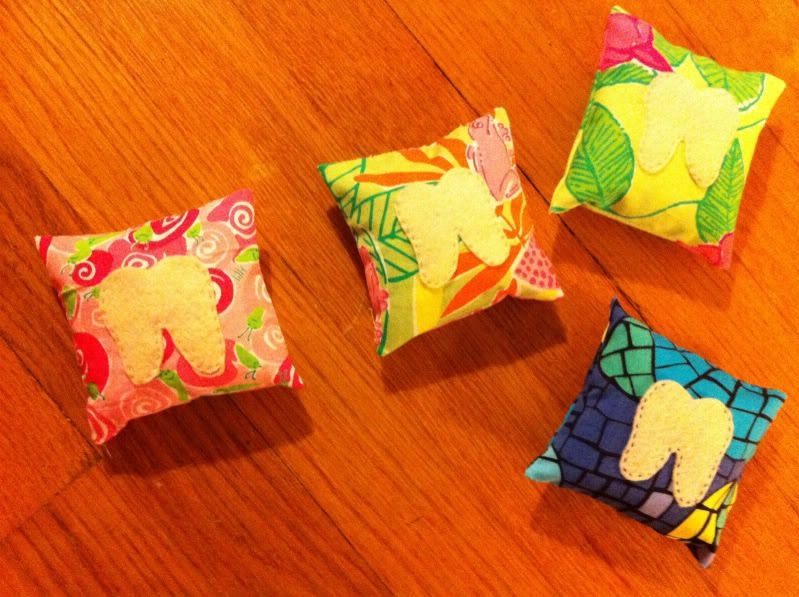
tooth fairy pillows

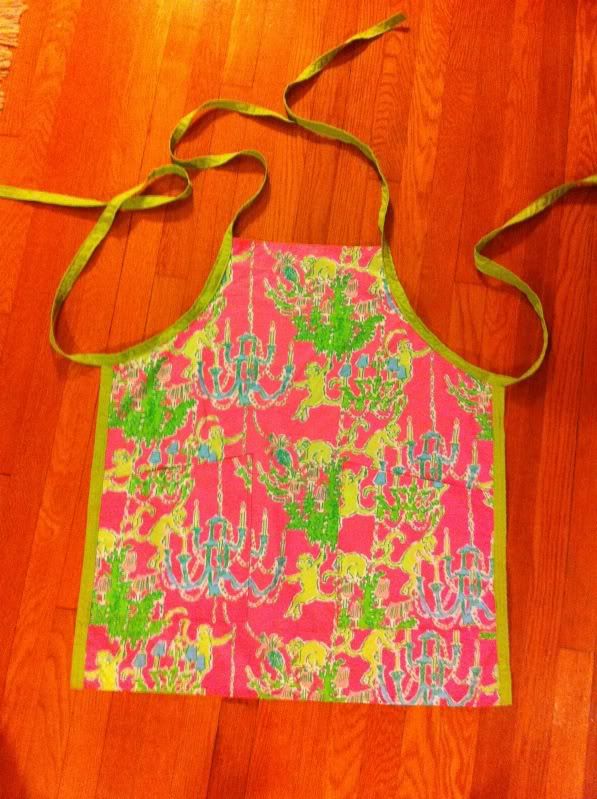
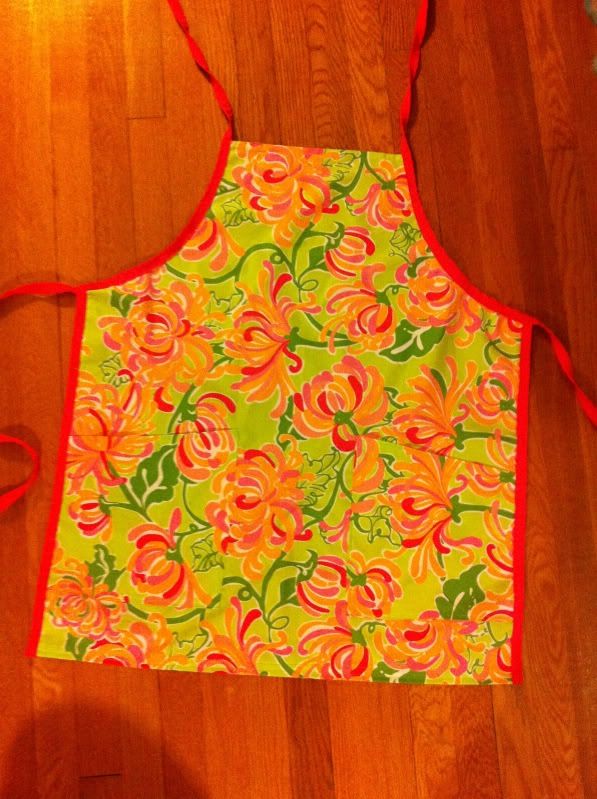
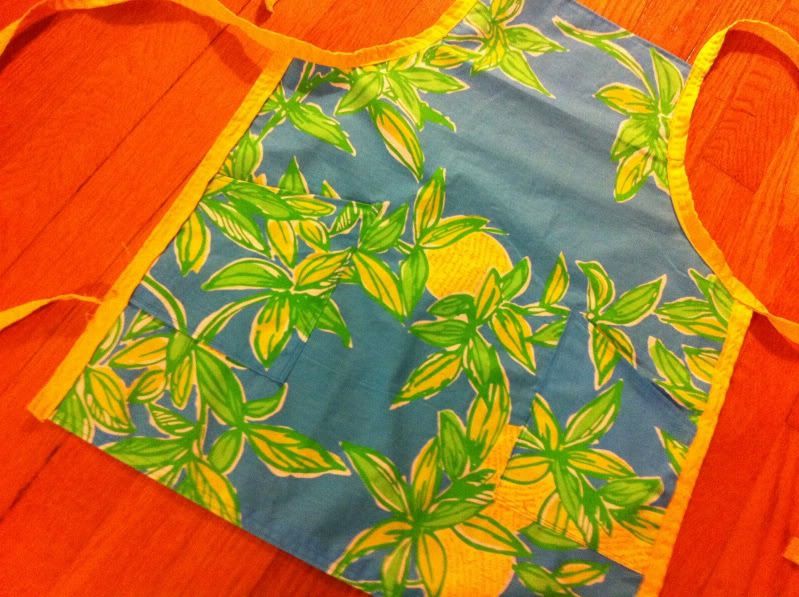
and because of course I should make some, aprons.
for adults

and for kids.

Not to mention the clothes I've been working on. For the most part, my clothes are by request only. I do have one dress listed which was meant for me, but it ended up being a tad too small. And because it came out so beautifully (seriously, how am I completely self-taught?! I must have absorbed my mom's quilting skillz, although even she won't attempt clothes since finishing home ec in high school) I hesitate to take it apart just to make it fit me, especially when I have plenty more of that fabric. So there's a 38in bust size 10-ish dress available. It's still unhemmed so that I can hem it to the buyer's height.

And then one dress order I'm still working on. Fortunately, my sewing room is nice and toasty, which makes me really want to stay in there all day during this frigid weather.

I started a facebook page for my shop- "like" me and be the first to hear about new items and special offers!

Tuesday, October 25, 2011

New shoes!

These are not the shoes you'd expect, but I love them just the same!


Over the weekend, my mom and I went to the Lilly Pulitzer Resort 2011 trunk show/preview at the Silkworm in West Hartford Center. Resort is lovely. However, I was confronted with sample sizes, which honestly kind of irks me. It's one thing to only bring one of each item in a variety of sizes, but bringing everything in S and 4 is kind of unfair. Is every single Lilly lover a size 4? I think not. Would it kill them to throw in a couple Ms, Ls, XLs, and XSs? Really? Especially when there were 3 Lana shirts in 2 different colors, all size S. What's the point of that?

This rant-let about sample sizes goes back to shopping around for bridal gowns and bridesmaids dresses. With the entire country concerned about weight gain and obesity, you'd think they could throw in a few larger sizes- why bother making plus sizes dresses if you don't have the models available to try?

And I feel completely justified in complaining because for several years, I actually was the main sample size used in bridal shops, so I could buy the samples at the end of the season sale and only have to do minimal alterations to make them work. I'm not just whining because I couldn't zip anything up.

But anyway. I just had to get that out. Other than that, the resort stuff is lovely. They didn't have many of the prints I'd caught a glimpse of in the bootleg lookbook photos that got passed around, but I don't mind waiting for the whole shebang to pop up on the website.

Even more exciting than the resort preview was the sale on all Lilly in the store! You may remember back during the Endless Summer Sale, I'd almost bought a Jonah- but then canceled my order last minute. I was worried the Jonah wouldn't be flattering on me. Yes, I could return it, but then I wouldn't be able to replace it. I played it safe and bought a cardigan. Well, I've regretted not having the Jonah. Not knowing how it looks doesn't really lessen the regret, it makes me more regretful that I haven't even been able to find one in a store to try on.

Well the Silkworm changed all that!

She had one single Jonah in Heel Yeah. Only one size, only one print. And what do you know, it was my size! I tried on a number of things- unfortunately I had my small purse so no camera (hopefully the time for the iPhone 4 is near).

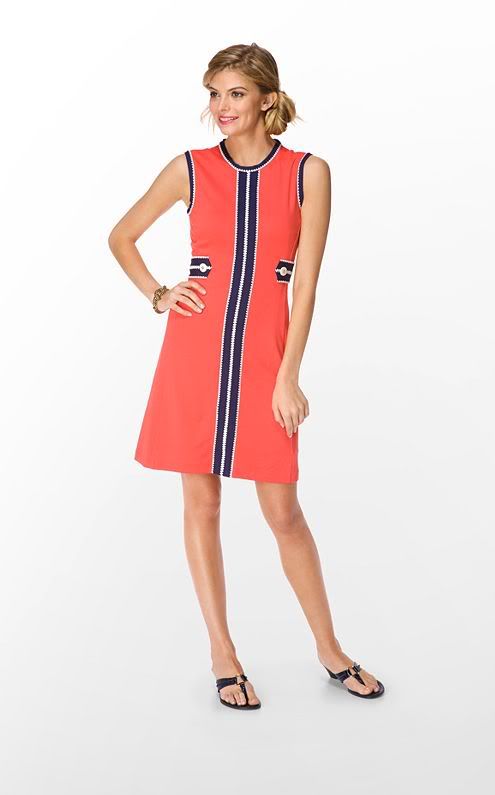
The Fannie fits like the Evie (still no picture of my Evie sorry, but I can tell you it's super flattering and lovely, highly recommend). However, the Fannie has a crew neck and rather wide shoulders, which are completely unflattering on me. I would only recommend this if you have narrow or sloping shoulders. The body is very flattering, with a classic higher waist and the contrasting color stripe is very well-placed. Fannie runs true to size.
Fannie Dress
in Pink Tomato (also available in navy/black and brown/ivory)
$198

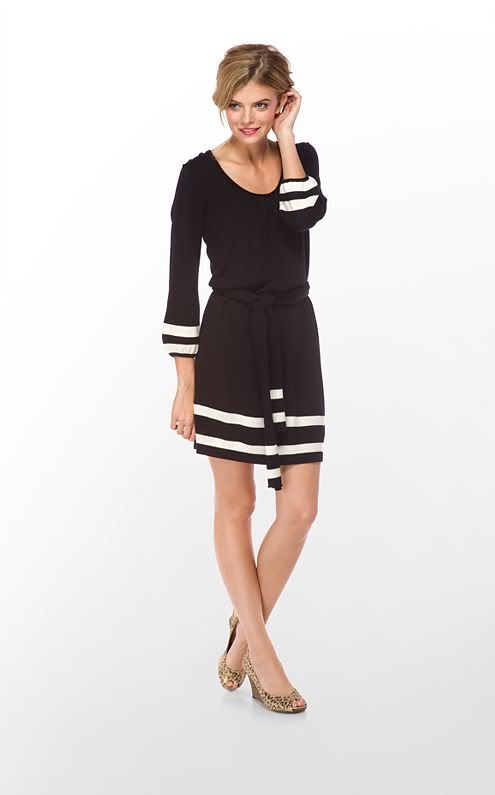
The shop owner gave me a Connie... I don't love the Connie. I was probably wearing the wrong size, it was very tent-like- I think she runs big, consider sizing down. I think my issues are just personal preference though, and I recommend trying it on if you like it. I don't even like it on the models, to be honest.
Connie Sweater Dress
in Black High Seas Stripe (also available in True Navy High Seas Stripe, with pink stripes)
$198

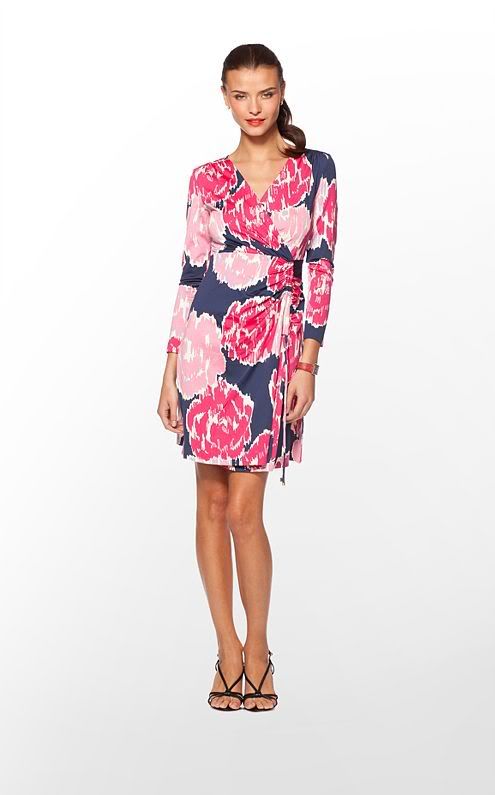
I also tried on the Augusta, but unfortunately in a smaller size, since that's all there was. In previous years, it would have been close to fitting, but with the new sizing there was no hope- so I think she runs true to size, but I can't be absolutely sure. However! This is a lovely, lovely dress. The ruching at the hip is very flattering and comfortable. The only thing is... it's REALLY low-cut. Like, get a plunge bra for this one. I was really surprised, because it looks rather high on the model. Go figure.
Augusta Dress
in Bright Navy Bravissimo
$278

The Ciara tunic in Chorus Girls is lovely, but I have no idea how to wear a top like this! It really looked like I was trying to look nice on a fat day. It's huge around the hips (on me, at least). I considered trying the next size down, but then I think it would have been too restrictive up top. It may be that this just doesn't work on me, but I want to warn you all about the bagginess! So I'm not sure how Ciara runs- she might be a little large, she might be true to size and the cut just didn't work on me... I really don't know. I wish we'd had more time and I could have tried other sizes. I was disappointed, because this print is gorgeous, and I think it's only available in Ciara, Bowen, and the hated Eryn (I hate Eryn. I know many love it, but I despise this dress).
Ciara Tunic
in Chorus Girl (also available in Pink Tomato Standing Ovation)
$128

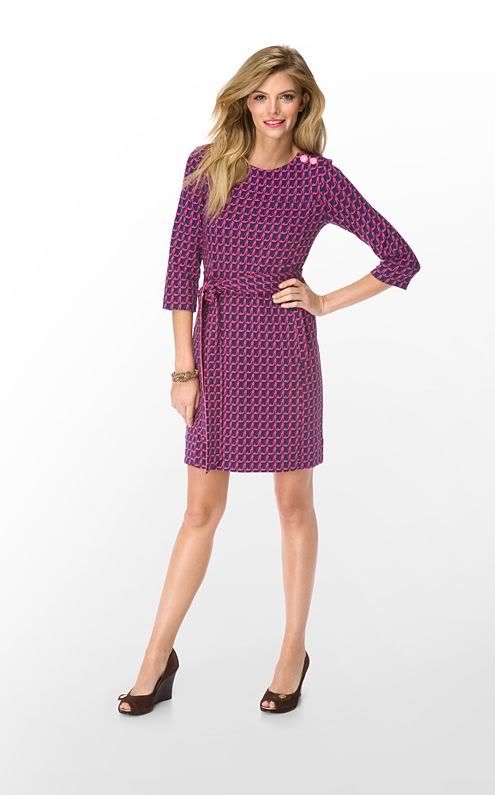
Finally, the Jonah in Heel Yeah :) I saved Jonah for last, because when I took it off the hanger, it looked just like Shauna, which looks like it might not work but then fits perfectly. Jonah is just the same! Jonah is basically the knit version of Shauna. Jonah is a hair roomy compared to other dresses from this season, which may be the goal of the style. It's obviously less structured than say, the Blanca or the Evie. My closet might just become overpopulated with Jonahs and Shaunas, that's how great they are. The construction of Jonah is subtle and flattering. There's a seam above the bust that goes across the entire front, and somehow shapes the dress perfectly. The buttons on the left shoulder are a lovely touch. And there are pocket! The only thing is it's one single, long, tube-like pocket, like on a sweatshirt, not two individual pockets. That's kind of weird, but not a big deal.
Jonah Dress
in Heel Yeah
$168

I wore Jonah last night to a meeting. I was worried the Heel Yeah print wouldn't be quite right for this meeting, a little too superficial-girly, but no one really recognized it as shoes, so now I love it even more. It's a perfect Lilly hotty pink on navy, one of the best color combinations this world has ever seen (oh, am I a little biased? hmm). I love that the buttons are pink, too! And I wore this sans sash- my figure doesn't do belted dresses (luckily the shop owner, who's about 5'10 and at most a size 2) is the same way, so we comiserated over our beltless-ness. I plan to pair the belt with jeans- I just got some gently-used Lilly jeans on ebay, and they fit all over except the waist is too big, My new White House Black Market jeans are the same, stupid things completely stretched out :( And I almost bought the next size up! yikes.

In other Lilly news, my etsy shop is up and has nearly all the inventory displayed that I plan it to have- I have Christmas stockings in 3, possibly 4, more prints to put up, and I'll get Christmas tree skirts in 2 other prints. So far I've made one sale and have 2 more in process. My goal is to be able to sew for the fun of it and be able to find homes for my products, as well as pay for the supplies :) I'm really loving making these Christmas stockings, but we're currently very traditional in our Christmas decorations, and as much as I want a very Lilly Christmas, it won't happen anytime soon. Maybe if we had a small side room that I could Lillify?

Wednesday, May 25, 2011

wamozart12 sews

That's right friends: she cooks, she knits, she sews! And sewing is the reason why I not only have not been cooking, but why I'm 2 weeks behind on my tv (luckily my DVR still has room to save all the shows I'm not watching, even while it accumulates more)

Sit down, let me tell you a tale.

One day in late April, I was reading the one and only fashion blog I read, What I Wore. If you haven't heard of it, it's a recap of what a 20-something former New Yorker/now Indiana-an wears each day, with her thoughts, reasonings, and sources for all her clothes and the way she pairs them. She has a very fun style, and her pictures (all taken by her husband), are very classic and fun to look through. I am by no means a fashion anything (maybe bordering nightmare from time to time), but I like seeing what she wears.

On that fateful day in late April, I was catching up on my blogs, and Jessica wore this lovely pink plaid dress that is just totally me- so I was very eager to see where she bought it. Lo and behold, she made it. What!? So then I got thinking....

(necessary tangent): in early March, mom and I went outlet shopping. The Garnet Hill store we happened by was in the process of closing, and all their stuff was an extra 50% off. If you're anything like me, the words "Garnet Hill" make you think of this.

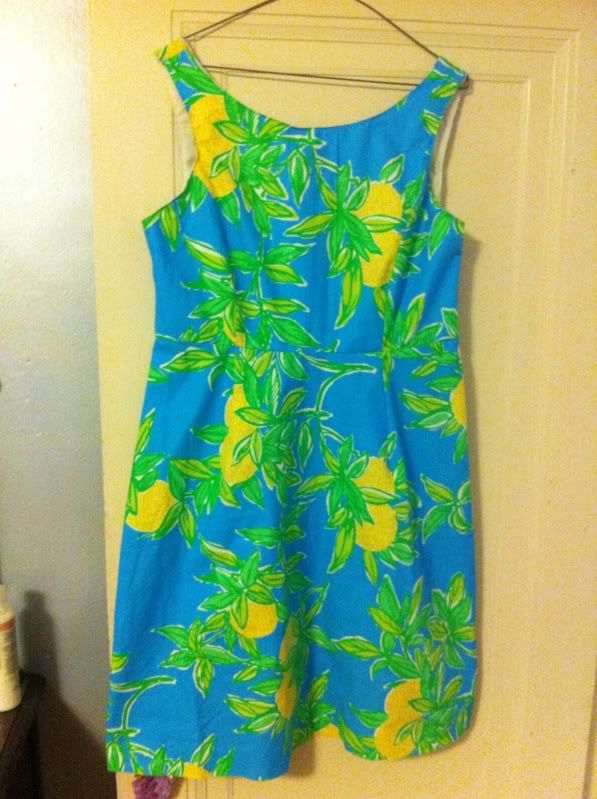
Long story short (we were there for well over an hour, our shopping buddies quickly shook their heads in completely non-understanding exasperation and went on to the next store), we bought 5 Lilly Pulitzer duvet covers for the fabric. Mom calculated that a king size duvet has about 21 yards of fabric. Lilly no longer sells fabric, but when she did, it was $20 for 1 yd. These duvets were $52 each.
(the blue pineapple print- totally my shade of blue, right?)

Now, mom, being the avid quilter she is, of course automatically thought of these lovely huge pieces of fabric as quilt backings, or to be used as large squares in the quilt pattern. I thought the same thing, but I have to admit, the idea of taking some of the fabric to my seamstress and having her copy a Lilly dress I already had in pink was right up there, too.

And then Jessica posted her dress.

So I got to thinking. I mean, hey, I'm a good quilter. I've only ever sewn straight line seams, but I've won ribbons for my quilts (VT Quilt Festival as a junior, Big E as a junior and as an adult amateur, and Cornish Fair as an adult amateur), I'm a star at matching points (because I'm so fussy and willing to rip out seams if they're not perfect), and I have a decent amount of experience with fabric and thread and sewing machines.

So I went to Joann's and bought some patterns. People suggested that Jessica's dress was somewhat ambitious, and I should start with an easier project. And I should start with a project using a cheap fabric, not my prized Lilly fabric. So I did. I bought 6 yards of white on white that'd be useful for quilting if the garment thing bombed terribly, 3 patterns (1 easy top, 1 easy dress, and Jessica's dress, Simplicity 2444), and I tried it out.

That evening, I had a simple, white sleeveless top. (Simplicity 2593) Side seams, shoulder seams, a gathered neckline, and binding around all the raw edges. It was simple, it was successful, it was fun.

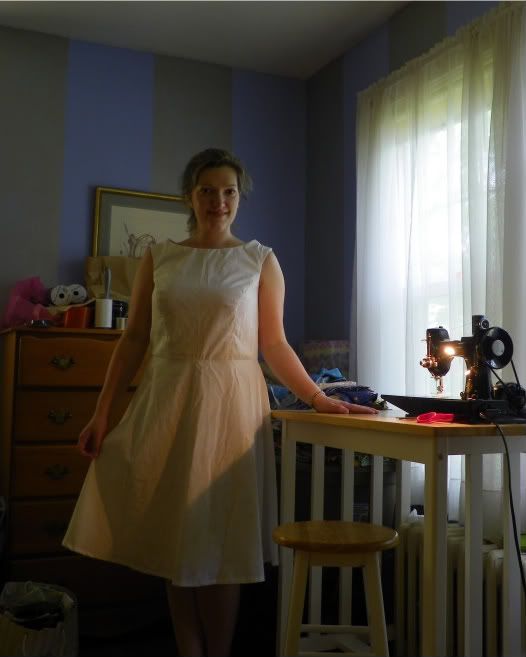
Then I made a white dress. (Butterick 4443)
(please excuse my awkward pose (using the timer on my camera was kind of frustrating, and of course I'd decide I simply must photograph myself when I don't have anyone to help) and my crazy frizzy summer hair)

This dress has a lined bodice and a zipper. I did the zipper all by myself- it was kind of a pain but it came out quite well in the end! It's not the most perfect fit, but hey- I've bought $100 dresses that fit worse than this. (the shoulders puff up because they're still pinned, I haven't actually gotten to the hand-sewn bits of this yet)

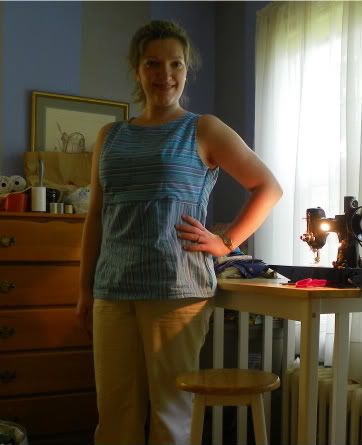
Then someone said that Joann's had all their Butterick patterns on sale for $1.99 each. So I made a top. (Butterick 5450)

I'm very fond of this top. That day I bought this pattern at Joann's, I also bought fabric to line the white dress. I fully intended to finish the dress when I got home that Thursday, but I couldn't stop myself from playing with these stripes. This top also has a lined bodice. It's very comfortable to wear. I plan to make the dress version, with a few tweaks that I noticed would have improved the fit on this top, but I won't go back and remake the top. It's good enough as is.

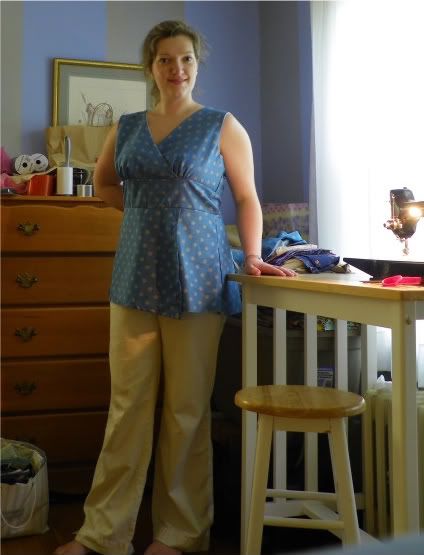
And another top. (Butterick 5485)

This doesn't have a zipper yet because I don't have a blue zipper. But it was my favorite top to make so far, I think because the lining in the bodice is sewn down as you go- no hand sewing at the very end on this top!

I'm on a roll. I am the crazy sewing lady. Because my sewing machine and table live in the guest room and I have a strict no-tv-in-the-bedrooms policy (although it'd be in our bedroom and not the guest room anyway), I don't watch tv anymore. I don't knit anymore, I don't cook, I just sew.

I'm still deciding what to make next.... I think the dress version of the blue striped top, with a pale blue fabric. I'm still not entirely sure I'm ready for Jessica's dress and my Lilly fabric. Or else one of these...
(Butterick 5490, possibly with a brown floral cotton)
(Butterick 5603, not sure what fabric)

My mom generously gave me a whole stack of fabric that she thought would look great as a garment, so I can't even tell you how much material I have to work with!

And Simplicity patterns are 5 for $5 at Joann's this weekend. :)

Friday, March 18, 2011

Baby Shower Card Tutorial

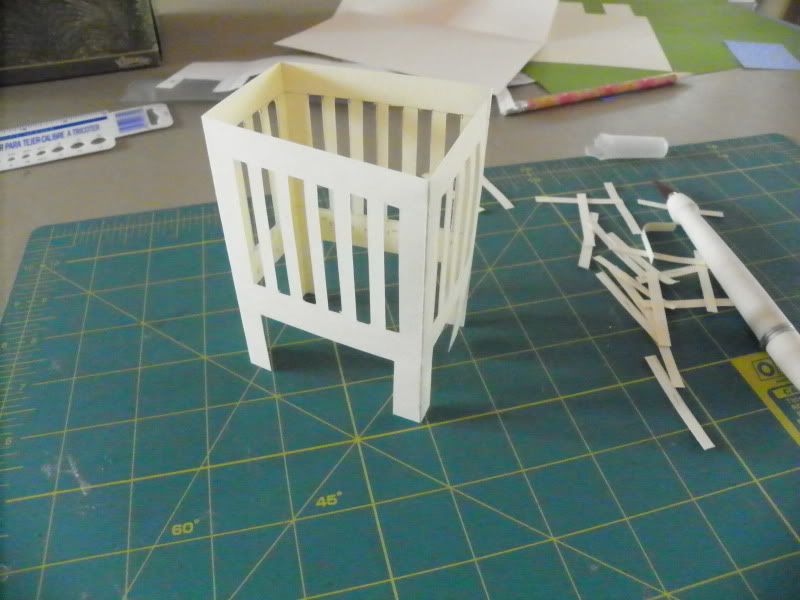
I made this awesome baby shower card for my friend for her shower in January, and I had a lot of requests to show how I did it! I was inspired by a pop-up crib card on Etsy, so I figured out how to do it myself.

Materials:
White cardstock (for the crib, or whatever color you want)
2 pieces of paper/cardstock for the card itself and the inner lining part
Small square/rectangle of paper for the window
Ribbons for the curtains
Craft knife (I have a Martha Stewart one from Michael's)
Cutting mat (I use my fabric cutting mats)
Sharp pencil
Low-temp glue gun (you can use double sided tape, Elmer's or a glue stick, but believe me, this is much easier. They're only a few dollars from Joann's, etc, and work well with paper. I don't recommend a hot glue gun for paper)
For decorations in the room: paper punches, ability to draw, etc, whatever you'd like.

First, the crib.
I'll see if I can figure out how to make a downloadable/printable pdf template, but for now...
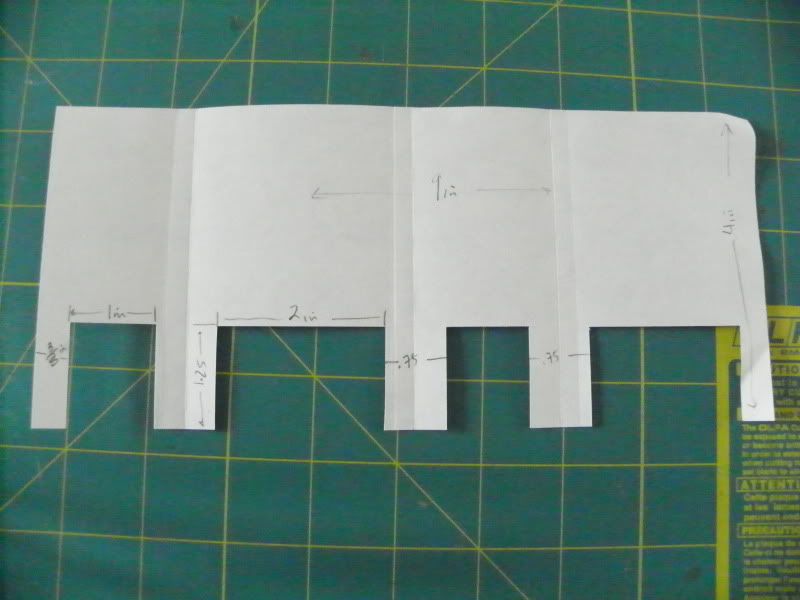
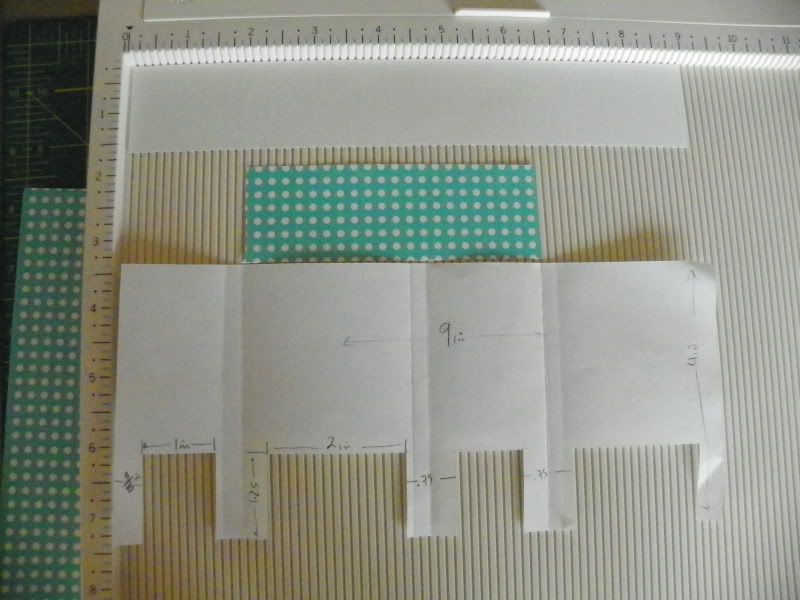
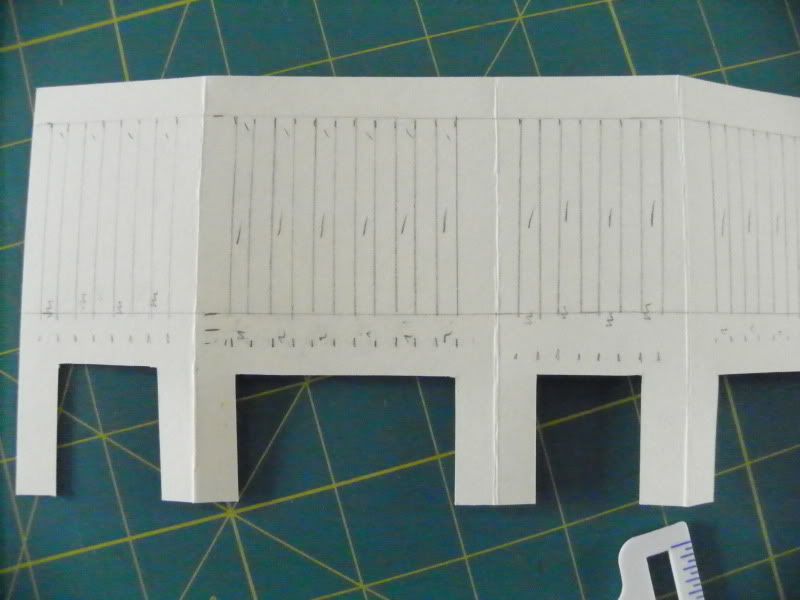
The crib is 4in x 9in. Eventually it'll be a 4-sided structure with legs. All of the legs are 1.25 in long. The end legs are single legs (since it folds around) and are 3/8in wide each, the other 3 legs are double legs and are 3/4 in wide. When you fold it, it'll make sense.
(if you click on the above photo, it'll enlarge and you can see my hand-written dimensions)

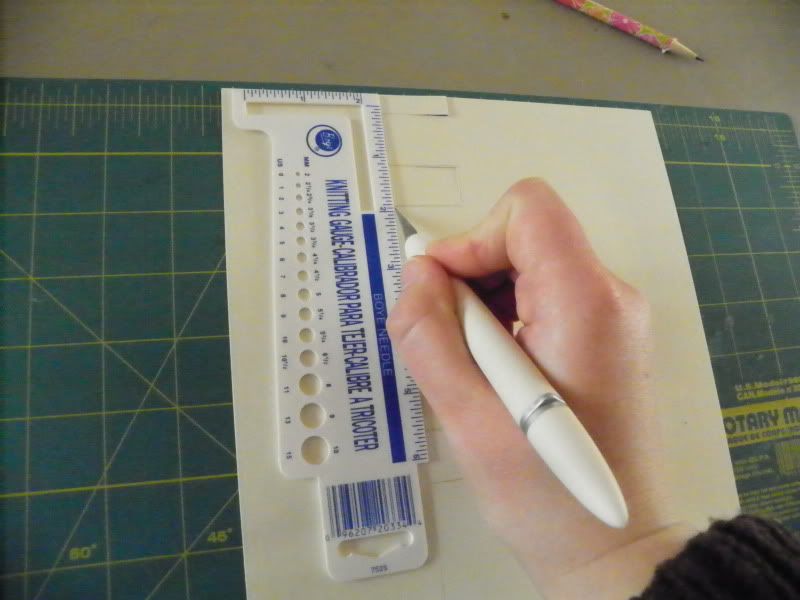
Trace all that out with a sharp pencil using very light lines, (same with this one, click to enlarge and be able to read my handwriting)
and then using a ruler and a craft knife, cut it out.

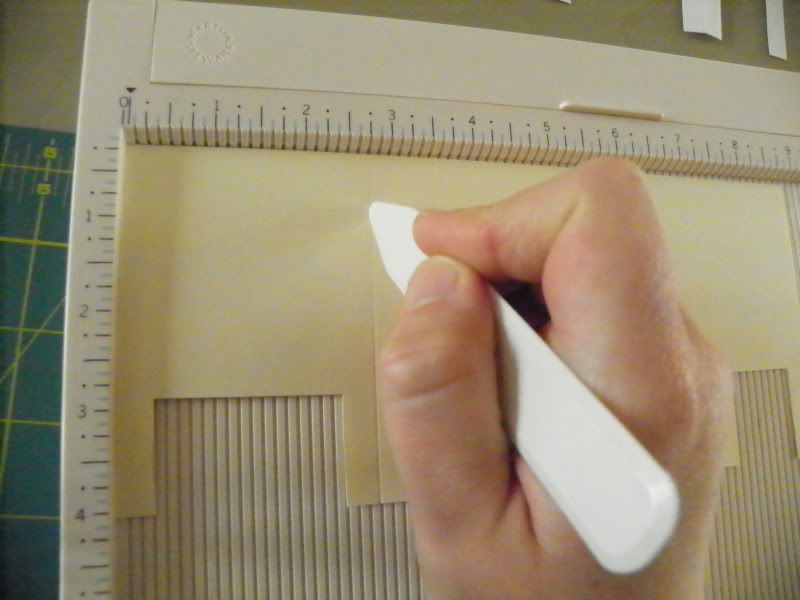
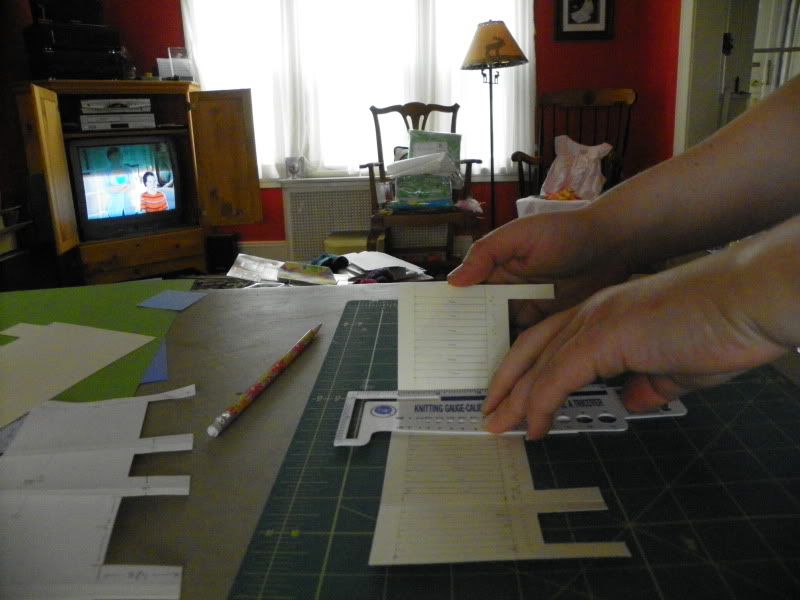
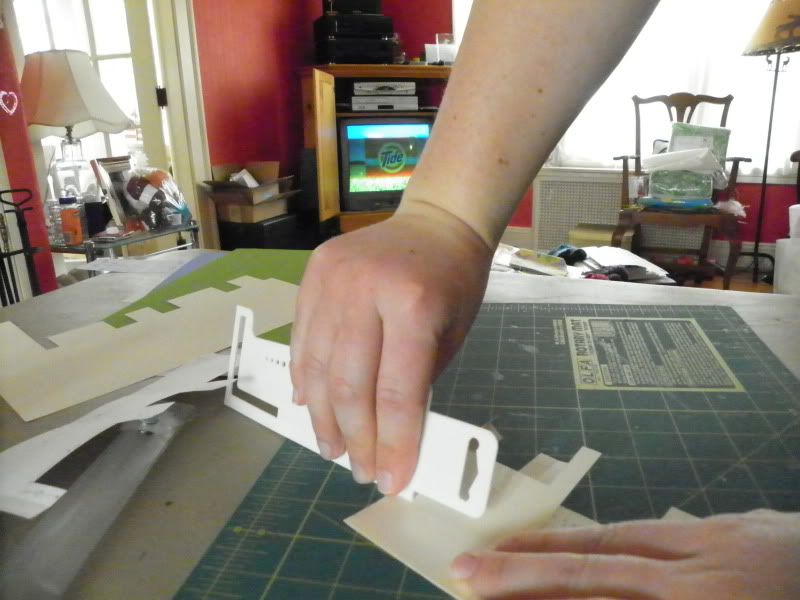
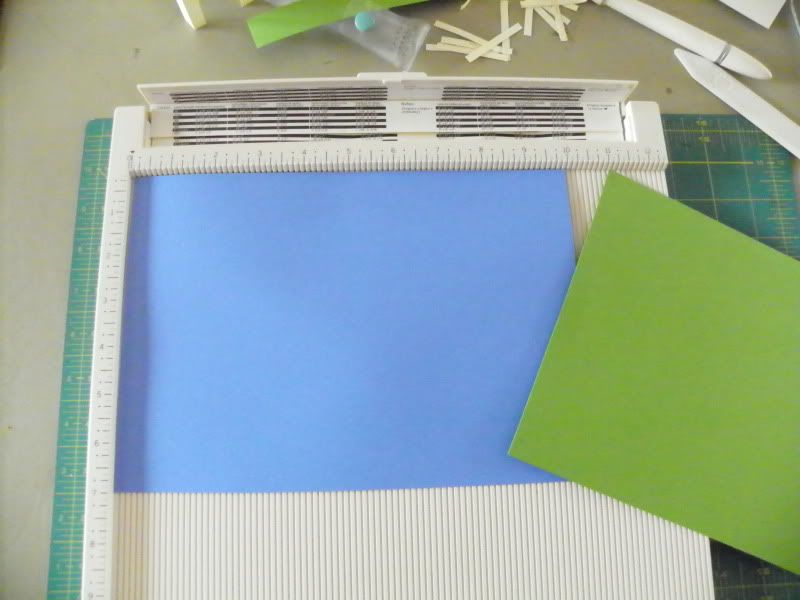
Now make the creases. I like my scoring board (Martha Stewart from Michael's), but before I had this, I liked to trace the line on the paper, butt a thin ruler up against that, and then bring the paper up against the ruler and then fold it over and slide the ruler down the fold to make it a really good crease. This works pretty well and reduces the special tools you need.

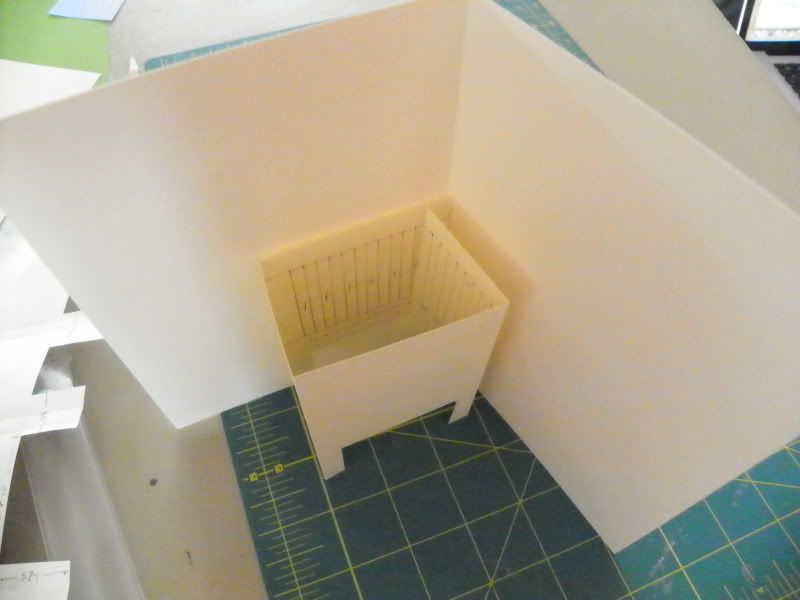
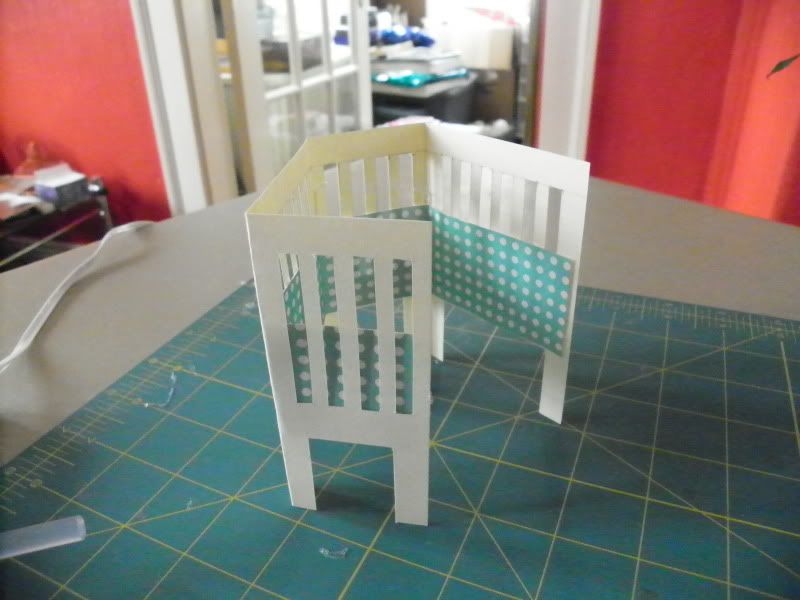
So the crib is cut out and folded. Is it folded correctly? I like the long edge to be on the left-hand side of the card, and you want the edges of the crib to meet in the fold of the card itself (otherwise it won't hold together), so refold if you need to.

Once you're sure it's folded the right way, flip it over and trace on the lines to cut out the bars of the crib. I like to trace on the lines so I know I'm cutting straight lines.

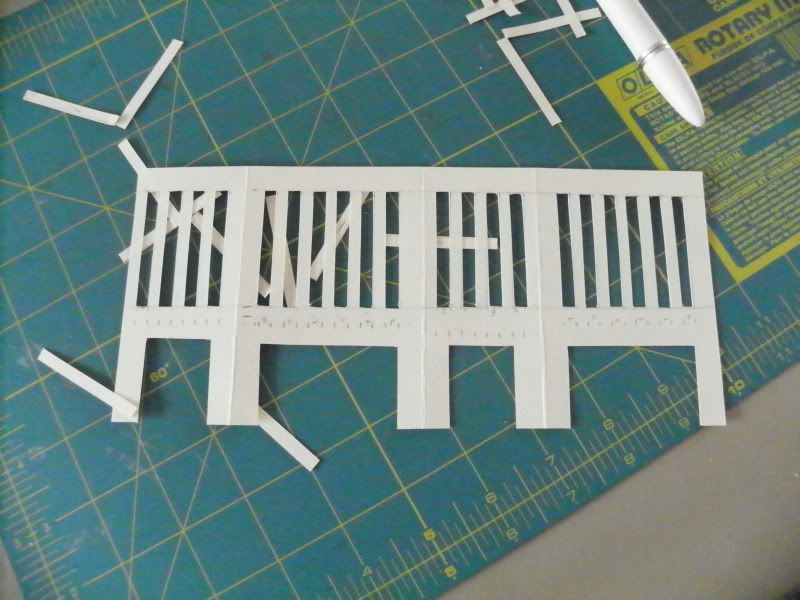
The bars are 3/16in thick and are 1/2 up from the bottom of the crib (the bottom not counting the legs) and 3/8 in down from the top.
On the short sides, I start 3/16 in from the edge and begin to trace lines every 3/16 in.
On the long sides, I start 5/16 in in from the edge.
Every other space between the lines is cut away, starting at the first block and ending at the last block. Mark the ones to be removed so you remember.


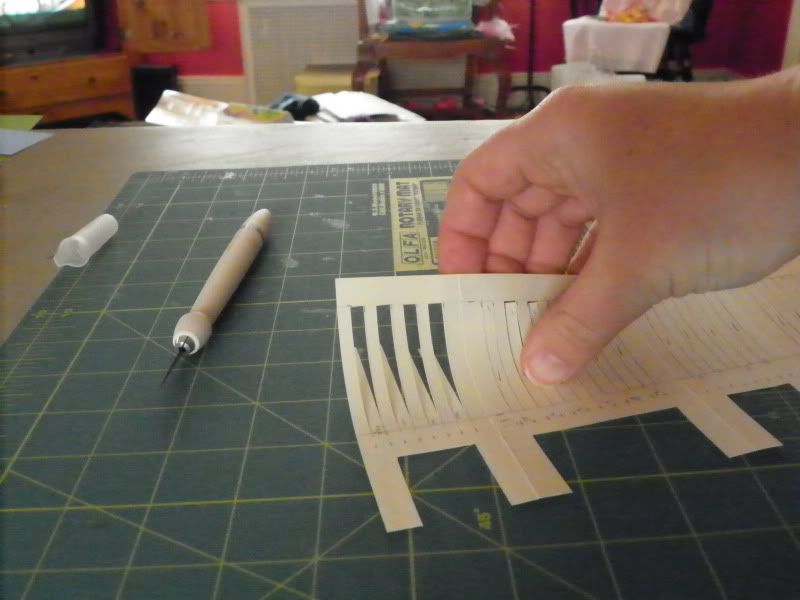
Now cut all the vertical bar lines you just drew with your craft knife.

Now remove every other block by cutting on the horiztontal lines at the top and bottom. Remember to only cut the blocks that you marked! Otherwise you'll end up with big holes instead of bars. This is why I mark the ones to be removed.

Ok, now the hard part's done, and we can have fun with decorating.

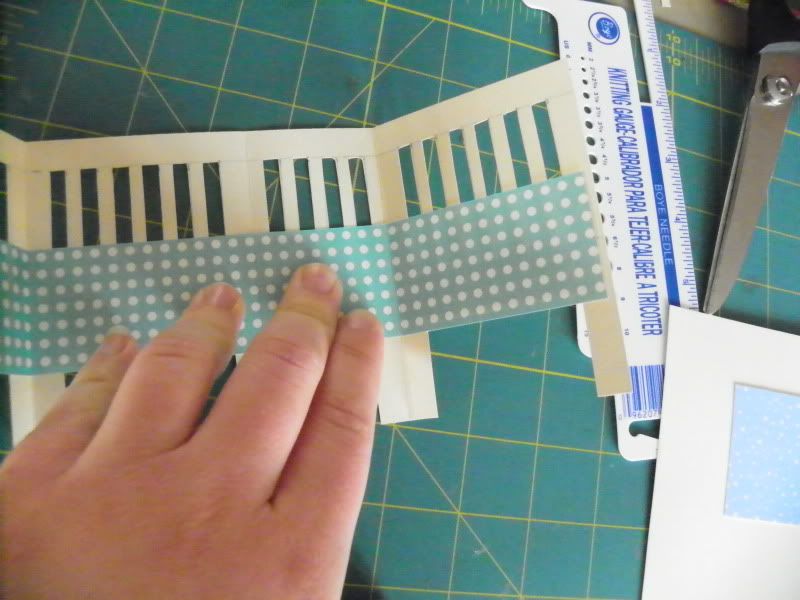
I like to add some bedding inside the crib.

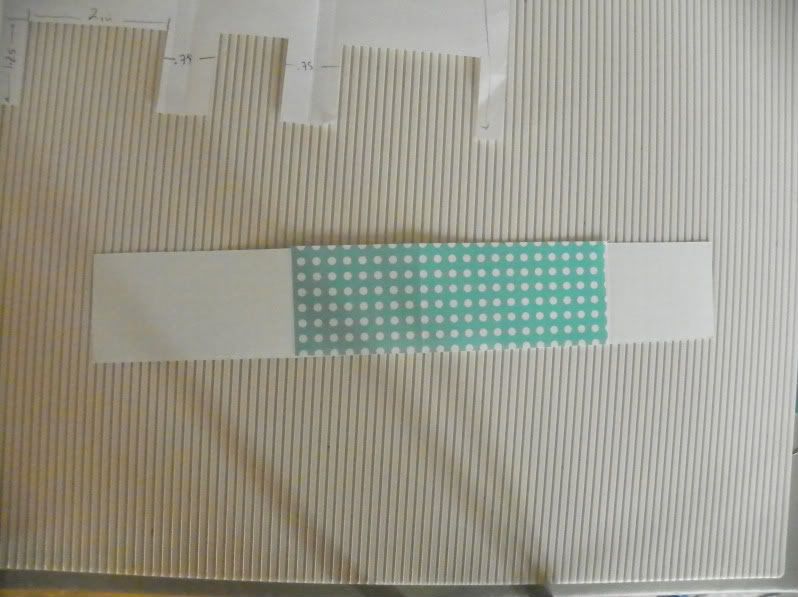
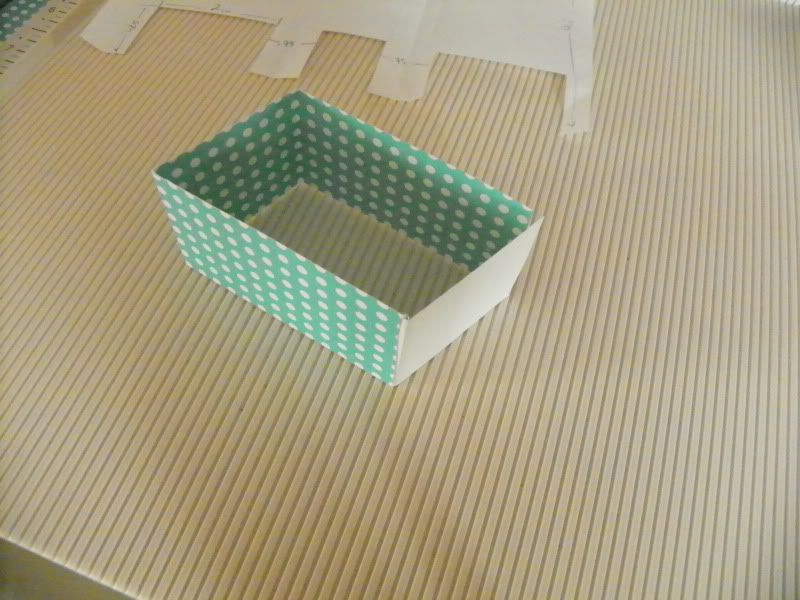
My bedding is 1.5in wide by 9in long. Remember how you'll view the crib once it's glued in, though. You'll be able to see all of the inside and half of the outside (since 2 sides will be glued to the card). So 4.5 in of that bedding strip should be two-sided. Either use 2-sided paper or glue a 4.5x1.5 in strip back-to-back with one half of the 9x1.5in strip. Score these to fit snugly inside the crib before you glue them (a glue stick is sufficient here, or you can use the lo-temp glue gun).

When scoring, line everything up so you score in the correct dimensions. Also, where the edges of the bedding meets isn't as important as for the crib, since the bedding will be glued to the crib anyway- but it's still easier to have the edges meet at the corner of the card.

Now attach the bedding to the crib! Use the glue gun for this step. Clint taught me a good trick for this sort of thing: line up the folds to get everything put together straight, then fold down one flap and glue, then the next flap, etc. Things stay together better this way than if you were to just glue the whole crib and try to plop down the bedding on top and have it line up perfectly. Fold each crease again after you glue each of the four sections, to make sure it's still lined up right.

The crib will be pretty stiff after you've glued the bedding on, just refold.

Before gluing the crib to the card, decorate the card.
The paper for the card is 10x7in, scored down the middle (at 5in) (or just buy a 5x7 card). You could make a smaller card, but you'll need to reduce the size of the crib.
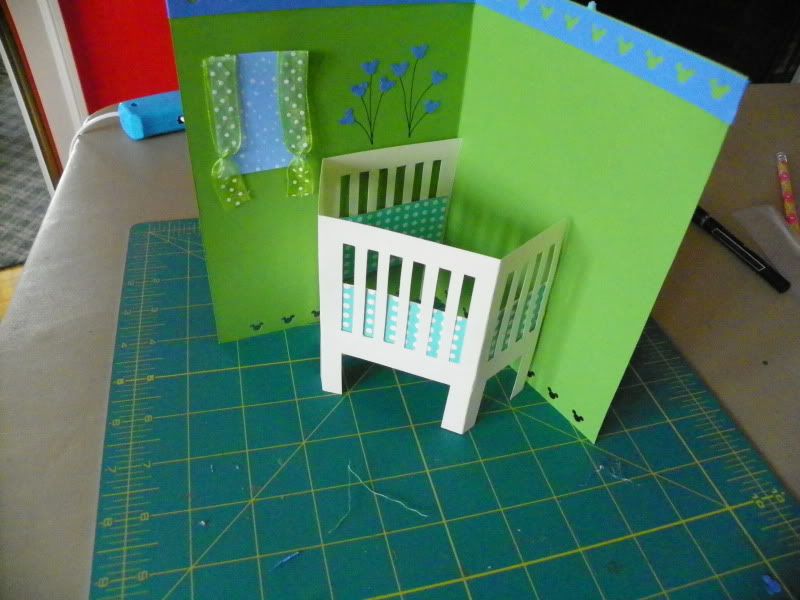
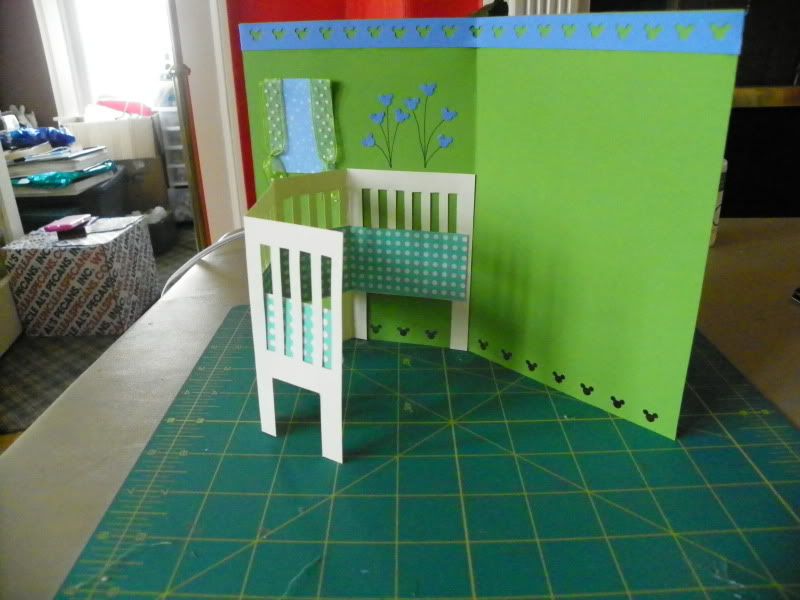
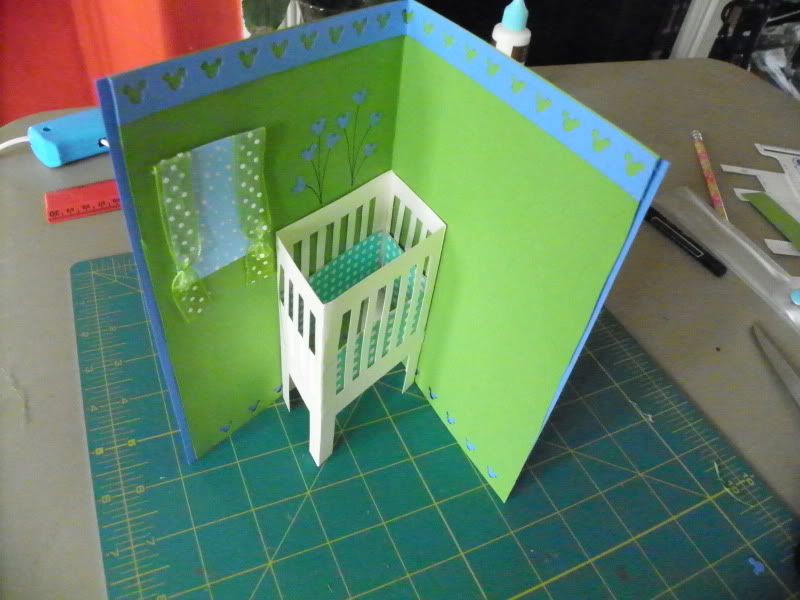
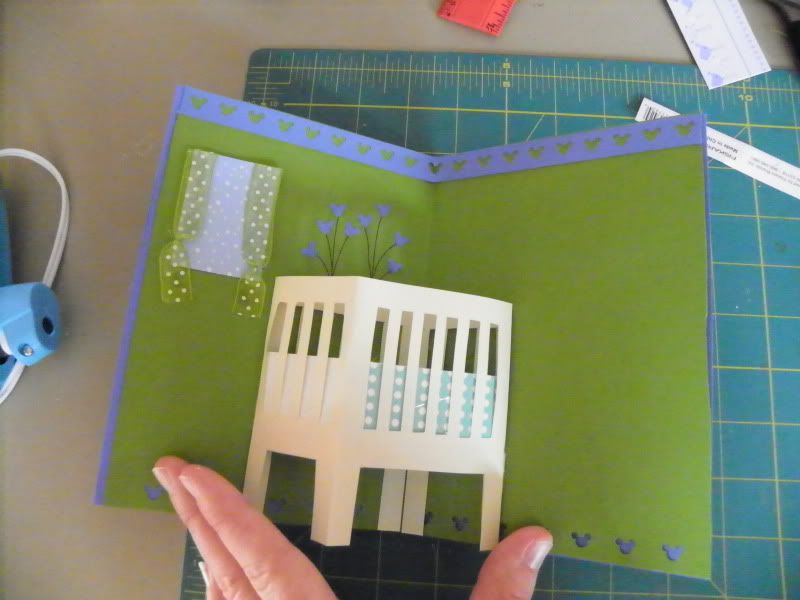
I've added a window to the left-hand side of the card (1.5x2in rectangle with some ribbon lo-temp glue gun glued to the rectangle, folded over the top and glued to secure, then tied with thread near the bottom), 2 bunches of mickey balloons (mickey punches glued down with regular glue and black ink lines). On the first version of this card, I made a banner of penants out of equilateral triangles and a lo-temp glue gun glued-on string. You can really do anything you'd like, ask the mom-to-be how they've decorated the nursery and use the actual room as inspiration.

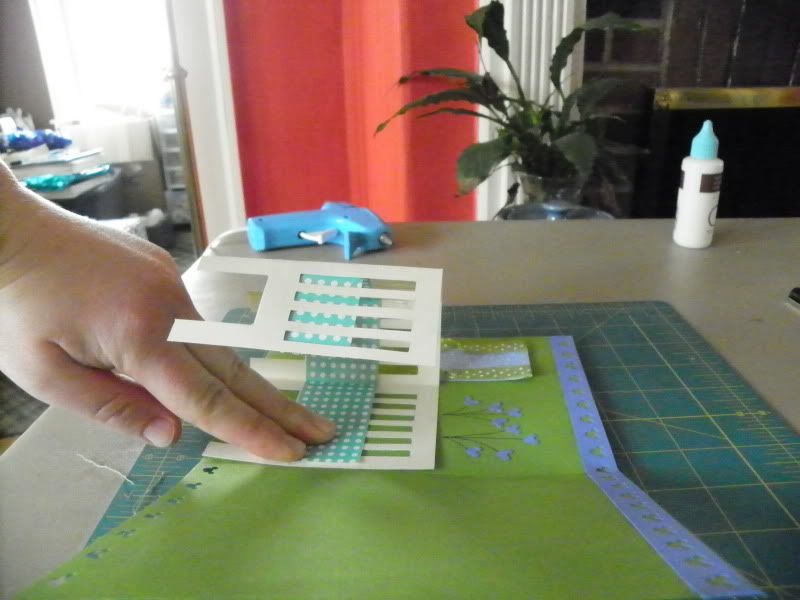
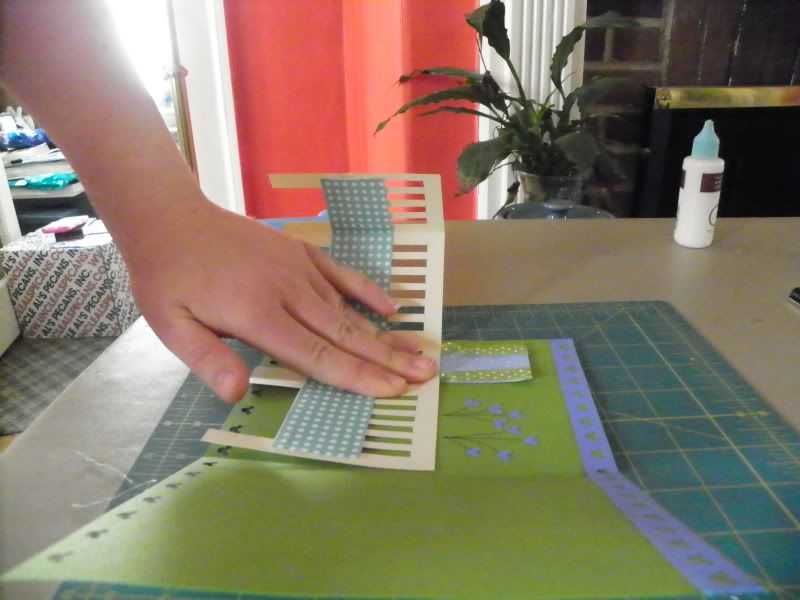
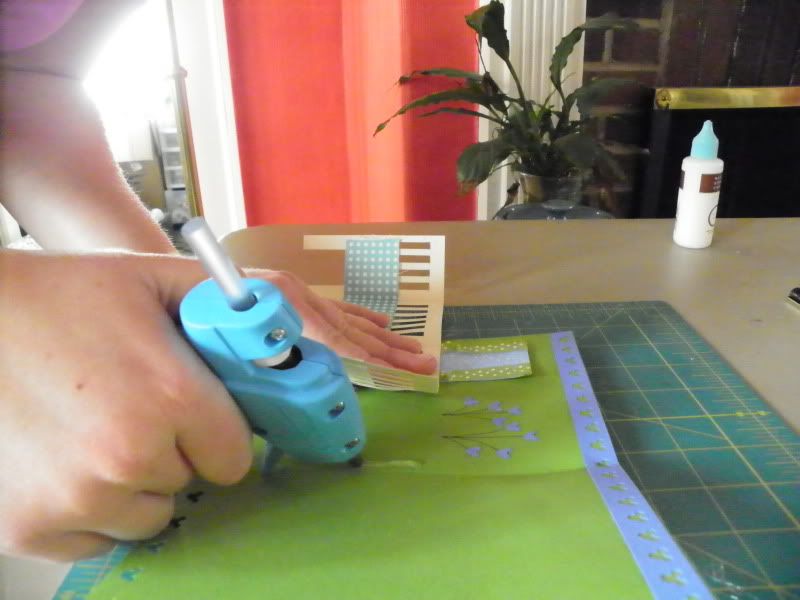
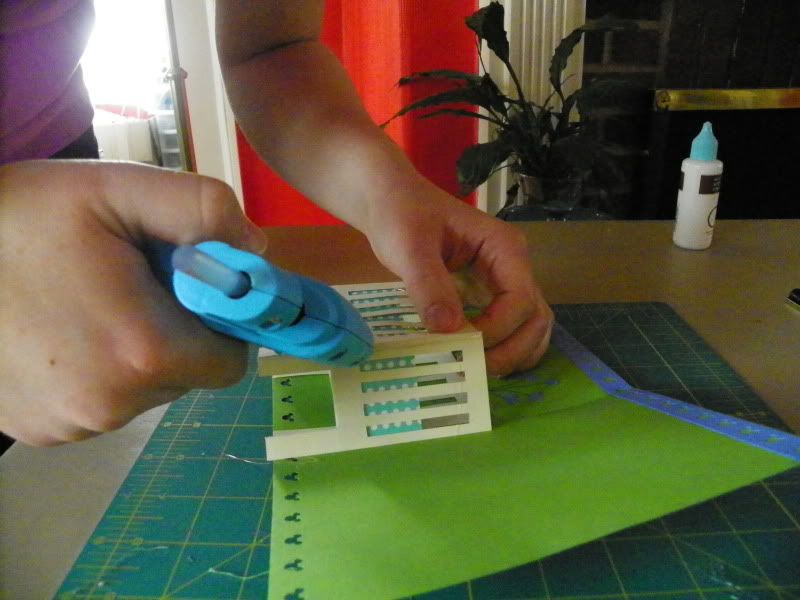
To attach the crib to the card, stand up the inner lining card and nestle the crib in. Hold the the crib in place and lay the card down. Now flatten the card, still holding that left-hand inner section that'll be glued, and then hold down the next section to the left, lifting the section to be glued slightly. And glue the crib (or the edge of the card, either way). Lay the crib down and press while the glue sets- this is why I'm using the lo-temp glue gun, because it'll set in a few seconds and you don't have to devise some elaborate way to secure the pieces together while they dry and wait hours for it to be completely dry and ready for the next step.

Ok, now glue the other section of the crib to be glued to the card,
line up the card and press the two together. Voila!
The last step it to glue the inner card to the outer.

This is totally optional, you can just use a card. But if you want to use a decorative punch outn the inner card and have another color show through, you will need the outer card. I like using one cardstock and one paper for the pair, either one can be the inner or outer. If you use 2 pieces of cardstock, it gets pretty heavy- not a problem, but be aware of that. And you may want to trim off any excess outer/inner cards so they line up exactly.


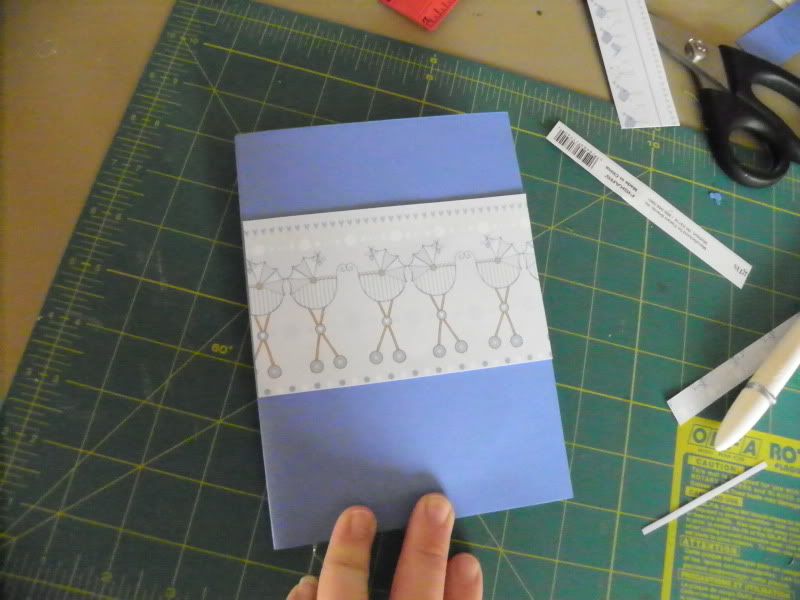
And then decorate the front of the card however you'd like. I went simple with this one and just used a stripe of cute blue prams.

There you have it, how to make your own pop-up crib card. It's not a speedy process, but once you figure it out you can get an assembly line going and it won't take too long. I'll let you know how long my third card takes, after I've figured out all the measurements and don't have to stop to photograph the steps and blog each step as I go.