Sunday, January 31, 2010

Nutella Week!

This Friday is World Nutella Day, and to celebrate this momentous day, I'm going to share a different nutella recipe each day this week. Some of the recipes will be Nutella recipes, really emphasizing Nutella, and others will be recipes that merely include the silky, creamy, dreamy taste of Nutella. Today's recipe is from the second category. Tomorrow's recipe will be more of the first.

First we have something I was excited about before I thought to use nutella in it: French macarons. Bakerella went to a macaron-making class, and blogged about it great educational detail. Because I've wanted to make these for several years, ever since my dad brought home a box from a business trip to France, I jumped on this tutorial and made my own as soon as I could.

The recipe is different than anything I've ever done before. It's kind of like the amaretti I made before Christmas (with little success, they were hard as a rock, and not in a crunchy-crispy way). But 1. you need to measure by weight, not volume. As luck would have it, I have a kitchen scale. 2. you use egg whites, but you have to age them. I'd never seen anything lke this before. The reasoning is simple: fresh egg whites are too wet, they need to dry out a bit. Huh.

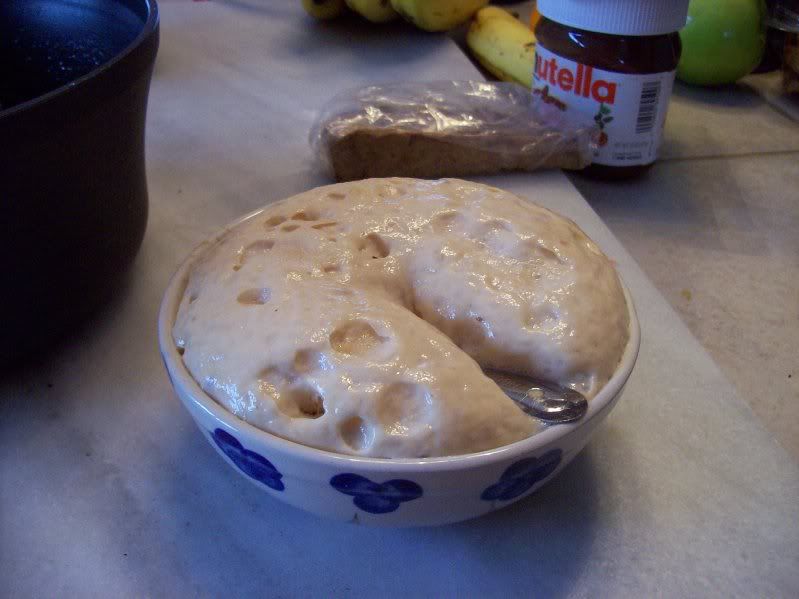
90g egg whites (about 3 large egg whites- my 3 egg whites were 100g, so I adjusted everything else accordingly). Dry them 24hrs in a loosely covered contained, at room temperature. Tartelette, who taught the macaron class, says you can age them longer, but put them in the fridge.
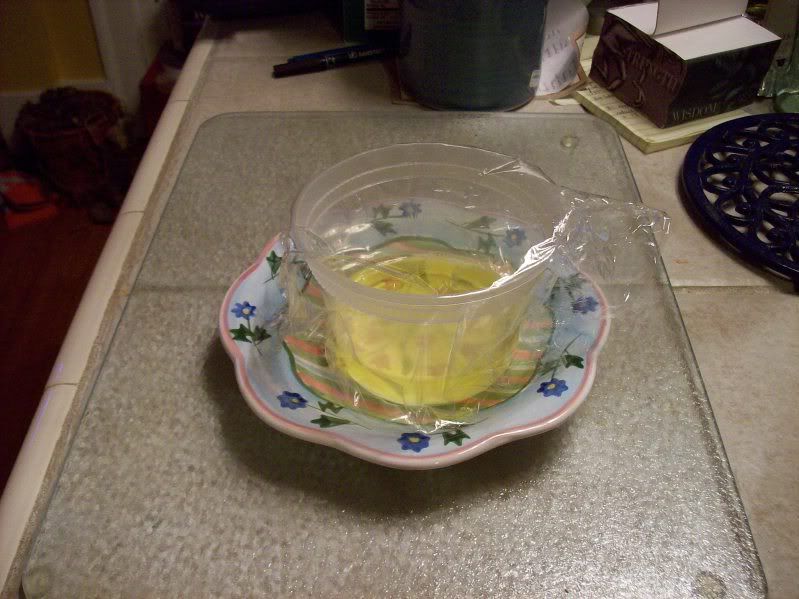
I aged mine 24 hours in a deli container lightly covered with plastic wrap, on the counter (after warning my husband 1. not to knock them over, and 2. I meant to leave them there).

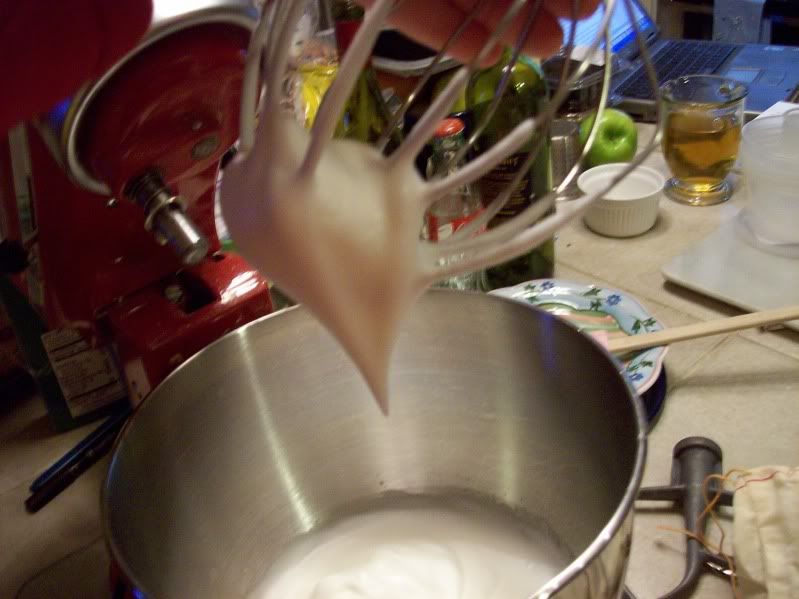
The next day, I beat the egg whites with 30g of granulated sugar in the mixer, until stiff but not dry.
While that was going, I weighed out 200g powdered sugar and 110g almond flour (I opted not to grind the almonds myself, I did that for the amaretti, and they were pretty chunky).
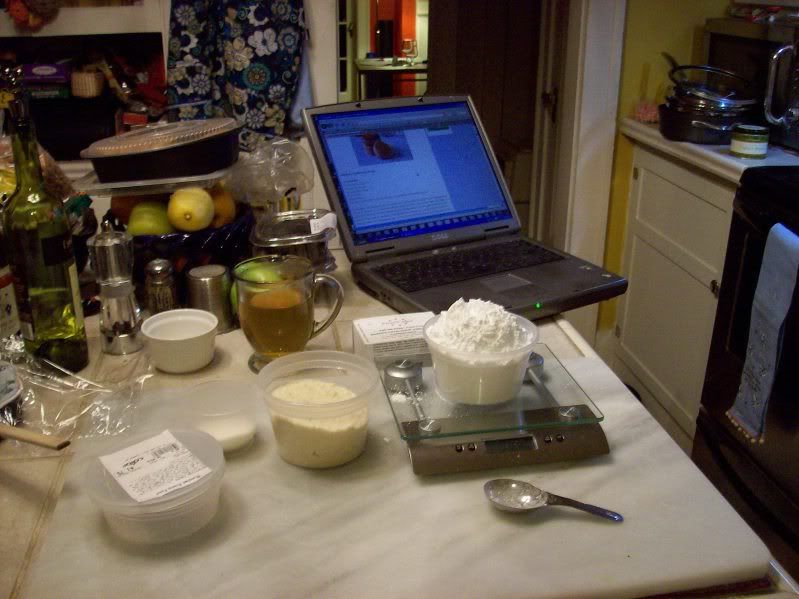
wooo kitchen scale! I had no idea I'd love this so much. I actually mostly got it for weighing yarn, and partly because Alton Brown says I should have one.

I whisked the almond flour and powdered sugar together, and dumped it in the egg whites. I folded it in by hand. Go see Tartelette about this, she gives good instructions on how exactly to add these together. Basically, dump the almond/sugar in, and fold it with a spoon for a few quick strokes. Then slow down the stirring until it's smooth, and you don't want to beat more than 50 strokes. Drop a bit of the batter on a plate and it should stay smooth, not crack- if it cracks, beat a few more strokes.

Anyway, go see Tartelette about that.

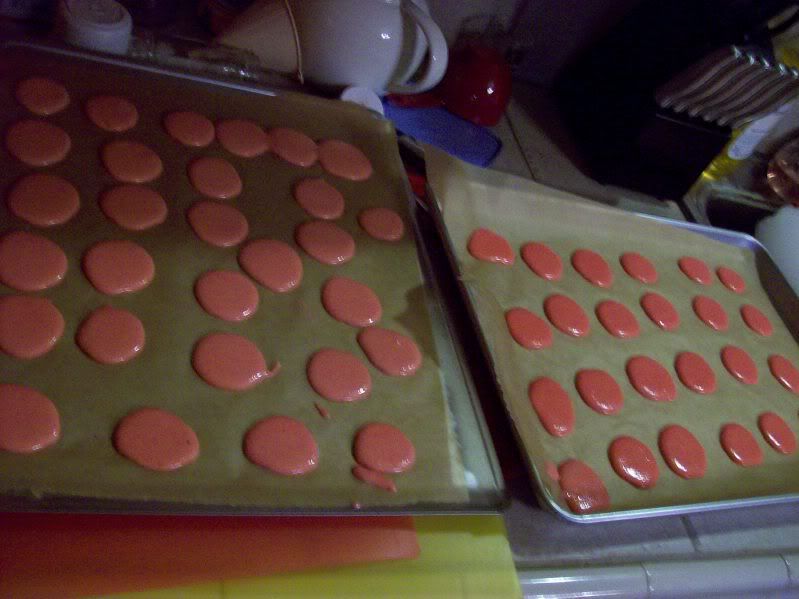
I colored my batter with paste food coloring: pink and red. The 2 bowls of batter were vivid, but pink and darker pink, nowhere near red. Ah, well, not a big deal. I transfered the batters to a piping bag, and ideally I would have used a big round tip, but I only had a big star tip- it ended up being fine, the batter's so liquid that it settled out on its own. I piped 1-1.5inch wide circles, and then let them sit on the sheet for an hour to harden. (Note: space the circles far enough apart, and remember that the batter's liquidy and will settle out a bit. I had some problems with my macarons running into each other).

Then bake for 18-20 minutes at 300oF.

Ok, so I had some issues somewhere along the way. My macarons didn't rise very much, and they got a little wrinkly on top. At first I thought it was an oven temperature problem, but now I'm wondering if my batter was was too wet, and I should have dried the rounds longer before baking.

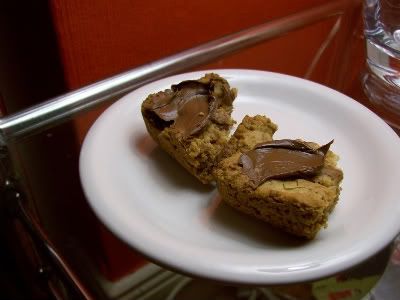
But regardless, I turned an iffy result into something great, because I filled them with nutella!

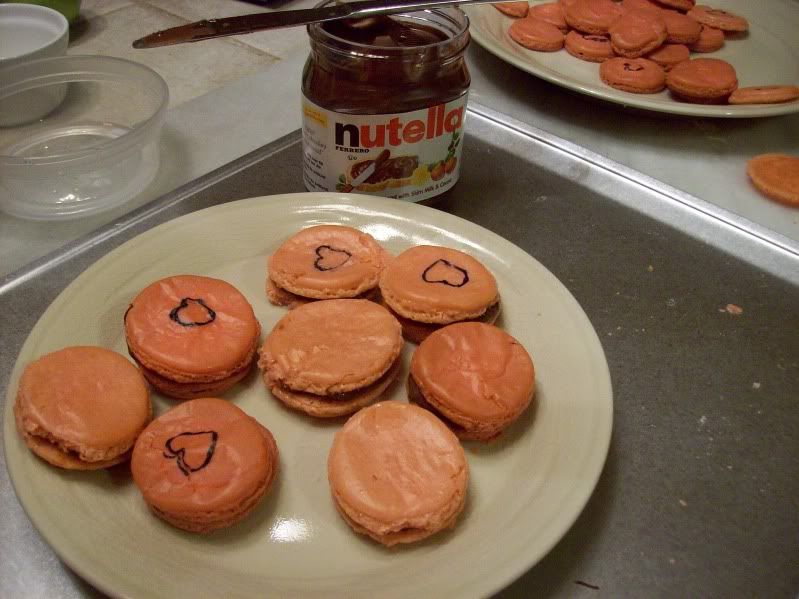
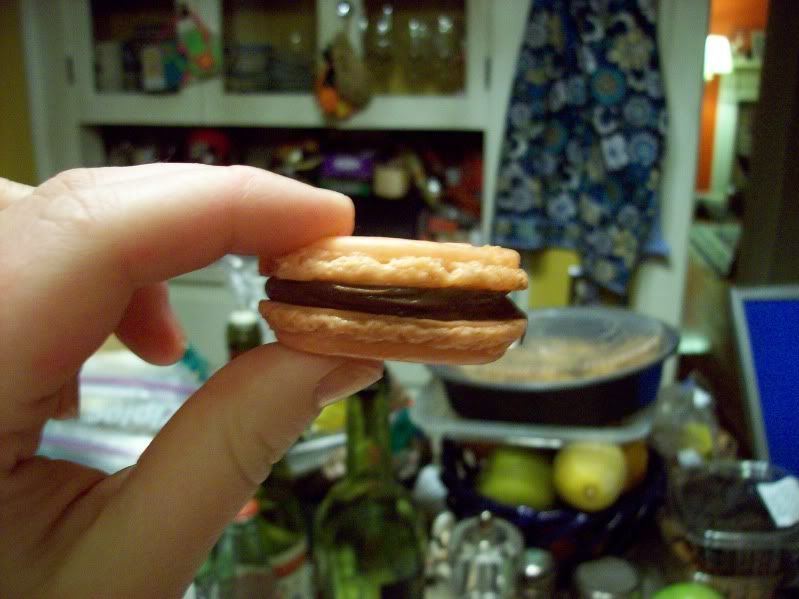
A day after filling them, they have a really nice texture- kind of crisp, but kind of soft, and not in a sticky-soft-can't-bite-it way (if that makes sense).

Moral of the story: take a fancy recipe, have mediocre results, add nutella, and great success!

Tomorrow's recipe will have more emphasis on nutella, but this one was worth sharing anyway.

Nothing beats the smell of freshly baked bread

My favorite thing about baking bread is not only the smell of the bread baking, but the smell that lingers, so that when you come home from work the next day, your home still smells like a bakery. Fortunately for me, I have entered my 2 most recent dwellings through the kitchen, where the smell is the strongest.

I don't bake bread often. I really love doing it, but because it takes so long (even if all the time is just spent waiting), I can never seem to fit bread into my schedule. So this weekend, when my husband and I decided to be an old, boring married couple and do nothing, I decided I'd jump on this and bake some bread.

Originally, I'd planned to make Smitten Kitchen's recent Rye Bread blog post (because really, rye toast with berry jelly is one of my favorite breakfasts), but I didn't have any rye flour. So I went on King Arthur Flour and browsed until I came up with cinnamon raisin oatmeal bread.

I made myself some coffee and got started.

I combined 1/2 stick of butter with 1.5 cups of milk in a medium saucepan over medium-low heat and melted, while I made myself breakfast. Once it just barely started to bubble, I added about 1.25cups raisins, 1cup oatmeal, and 1/2cup brown sugar and stirred to combine.

I also combined 1T yeast, 1T brown sugar and 1/2cup warm water in a bowl and let it go. They both waited for me while I had breakfast (about 20 min).

The yeast maybe didn't need to be left alone so long, but that's ok.I added the yeast to the raisin/milk/etc mixture, stirred to combine. Then I added a cup of flour at a time, and mixed well. I ended up using 3cups of all-purpose flour, and 2 cups of whole wheat flour. The last cup of flour had 2t each salt and cinnamon mixed in. I kneaded by mixing with the dough hook in my kitchenaid for about 7 minutes (why yes, I am lazy). One drawback of using the mixer: the raisins essentially get minced doing it this way. I'm glad I used the cheap sunmaid raisins and not my nice organic flame raisins for this.

I let the dough rise for 4 hours on the radiator (recipe said 1.5-2hrs, but our errands took longer than we thought). Then I punched the dough down, kneaded it briefly, and shaped into two loaves. I placed each loaf into a greased loaf pan, and let rise another 2 hrs (despite the recipe suggesting 45-60min), again on the radiator.

I'm kind of excited by my radiator-rising idea. I've had problems letting bread rise on the top of the stove before- burned dough, melted bowls, etc. No matter how low I set the oven, it's still too hot, and our kitchen is definitely the coldest room of the house (Clint thinks one of the walls isnt' insulated, and based on things in the dishwasher or cabinets, I'm inclined to agree). But we have these awesome radiator covers, and the radiators actually get warm, so I just set it there. I worked beautifully, and the cat didn't noticed the dough at all (which was kept covered, but still).
After all the rising and shaping and 2nd rising, I baked the loaves at 375oF for 45 min (recipe says 30-35). When they were done, I brushed the tops with melted salted butter, waited an appropriate amount of time, cut, and devoured.

And then toasted for breakfast the next morning. Success!


In crafting news, I finished my glitter ball garland. :-D It's the glitter balls I mentioned before (water-down glue painted over styrofoam balls, and glitter sprinkled over them) strung on a strand of funfur and some fun glittery plastic hearts on the ends. It's totally me, and Clint tolerates it. (if you decide to make one, you might want to spread some newspaper all over the floor and work on that, because I now have glitter all over my house... and my cat.)

And I've completed sock #1 of my Monkeys, I can't wait to finish sock #2 and wear them :)

Thursday, January 28, 2010

Dumplings, dumplings, dumplings

Apparently, I have a thing for dumplings.

On Monday, I made molasses-maple glazed pork with black pepper and thyme dumplings.
Monday was the only evening all week I'd planned to be home, so I wanted to take advantage of my evening and cook a big dinner to give us leftovers. I'd planned to do a marinated pork roast recipe I found online, but unfortunately failed to note that the pork should marinate 24 hrs in the fridge. So I found a Bobby Flay recipe and played with it.

In my non-stick-sprayed Le Creuset braiser (love this item), I heated 1T olive oil over high heat and trimmed the fat off a 2.5lb boneless pork roast, and rubbed it with salt, pepper and thyme. I then seared the pork on all sides (about 10 min total). Then I transferred it to a 350oF oven for 45-60 min, until it reached 125oF.
Meanwhile, I made a maple molasses glaze: 1/2cup molasses, 1/2cup maple syrup, 2 heaping teaspoons of whole grain mustard.

Then I chopped 2 carrots, 2 celery stalks, 1 large onion, and 2 cloves of garlic.
Once the pork reached 125oF (about 45 min), I pulled it out and brushed it liberally with the maple-molasses glaze. I did this about every 7 minutes until it reached 145oF (maybe 20 min total more, glazing 3 times). Then I pulled the pork out of the pan to rest on a plate (and later put it back in the still-warm, but turned-off oven to keep warm).


I placed the braiser on the burner and added my veggies (Bobby Flay says to remove most of the fat, but since I hardly added any oil, and trimmed the fat from the pork roast, there was nothing really to remove, just maple/molasses glaze) and began to cook them over medium-high heat, until softened (8-10 min).

And I made the dumplings while stirring the veggies every so often.
1cup flour
1.5t baking powder
1t salt
2T crisco
1T freshly ground black pepper (next time I will use 1.5 teaspoons)
1t thyme
1t marjoram
1/3cup milk
Mix all with a wooden spoon, then knead for a minute or two, and divide into 12 balls.
I had them wait a few minutes while I added 1 cup of chardonnay and 4 cups of my chicken stock (recall my chicken soup post) and 1 cup of water.Once that started to bubble, I added the dumplings, and cooked for 8 minutes, uncovered, before flipping them over
and then I cooked, covered for 5 more minutes.

and that was it! I served the veggies and dumplings in a stew bowl (although the liquid reduced far more than I expected, a plate would have been fine) with 2 slices of pork.

This is another ugly dish, but maybe comfort food should be ugly- this is really nice on a cold winter's night. It's a little sweet from the maple/molasses glaze, but the peppery dumplings give an intense warmth.

Tuesday, January 26, 2010

Chicken Soup for the Stomach

I grew up on my mom's chicken soup with dumplings. This old Yankee version is not the same as the southern classic "chicken with dumplings", as our version contains no dairy products, just fresh winter veggies, chicken, and broth. However, I'm basing that on a single Paula Deen recipe, and have never tasted chicken with dumplings, so I could be wrong.

As a child, I was never really big on chicken soup. I'd eat Campbell's chicken noodle soup with saltine crackers when I was sick, or after being out on a cold winter day, but I would never chose soup over any other dish. I started getting into soups when my college would have myriad tomato-based soups (although never cream tomato, I still hate that kind, only the pureed tomato or veggie broth type, like tomato basil, or minestrone), and I started eating the cheese from my dad's french onion soup when he'd order it, and gradually started eating that. New England clam chowder is another story, I could and would eat gallons of that (then and now). Eventually I discovered squash bisque, and soup took on a whole new meaning. But while I gained a taste for soups in general, chicken noodle was just something to eat while sick.

Then I went home a couple weeks ago for a night, and mom called up when I was about to leave and said, "what do you want for dinner?" This is always a fun question, because they actually keep food on hand in their house- meat, fresh veggies, the kind of thing you have to go to the grocery store more than once every 10 days for. I said I had no idea, and by the time I got home, she seemed tired and said, it's chicken soup for dinner.

I thought, blah. But she was going to make dumplings, so I could deal.

You know where this is going. I liked the chicken soup so much that I had to email her several times the following week to learn how to make it myself- the fact that whole chickens were on special for 99cents/lb at Big Y definitely helped.

My Mom's Chicken Soup (my interpretation)

Boil a whole chicken in enough water to cover it. My chicken was about 6.5lbs. I added an herb blend (Penzey's Sunny Paris, I was also considering a Stonewall Kitchens poultry blend I have) and 2 garlic cloves. Bring the water to a boil, and let it boil for about 1.5hrs (I let it sit on the stove, in the water after turning the burner off, since I had other things to do). Normally you'd also season with salt and pepper, I did not (I did that later).

The liquid in the pot is now chicken stock:
"Chicken stock tends to be made more from bony parts, whereas chicken broth is made more out of meat. Chicken stock tends to have a fuller mouth feel and richer flavor, due to the gelatin released by long-simmering bones."

One key point, to save you some surprise and confusion: if you chill the chicken stock, it turns gelatiny. Very, very gelatiny. This is normal.

Remove the chicken from the stock, and transfer the stock to a container. Most of it will be put in the fridge for a later use, and about 1/3 of it used for the soup. Pull all the meat off the bones, discarding the bones and skin. Transfer the meat to a big pot (I just reused the boiling-the-chicken pot, with a quick rinse). Add about 1/3 of the freshly-made stock, and
6 carrots
6 celery stalks
2 onions
2 sweet potatoes
all of that diced into big chunks
and 3 garlic cloves (remember to pull them out at the end)

Then I added "enough" water. I hate this term, how do you know how much is enough? I basically added water to get near the top of the pot. It turned out to be not enough, so each time I reheat the soup now, I add a little more water.

Also add whatever herbs you'd like. I used the Penzey's blend again, but my mom likes dill. You can also add more salt/pepper at this point. Whatever you add, taste the liquid and see how it's going. Have some fun with your spice drawer/shelf.

Boil that until the veggies get softened enough, about an hour.

I made the mistake of pre-boiling the sweet potatoes before adding any of the other veggies or meat. I boiled them for about 20 minutes, and once the soup was complete, they verged on mush. You don't need to pre-boil sweet potatoes.

Then chill the soup. Due to my poor timing, the soup got done around 12:30am on Wednesday night, and even an hour later, it was still too hot to put in the fridge, so I took advantage of our screened-in porch and put it outside. If this isn't an option, don't start pulling the chicken off the bones at 10:30pm like I did. The soup chilled outside in high 20s weather for about 8 hours, then in the fridge for another 10hrs.

Chill the soup for at least 12 hours, for the fat in the liquid to harden. (my soup-fat did not harden after 8hours outside) This is how it looks
Very unappetizing, right? But it skims off the top really easily, it's about the consistency of butter.
This looks a lot better. This is 2 servings of soup that I took out to reheat (over medium-high heat until bubbling) for dinner.

I make the dumplings fresh.

Dumplings for 2
1 and 1/3 cup flour
2t baking powder
1/2-1t salt
1T+1t crisco (I actually used I can't believe it's not butter, since I bought it especially at my husband's request, and he ignores it)
The above ingredients are homemade Bisquick. 1 and 1/3 cup of bisquick will work if you have that- I just didn't have any)
dash of pepper
herbs of your choice- again, I used the Penzey's blend (about 1-2t), and my mom uses dill
1/3cup milk

Stir that all together, drop by spoonful into the boiling soup.

Cook the soup with dumplings uncovered for 10 minutes, then covered for 10 more minutes. If you have my luck, it will boil over many, many times.

Result:
The dumplings turn the soup opaque (but not really creamy, just thicker), and I think mine is yellow because I used I can't believe it's not butter, with its lovely yellow #5 or whatever, instead of uncolored crisco.

Because I skimped on salt and pepper while making the soup, I always make sure the shakers are on the table and full.

This isn't the prettiest meal, but it's actually really tasty. And I feel that making soup is an "anything goes" type of dish, so what I've written here is merely a guideline for your own soup-making adventure.

And what about the extra stock? Well, I actually end up adding a ladlefull of stock each time I reheat 2 servings of soup (and some extra water). I did use the rest of the stock up last night in a pork dish you'll read about later. I miss having that giant thing of stock in the fridge, so I may make another batch of stock/soup this weekend.

I'm sure you can also buy canned/boxed stock, but if you have the time, boiling your own chicken is a lot cheaper, and doesn't really require any effort on your part, aside from pulling the meat off the bones. I recommend doing this the old-fashioned way. Canned broth/stocks have their place, and it's not in this soup.

Tuesday, January 19, 2010

Smell-good Sundays

I've accidentally started a little tradition/trend for our little household- I do something in the kitchen first thing on Sunday "morning" (because we lately we're sleeping in on Sundays, so this is more like, noon-ish) so make the kitchen smell ridiculously good.

Last week it was whole wheat pancakes, this week I decided to try my hand at waffles.
I've traditionally had a hard time with breakfast foods, with the exception of french toast, which my husband doesn't really like (it's my favorite, so I've gotten good at it- especially at making french toast for one). I burn pancakes, and my waffles stick to the iron and fall apart.

Example.

This was a batch of waffles I made with some fresh blueberries and strawberries this summer. I sprayed and sprayed and sprayed the iron before each ladleful of batter went on, yet they still stuck. My waffles almost always looked like this. We think the problem may have been that the batter was too runny.

But, since I'm always up for attempting to learn from and correct my mistakes, I tried again on Sunday. I used:
- a brand-new waffle iron (bridal shower gift)
- a brand-new waffle recipe
- lots of non-stick spray
And the result:
crisp, fluffy waffles that tasted and smelled delicious. And maple syrup really brought out the cardamom in the waffles (very unexpected).

The recipe came from a French breakfast cookbook I bought at La Madeleine a few years ago. It uses browned butter, which adds so much to the flavor of anything it's in. I also added cardamom. This process was by no means quick, and I wouldn't recommend this if you have a household of hungry people, but for us (me with a full pot of coffee, and Clint, who'd decided to tackle cleaning out and rearranging our spice drawer), it was great.

Melt 12T (1.5 sticks) unsalted butter in a saucepan over medium-high heat. Co
ok til it bubbles, and then watch it carefully as it browns- you want a caramel-color and for it to smell nutty. I usually take it off the burner when it's a light caramel, because it'll cook a bit more by itself, and you don't want to burn it.

Combine 2.25 cups flour, 2T sugar, 1t baking soda, 2t baking powder, and 1/2t salt in a bowl (I also added about 1-1.5t cardamom, and I was going to add orange zest, but forgot to). Whisk in 1.5cups milk and 1t vanilla. Beat in 3 eggs, one at a time. Add browned butter, and beat til just combined. (Edit: Before I said 2T baking powder, I meant 2t)
The batter was thicker than previous waffle recipes I've used (which, ok, is only the Bisquick box recipe, but in my defense, my mother will only use bisquick for pancakes, waffles, biscuits and muffins, and I only ever make waffles at her house (except once I made some yogurt waffles for myself- they were only ok)), which boded well.
Drop 1/2-3/4cup batter on waffle iron, and cook according to your iron's instructions. We got 7 waffles out of this batch, and because each took about 5min to cook, I placed all the waffles in a 200oF oven to keep warm and crisp.
The waffles tasted good- a little nutty from the brown butter, and just a little sweet, good for pouring maple syrup over. The kitchen smelled delicious. We munched on the first waffle, just plain, while we waited, and it was great. When we added the maple syrup, however, the cardamom flavor really popped.

So that was tasty.

In crafting news, Girl Friday is nearing completion, but she needs some serious blocking- horizontal ribbing always needs some coaxing. I had some fun with glitter last night, though.

I decided that Valentine's Day is a crafter's last hurrah- you get all crazy with Christmas crafting, it's suddenly over, but Valentine's Day is like a chance to do all the crafting you didn't get to do before- and if it's red, it works (well, unless it's red reindeer or something).

I saw this craft on the Martha Stewart show, and really wanted to make one, but I never had time.

(photo and directions at Martha Stewart)

So as I ran some errands yesterday, I stopped at Michael's to add to my glitter supply. I had red and silver and white (and green and some Halloween colors) at home, so I just bought pink tinsel glitter (and brownstone tinsel glitter that was on clearance) and some more glitter glue.

I cut corners a bit on this garland- I simply coated styrofoam balls (in 3 sizes) in watered-down glitter glue and coated in glitter- either tourmaline or garnet tinsel glitter, silver regular glitter, or a mix. at first I stuck toothpicks in them to be able to hold them, but then I switched to bamboo skewers, so that I could also stand them up as they dried. Tonight I'll string them on a length of red funfur (cheaper than Martha's tinsel idea, and now all my stupid funfur finally has some use!)

I also made candied grapefruit and orange peel last night. They still need to be sugared, and then I'll tell you about them, as well as another fun way to use your leftover citrus rinds.

Friday, January 15, 2010

Friday, Girl Friday

or, the Three Week Sweater

I've mentioned my Girl Friday briefly before.

I haven't knit a sweater in a long time- at least a couple years (not counting baby sweaters). I enjoy knitting big things, because you can just start knitting and go, but sweaters have two problems: lots of seams to sew (this is my least favorite part of knitting), and you actually have to make them fit. My go-to baby sweater pattern is Peapod, and the body of the sweater is knit in one piece, so the only seams are the arms (which could easily be done in the round) and shoulder seams. And with baby sweaters, they don't actually have to fit the baby. Babies grow so quickly that they should be a bit big anyway, or else baby will wear it once, and that'll be it. Babies also don't care if their sweaters are boxy, or the sleeves are too long. Babies generally don't have any sort of fashion sense. So grown-ups like me take advantage of this, and knit them things they'll regret in their dating years.

But sweaters for me are not so easy. Out of the 4 pullovers I've knit myself, I've worn 3 of them once, and the last one never. Of the 3 cardigans I've made, I've worn one once (it's super heavy and thick), one several times (it's white, good for DAR, and the size issues are partially fixed by pretending it's a wrap sweater) and one once, with the intention of wearing it again.

So with this track record, starting a new sweater was a little daunting. But, since knitting myself a sweater and actually wearing it (no matter how many times I need to frog and rework it) is a 2010 goal, I decided to start one asap. I went with a cardigan- easier to fit. If it's not perfect, I just wear it open. And with this pattern, I can make the edging wider if it's too small to button decently. This is what the sweater should look like:

(photo by Mercedes Tarasovich-Clark, more info on her and her pattern at knitty.com)

I placed a knitpicks order when I knit myself a Christmas stocking, and got 12 balls of Swish worsted in Truffle (as well as sock yarns for Clint, myself, and an unspecified pair)

And so, on December 27th, once all my Christmas knitting, was done, I cast on (using size 8 needles).

On Day 3, the back was finished.
On Day 7, the front panels were finished.
On Day 16 (after going back to work, and no more long distance car trips), the sleeves were finished.
On Day 20 (today), the body of the sweater is sewn together, and I've 1.5 inches into the 3-4in (I'll have to see how I want it) collar. The sleeves are not yet sewn in.

The morning before I started sewing seams (before blocking):(Pansy likes to help with these pictures)

And a close of up the lace pattern (which is said to be very easy to memorize, and this is very true)
Now I have to think what to knit next- and we're going to a hockey game tomorrow night, so I need to think fast. I'll probably use my Christmas yarn to knit some of Cookie A.'s Monkeys (socks).

Tuesday, January 12, 2010

The healing properties of Nutella

I had a bad day yesterday. Nothing serious, just many, many little things going wrong, culminating in getting a trojan virus on my computer. Luckily, my virus protection software is up to date! Thank you, Norton! But needless to say, by the time I returned home, I was in kind of a mood.

Now, the day before, I'd read the newest issue of Martha Stewart's Everyday Food. I really love this magazine, but this month I think it's really surpassed its previous excellence in giving me a ridiculous number of delicious (and healthy!) recipes to try. The very last recipe of the magazine is always a cookie recipe, and this month it's nutella sandwich cookies, using whole wheat flour and oats- so it seems rather healthy! (apologies- I can not seem to find this recipe online, or else I would definitely post it. I'll copy it down and post when I make a batch, though.)

With nutella cookies on my mind, I was eager to make these. However, after more thoroughly reading the recipe, I saw the dough needs to be refrigerated (and you can skimp on the time of fridging, but you can't really cut it out altogether), and the idea of rolling out whole wheat dough (it can be tricky) was very unappealing.

So I opted for another nutella treat. A friend made these for a party I threw back in April, and actually gave me the rest of the nutella (did you know nutella has a shelf life of about a year?), and her bars were ridiculously good. So I made them instead.


I made Nutella Blondies.

These were very easy. You simply melt half a stick of butter, and mix it with 1 and 3/4 cup brown sugar- that's a very, very high sugar:butter ratio. Then beat in 2 eggs and some vanilla and let it get fluffy (it gets very fluffy). Add in 2 cups of flour that's been sifted with 2t baking powder and 1t salt (I'll try 1/2t salt next time, they were overly salty, but noticeably salty), and then stir in a heaping tablespoon (and I mean heaping) of nutella and 1/3 (I used 1/2) cup toasted hazelnuts (I used almonds- I don't keep hazelnuts on hand, and I toasted the almonds for about 15 min, from the time I turned the oven on to the time it was finally up to 350oF).

Press it all into a greased 8x11 pan (I don't have such a thing, used 1 loaf pan and 1 8x8 pan) and back 25 (I did 30,, which was maybe a hair too much) minutes. Let them cool and top with a little dollop of nutella.

Now, you can see that they look good. You can imagine that they taste good. The one thing I did not expect was how ridiculously good they smell. Clint was in the living room while I baked these, and when I opened the oven to peek at them after 23 min, he had to come into the kitchen to investigate the heavenly aroma. I thought we were both going to pass out from the delicious smell. You may think I'm kdding, but I'm not- not completely.

So anyway, these are very easy, they're very good (the best blondies I've made so far, so I'm keeping this recipe to modify as needed), and interestingly enough, they're actually really low in butter. The same amount of ingredients for cookies would have 4 times as much butter, so it's possible these are healthy (I may try substituting 2/3 cup of whole wheat flour for the same amount of regular flour). Note: I'm kind of ignoring the nutella I added to this, which was about 1/3 of the total fat- nutella is unfortunately very unhealthy (I'd like to note that a friend pointed out the irony of the commercials where the mom gives her kids whole wheat toast spread with nutella, as a way to get them to have a healthy snack. Nutella is delicious, and by definition, terribly unhealthy).

Speaking of healthy, and I don't have an accompanying photo (but they weren't pretty, anyway), I made whole wheat pancakes this weekend. A friend gave me her mother's super awesome pancake recipe, and since Alton Brown taught me how to make pancakes decently (not perfectly, but I'm getting there), I've been going to town on this recipe.
2.5 cups milk
2 eggs
2T melted butter
1/4cup sugar
2cups flour
2t baking powder
1t salt

Whisk milk, eggs and melted butter, stir in sugar, add the rest of the ingredients. Cook on a greased/buttered skillet (friend said butter, but I'm finding that either works well enough). Normally I halve the recipe and add whatever fruit we happen to have in the freezer (usually blueberries, sometimes strawberries). This weekend, I wasn't in a fruit mood, I was in a gingerbread mood.

So.
substitute whole wheat flour to be one third of the total flour (i.e. 2/3c whole wheat, 1 and 1/3c regular flour)
brown sugar instead of white sugar
2t cinnamon, 1t ginger, 1t nutmet, 1/2t cloves.

Yum! It had a nice flavor from the brown sugar and spices, and an earthiness and more texture from the whole wheat flour.

Again, no pictures, because even though I can make pancakes, I still burn most of them, and you don't want to see burned pancakes when I'm trying to suggest a recipe.

Tuesday, January 5, 2010

2010: new year, new recipes

And the first new recipe of 2010 is sage-covered pork roast with dried fruit compote.

PSA to southern New Englanders: Big Y is having a special on pork roasts this week, buy 1 get *2* free! My mom emailed me about this, so of course I high-tailed it to the grocery store last night. I got 3 2.4ish lb boneless pork roasts for $14.50, and I cooked one. Sadly, I have no pictures, but next time I do this (there will be a next time), I'll photograph it. (ETA: and 5 days later, there was a next time)


Pork roast:
trim off fat, rub with kosher salt and freshly ground pepper. Lay some sage leaves covering the top, arrange in rows, and tie on with kitchen twine. In a oven/stove cooking vessel (I used my Le Creuset braiser for the first time! love it), brown the pork on all sides- about 10-12 min total. Wrap in parchement paper, and bake for 50 min in a 375oF oven, until it reaches 170-175oF (the recipe I found said 160, but mine got up to 175 and was just barely done enough). Remove roast, let rest for 10 min on a platter, then unwrap from the parchment and pour the juices back into the cooking vessel. Add 1/3cup each of chicken stock/broth and apple cider. Cook til reduced, add 1t (recipe said 1T, but we're trying to be healthy) butter and cook til reduced to 1/3cup total. Pour over the meat.

Dried fruit compote (to serve on the side):
while the pork is in the oven, combine
3cups apple cider
3/4cup raisins
3/4cup dried cranberries (cherries would have also been good)
1/2-3/4cup roughly chopped dried apples
16 dried apricots, cut in quarters
1 cinnamon stick
zest of 1 orange (and juice, if you want- the zest adds enough orangey flavor)
1inch piece of peeled fresh ginger (or some large pieces of crystallized ginger)
dash of pepper

in a medium-large saucepan over medium-high heat, cook, stirring occasionally, for 20-30 minutes, until thick and gooey and delicious-smelling. Remove ginger and cinnamon, and serve warm.

These two items were delicious. We also had roasted sweet potatoes (toss sweet potatoes cut into finger-like pieces with some apple cider, salt, pepper and chopped sage, spread on a foil-lined cookie sheet (spray the foil) and bake in the oven for as long as the meat is in it- 40-50 min at 375), garden salad, and boiled wax beans (broccoli the 2nd time around).


Then I was lucky enough to have the same thing today for lunch :-D

Craft update:
I'm knitting Girl Friday in KnitPicks Swish Worsted in Truffle (a chocolately brown). So far, so good. In 3 days I finished the back. In 4 more days, I finished the panels for the front (it's a cardigan). Now I've been on the sleeves for 3 days, but am only halfway to the elbow. However, this progress, after I told someone there was no way I'd ever finish it in time to wear this winter, but maybe on chilly spring evenings, is impressive. And after knitting all those adorable, yet full of ends to sew in, korknisse, a large thing like a sweater is a joy to knit.

Next up: socks for Clint, using a pattern from my new sock knitting book, and knee socks for me- possibly in the reverse order, Clint's socks are my ravelympics project (start a project during the Olympics opening ceremonies, and finish it by the end of the closing ceremonies, and for me, probably only knit it while watching the Olympics, preferrably curling) and I'll most likely finish the sweater well before the Olympics start.